Linux desktops are good at many things but just like Windows, they’re not known for being the most battery-friendly. That’s not to say they’re any worse than other desktop operating systems. But if you’re looking to squeeze more out of your Ubuntu machine, Slimbook has created a handy battery saver for Ubuntu. We’ll call this Slimbook Battery Saver.
For the uninitiated, Slimbook is a hardware manufacturer that sells Laptops running Linux based operating systems, such as Ubuntu. The OEM has made a battery saver/optimizer tool for the Ubuntu desktop. Their main goal was to use it on the machines they sell. But on Linux, everything is for everyone, almost.
Slimbook Battery Saver for Ubuntu
The tool is called Slimbook Battery 3 which, as you can guess, is the third updated version. It’s an open-source tool as well. Even though Slimbook developed it for their own machines, it should work on any hardware. The only requirement is that your device is running Ubuntu or its derivative.
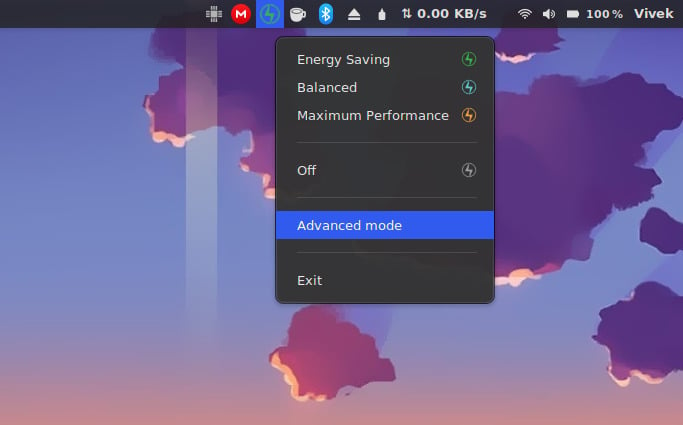
There are two main parts to this: a tray-based applet that will show up in the system tray. It shows whether you’re using GNOME, KDE Plasma, or any other Linux desktop as long as you have a visible system tray. This applet lets you pick a power/performance state. It allows quick switching between three energy modes: Energy Saving, Balanced, and Maximum Performance. You also get the option to turn it Off or even Exit it completely or go to the Advanced mode.
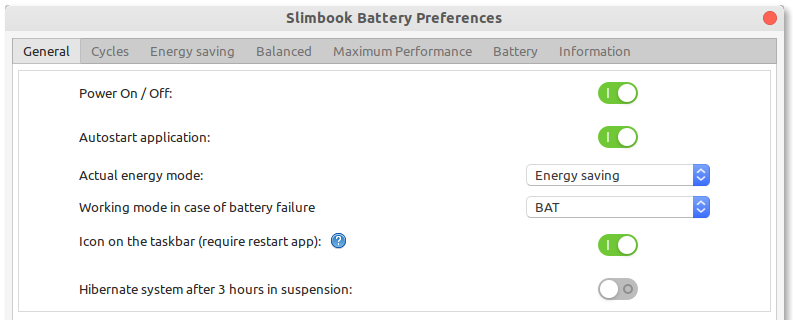
This is the second part of Slimbook Battery Saver. Advanced Mode simply opens up a configuration panel with, you guessed it, advanced settings. There are seven separate tabs each with different toggles and preferences. The Slimbook Battery Preferences or Advanced Mode lets you adjust and fine-tune the three energy modes you can switch to.
Other than that, you can adjust the charging behavior and alert cycles, and see battery information such as the manufacturer, type, capacity, etc.
Note
Remember, this tool is not developed by the Linux developers nor the developers of Ubuntu. It’s a third-party tool and is not guaranteed to extend the battery life on your Ubuntu machine significantly. It should still be better than not using anything at all. At least it can disable unused hardware features automatically which should have some effect, especially for people using this on a laptop.
Don’t Miss: Sony WI-C600N Wireless Headphone – Detailed Review
Install Slimbook Battery Saver
Slimbook Battery Saver can be installed on Ubuntu from the official Slimbook PPA. First, you’ll need to add the PPA to your system’s list of software sources. To do that, enter this command inside a terminal and enter your password when asked.
sudo add-apt-repository ppa:slimbook/slimbook
If you’re using one of the newer versions of Ubuntu, you can go ahead and install Slimbook Battery Saver, but on older Ubuntu versions you’ll have to update the list of software sources first. You can do this with this command.
sudo apt update
To install Slimbook Battery Saver on Ubuntu, enter the command given below.
sudo apt install slimbookbattery
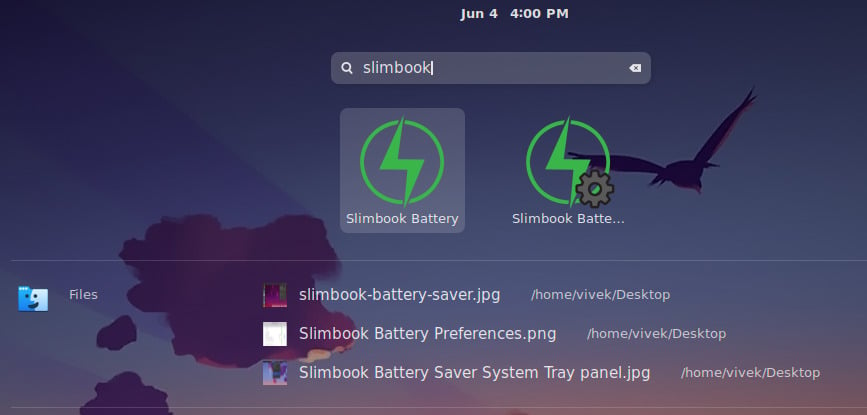
Once done, you can close the terminal and find Slimbook Battery Saver in your app launcher. It’s named “Slimbook Battery.”
Read Next: 5 Best Linux Icon Themes You Should Try