Microsft Windows OS allows you to roll back the drivers to a previous build. But why will you do so in the first place? The new version of a driver might be buggy, not have the desired features, or it can even make your PC unstable. In those cases, the best bet is to roll back the drivers to an earlier version. The steps shown here are for Windows 10, but they should be nearly identical in all other versions. Moreover, also have a look at our guide to disable automatic driver updates on Windows 10.
Steps to Roll Back a Driver in Windows 10
Rolling back a driver in Windows involves uninstalling the new version and reinstalling the earlier one. But you don’t have to do all this manually, the system will take care of this. On your end, executing a few of the below-mentioned steps is all it takes. Whether you want to roll back an NVIDIA Graphics Card or an Audio Driver, the steps are the same for all. Just make sure you’re using an account with administrative privileges. With that said, here are the steps to roll back drivers in Windows.
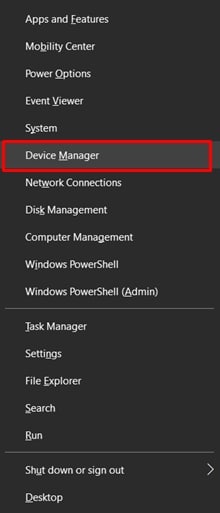
- Head to Device Manager on your PC. The easiest and quickest way of doing so is via the Win+X shortcut key combination. Once you press the mentioned shortcut keys, a menu will appear, select Device Manager from it.
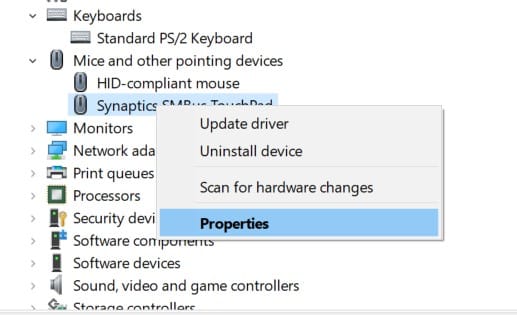
- Now navigate to the device whose drivers you wish to roll back. Click the arrow next to that device to expand the list.
- Right-click the device and select Properties.
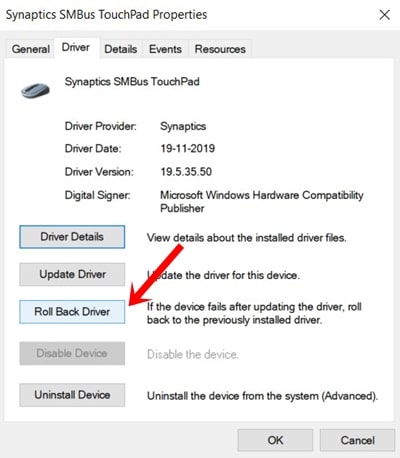
- Next, under the Drivers tab, look for the Roll Back Driver option on your Windows PC. On the other hand, refer to these steps to backup and restore drivers on Windows 10.
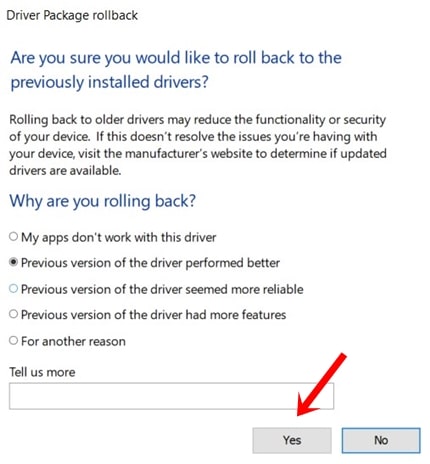
- In the confirmation dialog box that appears, select the reason for the rollback (compulsory) and click Yes.
- Windows will now begin the process of rolling back the drivers to the previous build. The process might take some time, depending on the size of the driver.
- A System Settings Change dialog box will now appear, which says “Your hardware settings have changed. You must restart your computer for these changes to take effect. Do you want to restart your computer now?” Click Yes to restart your PC. Once it does, your device will be up and running with the earlier version of the driver.
To learn how you can install unsigned drivers on your Windows PC, head to our tutorial.
In some cases, the Roll Back Driver option in Windows might be greyed out. There could be many reasons for the same. If you are rolling back the driver for Printers, then Windows Device Manager doesn’t support that. Moreover, Windows only holds only the last previous build of any driver. If the option is greyed out, maybe Windows 10 doesn’t have any earlier builds of that driver.
So this was all about rolling back drivers in Windows. If you still face any issues carrying out the above steps, drop your queries in the comments section below.
Read next: How to remotely sign out and lock Windows 10 devices