Of all the major desktop operating systems, Windows is still the only one that makes users worry about drivers, for reasons. Microsoft tried to solve this problem to an extent by making Windows 10 automatically search for and install drivers as part of Windows updates. It’s better than leaving driver installations entirely to the end user. However, sometimes this can be problematic too. Sometimes an updated driver breaks things. So when you know that a previous version of a driver works better, you’ll probably want to disable automatic driver updates on Windows.
Windows 10 is a little aggressive in making sure users install updates. So if you’ve looked for it, you probably already know that Windows 10 does not allow turning off Windows updates, let alone driver updates. Fortunately, or unfortunately, Windows is still stuck with some of its dated technologies like the Registry. Registry hacks allow users to configure Windows in ways Microsoft does not want them to. If you’re running Windows 10 Pro or higher versions, you can also use the Group Policy Editor.
In case you want to disable automatic updates altogether, there are also workarounds for that.
Via Group Policy Editor
Group Policy Editor is not available on Windows 10 Home. If you’re a Windows 10 Home user, you can use the Registry Editor method mentioned below to achieve the same results.
- Hit the Windows key on your keyboard and type “Group Policy”. You should have the “Edit group policy” as the first search result. So click it to open it. Alternatively, you can hit Windows + R and enter gpedit.msc.

- In the Group Policy Editor, navigate to Computer Configuration> Administrative Templates> Windows Components> Windows Update using the left column.

- On the right, you should see Do not include drivers with Windows Update. Double-click it to open its properties.
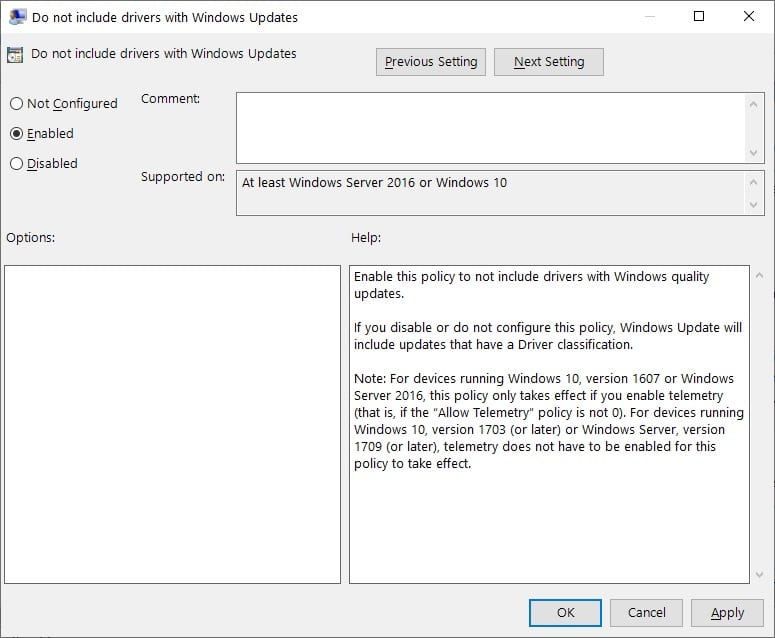
- In the Properties Window, select the Enabled option, then click Apply and OK.
Close the window and exit the Group Policy Editor. The changes should take effect immediately, but in case they don’t, a reboot should help.
Read also: How to Disable Windows 10 Lock Screen
Via Registry Editor
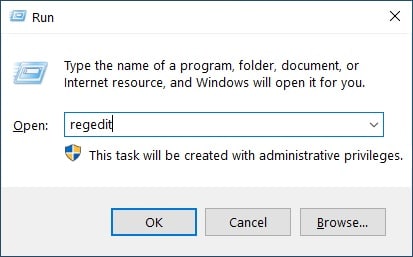
- Hit the Windows key and search for registry editor, or press the Windows + R keys and enter regedit in the run dialog that opens up.
- Navigate to HKEY_LOCAL_MACHINE\SOFTWARE\Policies\Microsoft\Windows in the Registry Editor. You can copy and paste the address directly into the editor’s address bar.
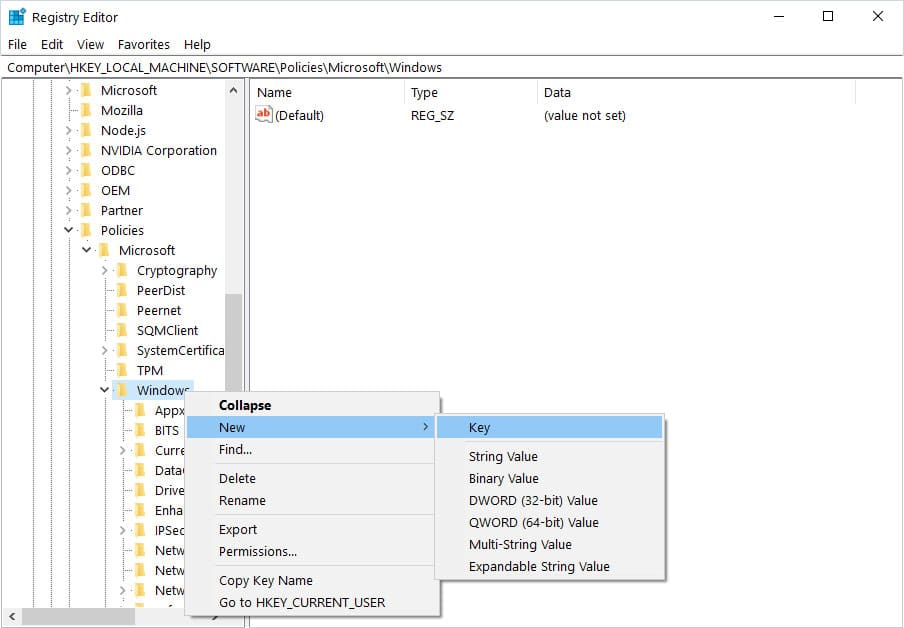
- On the left column, right-click the Windows key and select New > Key. Name the new key as WindowsUpdate.
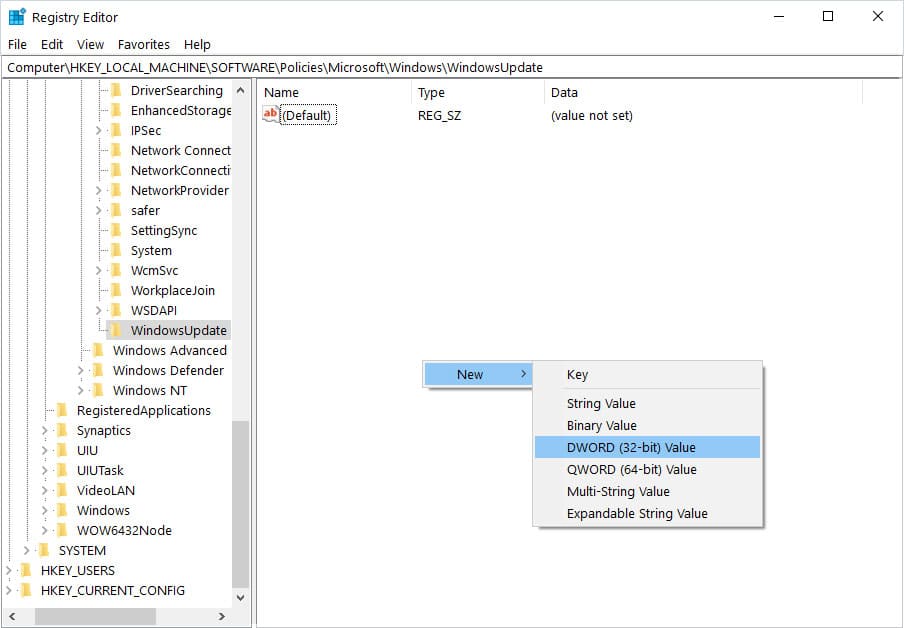
- Select the WindowsUpdate key and right-click an empty area on the right-hand pane.
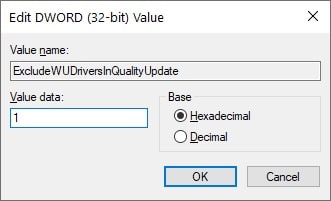
- Select New > DWORD (32-bit) Value and give it the name ExcludeWUDriversInQualityUpdate.
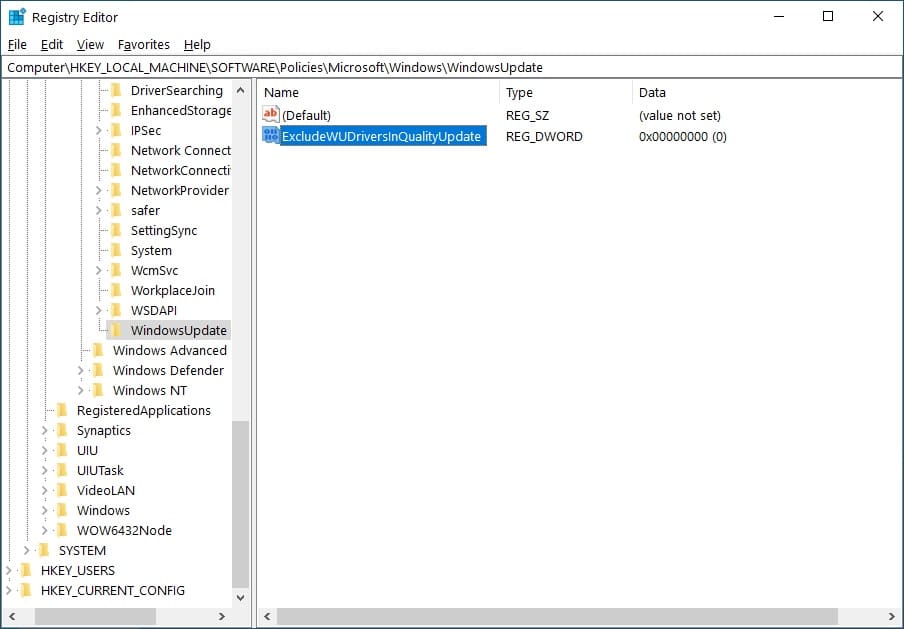
- Double-click the ExcludeWUDriversInQualityUpdate value and then change its value from 0 to 1. This will disable automatic driver updates on Windows 10. To re-enable it, change the value back to 0.