If you’re a Linux newbie, you might wonder what GRUB is. GRUB (GRUB2, more specifically) is the bootloader used by the majority of Linux distros. Unlike the Windows bootloader, which only detects Windows installations, GRUB can detect any OS installation, including Windows. This makes it ideal for Linux users who have more than one OS installed on their PCs. For many, one of those operating systems is Windows. If Windows isn’t the first entry in GRUB, updating Windows can become a bit more complicated than Linux. Fortunately, you can configure GRUB Customizer on Ubuntu to your liking.
In case you’re wondering, Microsoft hasn’t done something knowingly to make a few people dual-boot to keep Windows as their first OS. It is a possible explanation for the horrendous updating process on Windows. When Windows updates, it usually requires your PC to reboot a few times, sometimes several times. When your PC reboots, GRUB, after a wait of 10 seconds, boots up whatever OS is first on the list. So when you come back an hour later, hoping Windows is done, you may find your pretty Linux system waiting for you all booted up instead. When you reboot to Windows, the update process resumes where it left off.
There are many other reasons to configure GRUB. Booting into your non-favorite OS just because it was on top and you forgot to switch can be one. GRUB also lets you change a lot more than just the boot order. You can also remove entries you don’t want there or change the background. You can even apply a theme to make it look fancy. Like most things on Linux, GRUB’s customization file is a text file that anyone can edit to get the desired results. An app called GRUB Customizer makes the process even easier.
You can also look at my tutorial, where I explained the method to edit and repair the GRUB boot menu using commands.
Install GRUB Customizer
- Launch the Terminal. You can use the Ctrl+Alt+T keyboard shortcut.
- Enter the following command to add the PPA to install “Grub Customizer”.
sudo add-apt-repository ppa:danielrichter2007/grub-customizer
- Update the system. Users of Ubuntu 18.04 LTS and above should skip to the next step.
sudo apt-get update
- Install the Grub Customizer package.
sudo apt-get install grub-customizer
Note
GRUB is what lets you decide which OS you want to boot into. Do not touch any settings you’re not sure about.
Change GRUB Boot Order and Sequence
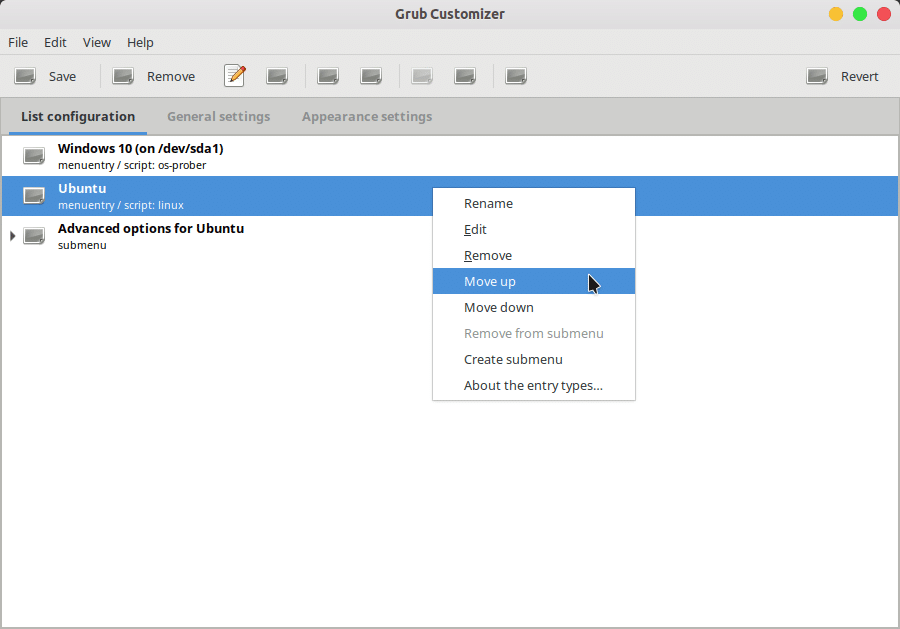
Once installed, launch GRUB Customizer from your app launcher or app menu. You’ll be asked to enter your password before GRUB Customizer opens up. It takes a couple of seconds to load up your boot order after that. Changing the boot order or removing entries is as easy as two clicks. All you have to do is right-click on a boot entry and select whether you want to rename or edit it. You can also have it move up or move down the list, or remove it altogether.
Change Default OS
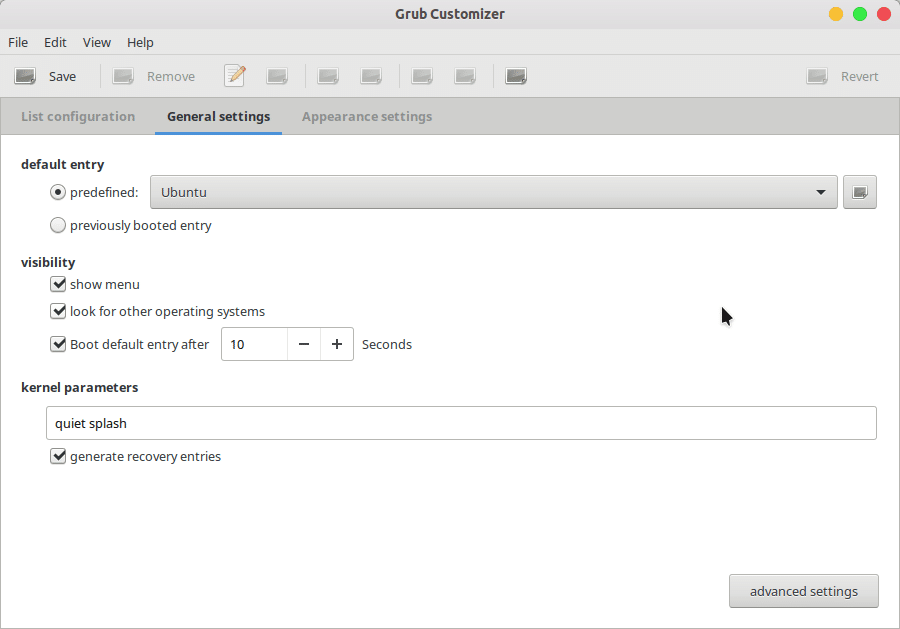
Other than moving an OS entry to the top, you can change the default OS that GRUB should boot to unless interrupted by the user. Under the General Settings tab, select the default OS from the drop-down menu next to the label predefined. You may also find it more convenient to have GRUB boot into the last used OS by default. To do that, select the previously booted entry.
Change GRUB Bootloader Background and Theme
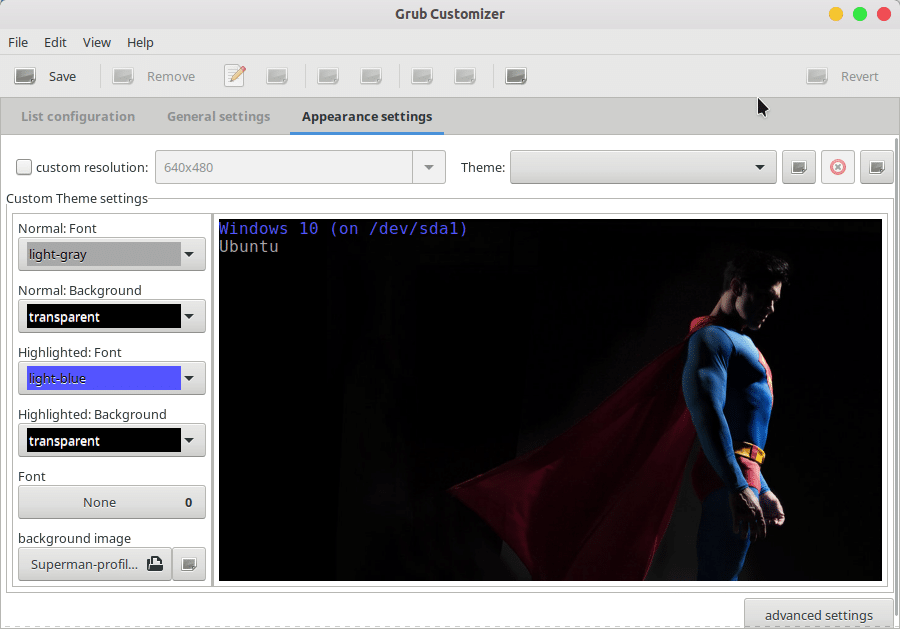
Under the Appearance settings tab in GRUB Customizer, you can play around with how you want GRUB to look. But before you jump at the opportunity, you’re playing with your bootloader and this is not just a GTK theme that you can switch if it doesn’t work. It’d be best not to play with the resolution settings unless you know what you’re doing. There are plenty of pre-built GRUB themes available all over the Internet that you can download and apply. You can add a theme by clicking on the add theme button.
Read Next: 5 Best Icon Themes for Linux You Should Try