GRUB or Grand Unified Bootloader is a bootloader package developed to allow users to select from two or more operating systems installed on a single disk. GRUB is what makes dual-booting a PC with Windows and a Linux distribution such as Ubuntu possible. You can always install two operating systems on a disk, but you’ll only be able to boot one unless the bootloader allows you to choose. If anything goes wrong, you can easily fix, edit, and repair the GRUB boot menu using commands.
GRUB is popular among people who use dual-boot setups. If you’re using a dual-boot setup, you’re most probably making use of GRUB whether you’re aware or not. Sometimes, when you install Windows after installing Linux, or as is my case, Ubuntu, it breaks GRUB. GRUB is still there, but the Windows bootloader takes preference over it, thus booting right into Windows. Today, we’ll see how to edit or repair the GRUB boot menu.
Boot Repair
Repairing GRUB can be done in two ways. There’s a graphical way, which is easier, and you will know what you’re doing. There’s a command-line way we will try to avoid here for two reasons. It’s difficult, in the sense that it will require a lot more explanation, without which you won’t know exactly what you did to your system. The graphical way is also harmless, meaning you can do it wrong and your data will still be very safe, waiting for you to try again and do it right. The only con is that it requires that you have a bootable Ubuntu disk or USB and a working internet connection. This isn’t a big deal since Ubuntu is available for free, and it’s easy to create a bootable Ubuntu drive.
Another scenario would be that you can access Ubuntu and GRUB boots normally, but it does not show Windows or any other OS you may have installed. In this case, you have access to your Ubuntu system, so you don’t necessarily need to boot from a USB drive.
- Boot your PC via a bootable Ubuntu drive and select Try Ubuntu. This allows you to use a Live Ubuntu session directly from your USB drive without installing anything. This step is not required if you can boot into Ubuntu installed on your PC.
- Whichever is the case, launch a Terminal window when you’re in Ubuntu. The quickest way to do this would be to press Ctrl+Alt+T. In the Terminal window, use the following commands one by one to install Boot repair.
sudo add-apt-repository ppa:yannubuntu/boot-repair

sudo apt-get update

sudo apt-get install -y boot-repair
Steps to Repair GRUB Boot Menu
- Once boot repair is installed, you can quickly search for it by pressing the Windows key and typing boot repair. Launch Boot repair.

- It takes a little time to load up, and when it does, select Recommended repair.
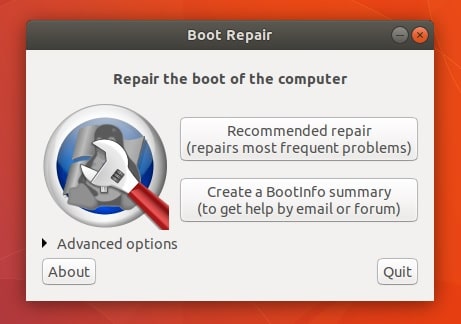
- Boot repair will guide you through the entire process. You will be required to push commands through the Terminal and make the necessary choices. Boot repair takes care of most of the other things you would otherwise have to do via more complex commands. It also lets you copy the commands so you can simply paste them into the terminal and execute them easily.
Steps to edit the GRUB Boot Menu
GRUB doesn’t require repairing very often, but you might not be in love with the default look. You can quite easily change how the GRUB bootloader menu looks to something more pleasing to the eye. You can also change the boot order, so it will boot into your OS of choice by default unless you choose otherwise at the time of boot. GRUB can be edited using a tool called GRUB Customizer. To install it, execute the following commands in a Terminal window.
sudo add-apt-repository ppa:danielrichter2007/grub-customizer
sudo apt-get update
sudo apt-get install grub-customizer
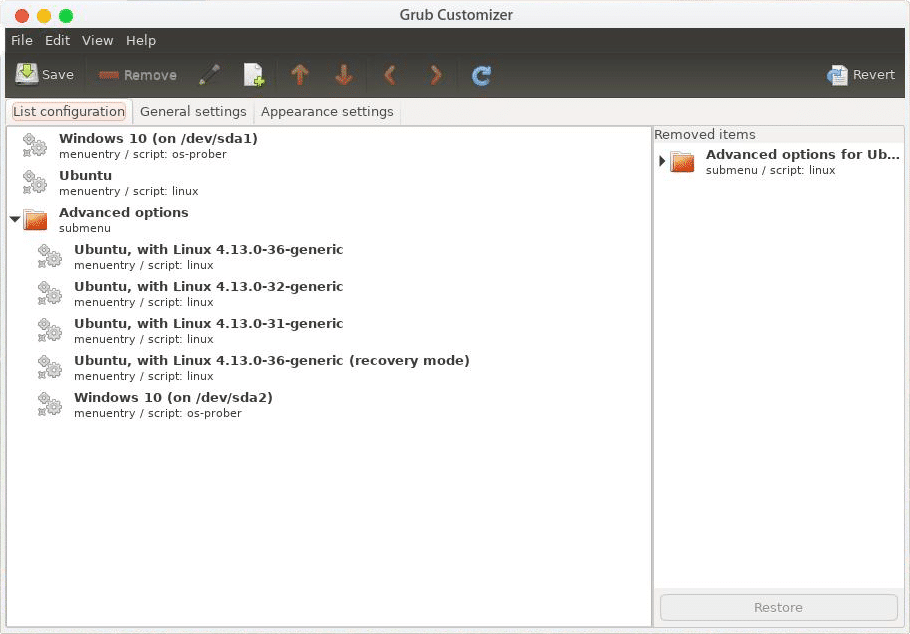
As you can see above, I’ve selected Windows to be the first choice. Usually, the list starts with Windows at the bottom. To move any listing up or down, select it and click the arrow buttons on the top.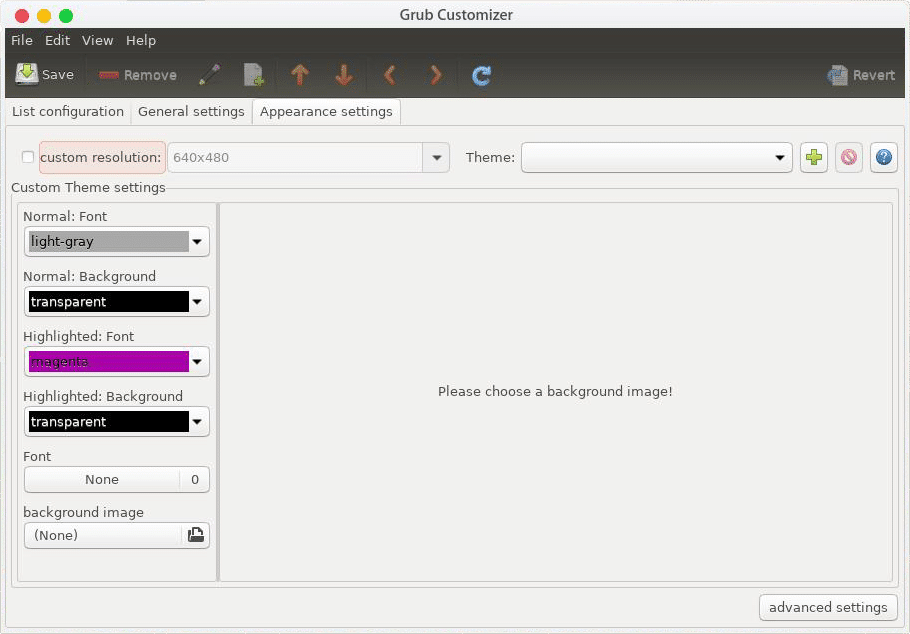
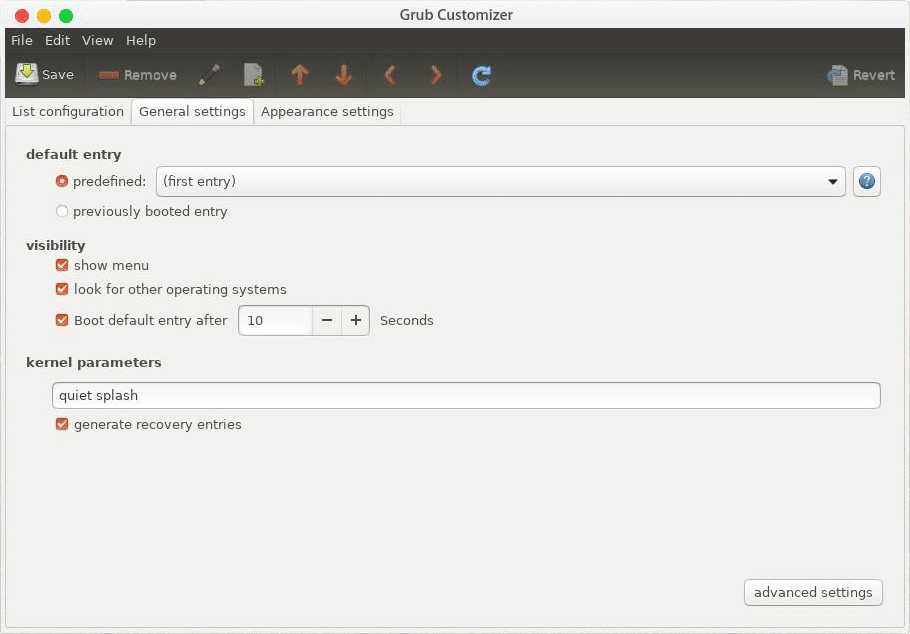
In the General settings tab, you can choose if GRUB should boot by default to the first entry in the boot menu or boot to the OS you previously booted into. There are some other settings too as you can see above.
In the Appearance settings tab, you can change the appearance. It lets you manually select the background image or color, font, highlight color, and font size. You can also install pre-built themes from the internet.
Be very sure of what you do with the GRUB customizer because any incompatible changes can break GRUB, in which case you will have to repair it.
Read next: Show Complete Date & Time in Ubuntu GNOME Top Panel