Websites like to keep you constantly updated with their daily content. And for that, it requests you to allow them to send you notifications. Seeing this as an easy way of getting information from your favorite sites, you probably would allow them to send notifications. It’s good to have regular notifications from your favorite websites but what would you do if they start bombarding your device with random notifications? Here is how you can stop and manage Chrome notifications on Android devices.
You might have unknowingly allowed the websites to send you notifications. Well, whatever the case, it is always a good practice to get complete knowledge on managing these website notifications on your Chrome browser. With that said, here are the steps to follow.
Stop Chrome Notifications on Android
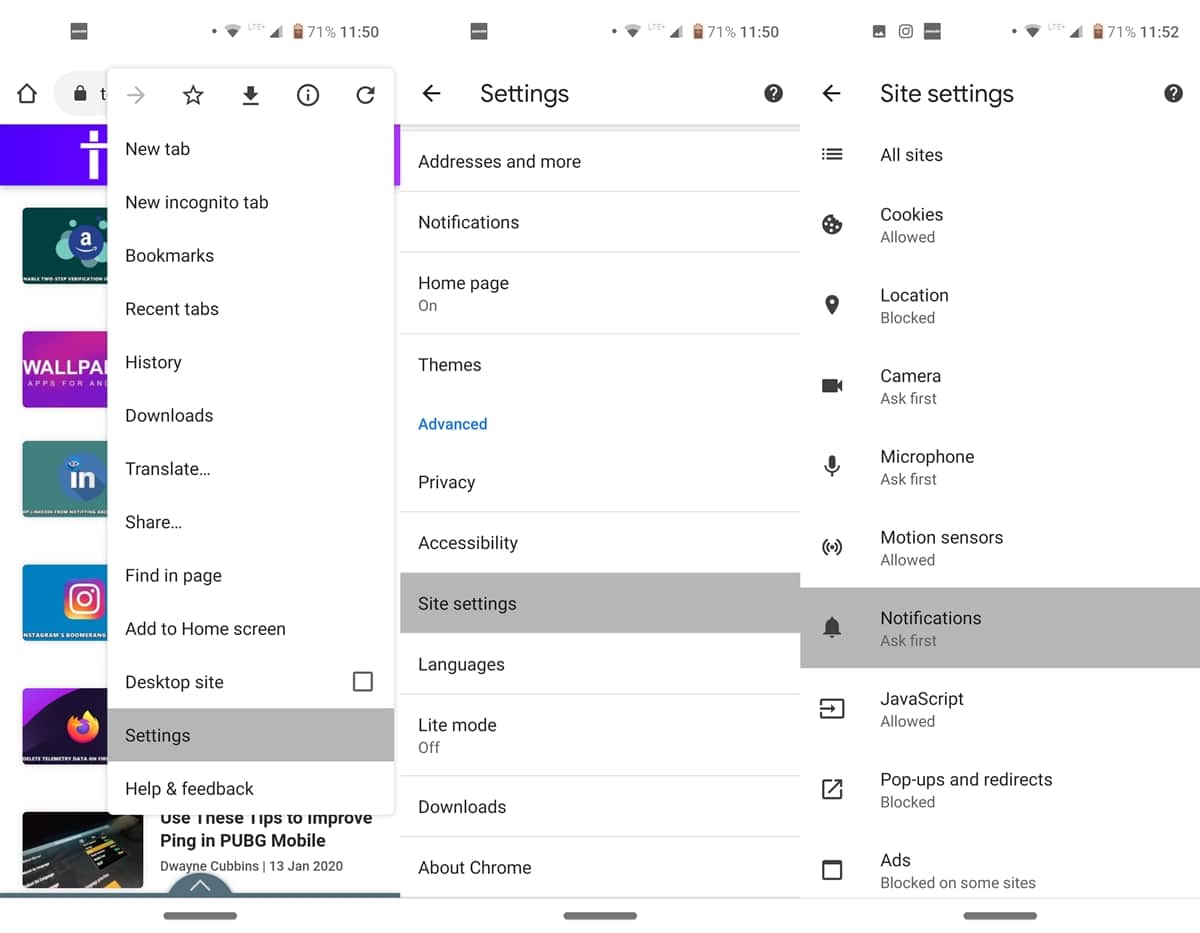
- Open the Chrome browser on your Android device.
- Tap the overflow menu situated at the top right.
- Select Settings from the drop-down menu.
- Head to Site Settings. This should be situated under Advanced.
- Now tap Notifications. This will show you the list of all websites for which you have blocked or allowed notifications.
- At the top of the page, you’ll see a Notifications toggle. Turning it off will disable all the notifications from all the websites.
- However, if you wish to act on a per-app basis, take the help of Blocked and Allowed sections.
If you are a Windows user, you should also check out how you can customize notifications on Windows 10.
Let’s take an example. Suppose you have allowed Facebook to send you notifications. However, it is becoming way too intrusive and you wish to disable this notification from Chrome. To do so, here are the steps to follow:
Manage Per-Website Notifications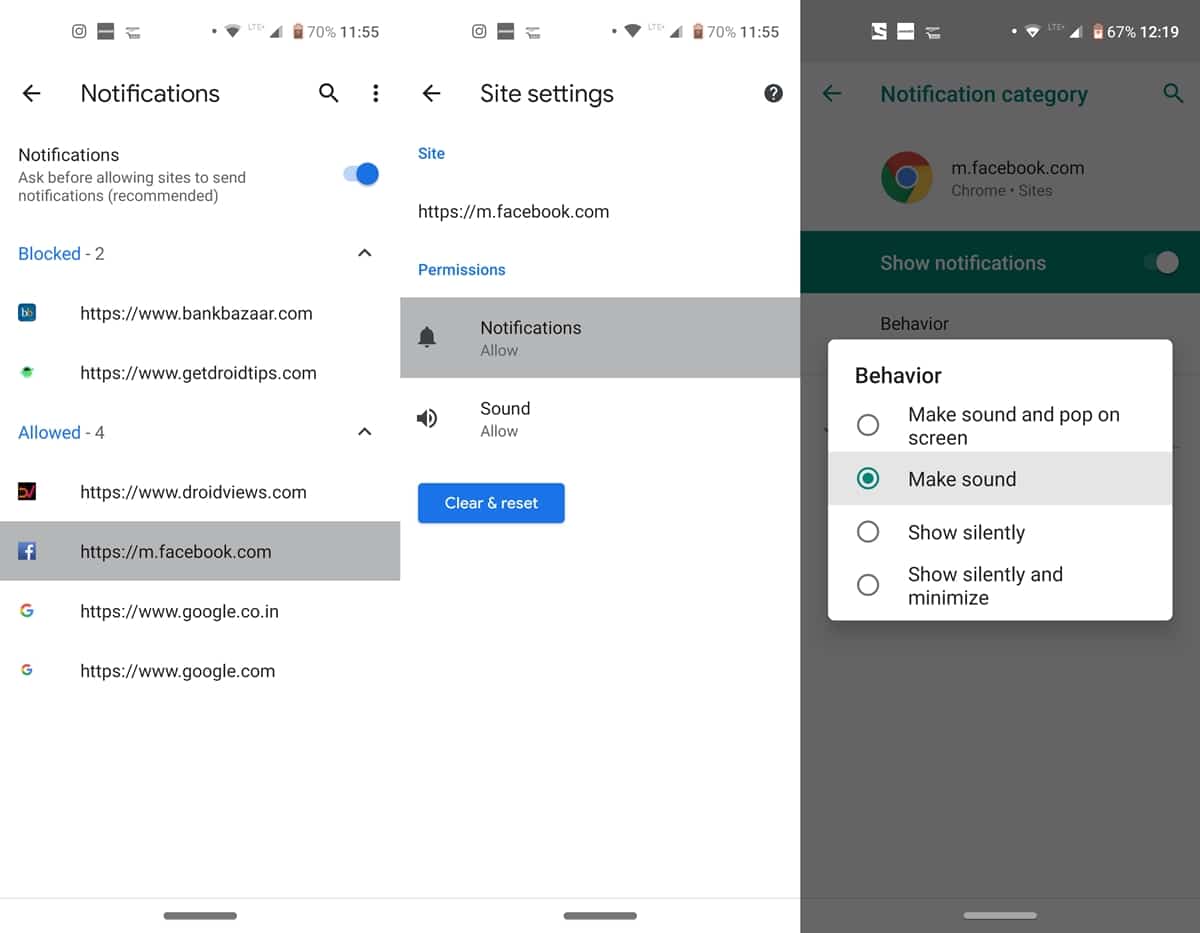
- Tap the Facebook URL under Allowed.
- Then tap Notifications and turn off the toggle next to Show Notifications.
- You also have the option to modify these notifications in Chrome rather than completely disabling them. To do so, tap Behavior and select any one of the following:
- Make sound and pop up on the screen: The notifications will pop up on the screen along with the sound
- Make sound: It will just make a sound but won’t show any pop-up notifications.
- Show silently: Show the pop-up notifications, but without any sound.
- Show Silently and minimize: You’ll silently receive a notification for a short period and it will be minimized.
Also Read: How to Access Dismissed Notifications on Android
Advanced Notifications Options in Chrome
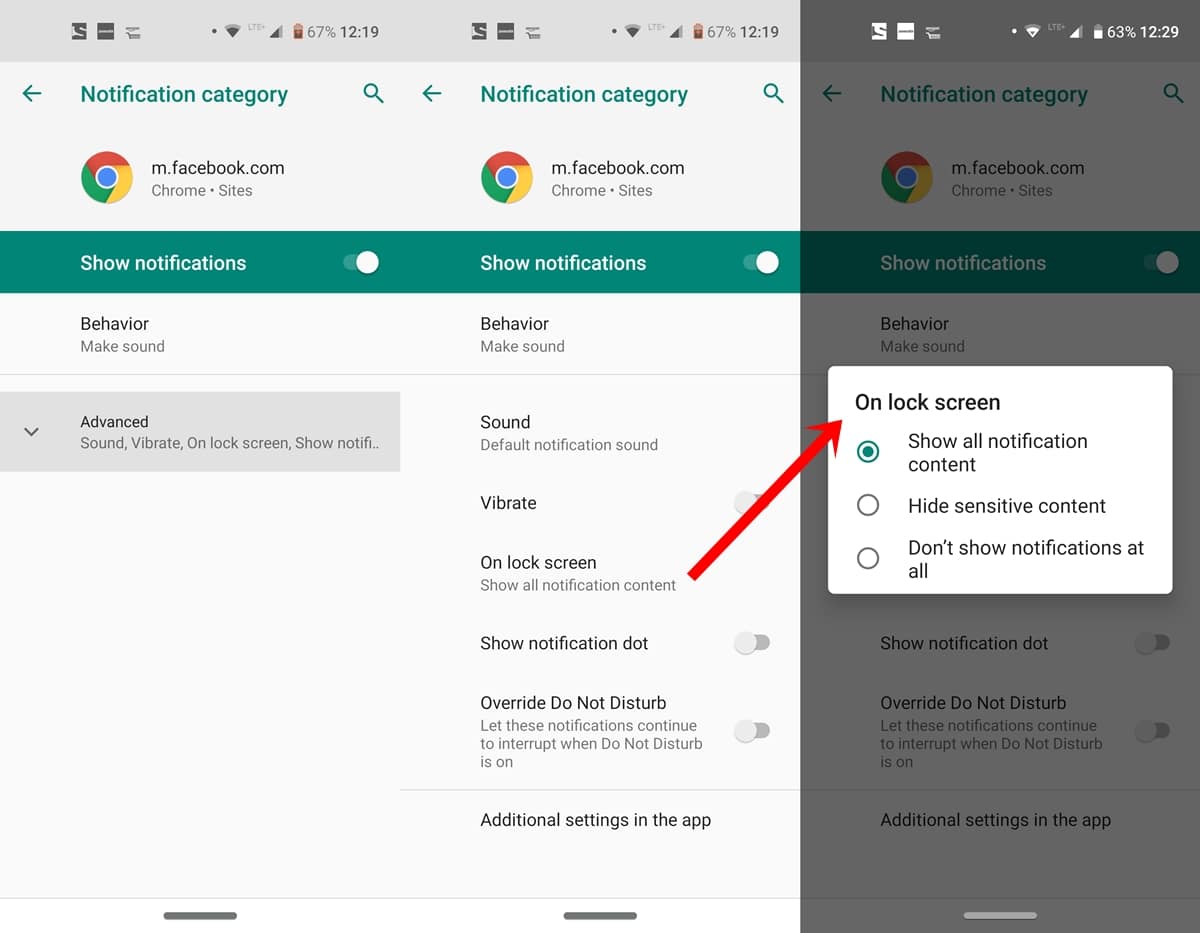
Apart from that, there are some other options to manage your Chrome notifications for a particular website. The same is situated under the Advanced tab. Here are some of the useful options to take note of. Moreover, also have a look at the steps to stop LinkedIn from notifying users that you viewed their profile.
- Sound: Choose the notification sound that needs to be played when a notification arrives in Chrome.
- Vibrate: Make your device vibrate in case of a pop-up notification.
- On Lock Screen: Manage what types of notifications should you get on the Lock Screen.
- Override Do Not Disturb: Add this website’s notifications to the Do Not Disturb’s whitelist. This means you will continue to receive notifications from this site in Chrome even when the DND Mode is activated.
So this was all about this guide on managing Chrome notifications on your Android device. Do let us know in the comments if you have any queries concerning this guide.
Read next: Open Websites in Application Mode on Google Chrome