On Windows 10, apps downloaded from the Microsoft Store have permission to run in the background. Like on Android, these background apps consume resources, and in turn, provide you with notifications, and fetch information to display up-to-date updates in their Live tiles in the Start menu. These apps can continue downloading in the background too and you won’t be seeing them cluttering your system tray. But Windows 10 lets you turn off background apps from running and save battery, bandwidth, and system resources.
Background apps have been one of the primary sources of battery drain on smartphones and the story is no different on Windows 10. The problem is these apps will always run in the background, even if you’ve never touched them. For instance, the Mail app in Windows 10 runs in the background. It checks for new emails and sends out desktop notifications when you receive a new email. If you feel that your Windows desktop or laptop is taking longer to boot up than it should, you must follow these tips to speed up the boot time on Windows 10.
Stop Background Apps on Windows 10
All the installed Microsoft Store apps have permission to run in the background by default. Whether they choose to run in the background or not is on the app developers.
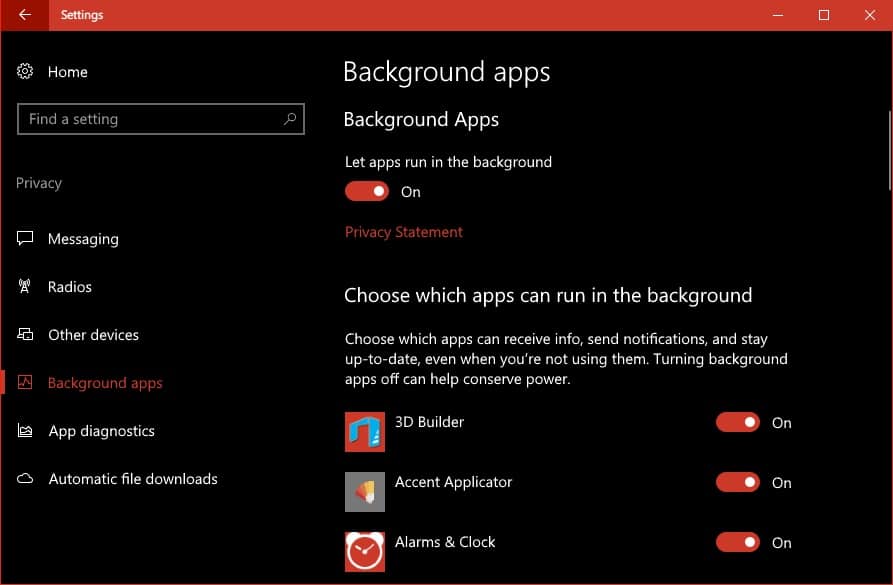
- To see which apps have permission to run in the background, open Settings.
- Navigate to Privacy and scroll down to find the Background Apps section.

- You’ll now see a list of apps that have permission to run in the background with toggles. There is also a toggle at the top that you can turn off to Let apps run in the background.

- Considering all the apps have permission, you might be tempted to toggle that one switch and prevent them from running in the background. But bear in mind that there’s a downside to stopping all the apps from running in the background. For instance, if the Alarms & Clock app is not allowed to run in the background, set alarms won’t go off. If you prevent the Microsoft Store from running in the background, your apps won’t automatically be updated. Also, you’d have to keep it open while you download any apps or update them. There are apps like the Newsreader app or the Mail app. These apps normally run in the background to update live tiles, download new data, and receive notifications. If you want an app to continue performing these functions, you should allow it to continue running in the background.
- If couldn’t care less about the Live tiles and other features, you don’t have to think twice before turning the switch off for a certain app.
When you’re done you can close the Settings app. The Windows 10 apps you configured will no longer run in the background.
Limit Background Activity to Save Battery
If you’ve been a long-time Windows user, you’d know the OS usually allows more than one way to perform certain tasks. Keeping up the trend, there is another way to limit and block all background app activity. If you’re running Windows 10 on a laptop, apart from the toggle in Settings > Privacy > Background app, you can turn on Battery saver mode and have the same results.
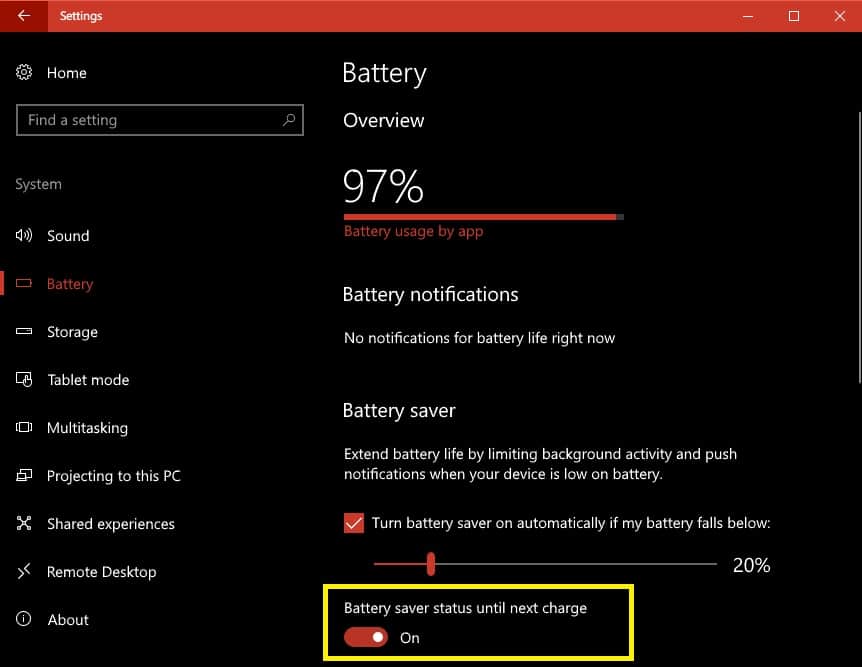
Battery saver gets turned on automatically when the battery charge drops below 20 percent. But you can manually turn it on anytime your laptop runs on battery power. If you go to Settings > System > Battery you’ll find the Battery saver section up top. Turn on the Battery saver status until next charge toggle and Battery saver will be turned on.
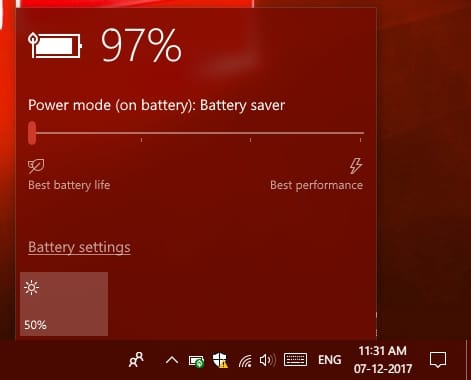
Alternatively, you can turn on the Battery saver quickly by clicking on the battery icon in the system tray. Drag the slider to the left to turn on the Battery saver. This is the plus point for using this method. You can quickly turn it on or off. When your PC is plugged in, you don’t care much about background apps draining power and may want them to run when plugged in.
If you want to customize, modify, and add new features to your PC, don’t forget to try these Windows 10 tips and tricks.


