With each new iteration of Android, Google is making it easier to handle new Android updates. With the introduction of Project Treble and A/B partition devices, things have drastically changed for good. In the case of A/B devices, the update gets installed to the inactive partition in the background, while you can continue working in the active slot. You can easily sideload the OTA update Zip using the ADB sideload command and Android stock recovery.
Not all users receive OTA updates at the same time because most Android OEMs push them in phases. However, if you get hold of an OTA update zip package, you can flash it via ADB with the help of this tutorial.
Sideload OTA Update Zip via ADB
Some manufacturers make it easy for users to try the OTA packages. They usually host this update file as a zip on their respective sites. Or sometimes, even the few users who are lucky enough to get the updates, capture the OTA URL or share the entire OTA zip files for others to download. So if you come across these OTA zip files that you want to sideload onto your devices, this guide will come in handy.
In this tutorial, we will explain the steps to manually install the OTA update packages via ADB Sideload and Stock Recovery. Go through both the methods described below, but before you do that, you have to make some preparations.
Don’t Miss: Unlock Pattern and PIN on Android Phones via ADB
Prerequisites
- Before sideloading the OTA package, make sure you are using the stock firmware without any system modifications. That is, make sure apps like Magisk, Xposed Framework, and even TWRP recovery aren’t there on your devices.
- Although installing official stock firmware doesn’t usually lead to data loss, it is still recommended to be on the safe side. So, please make a complete backup of your Android device before proceeding.
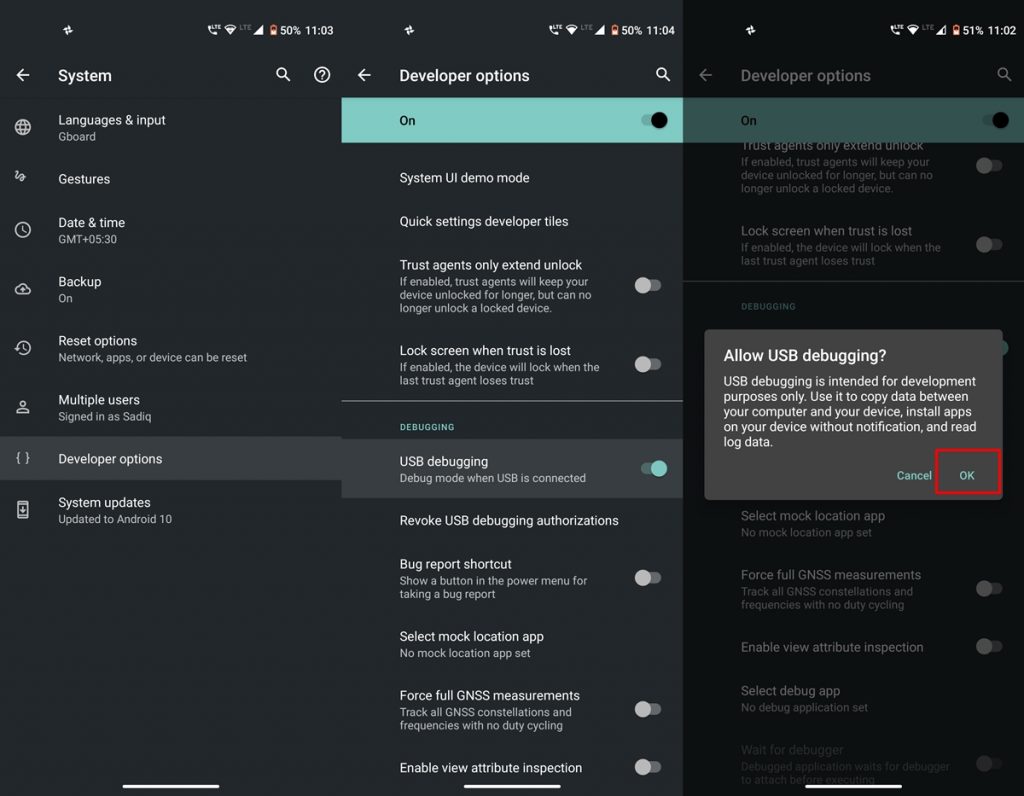
- Enable USB Debugging: To do so, head over to Settings > System > Advanced > Tap on Build Number 7 (on some devices, 5 times) > Go back to System > Developer Options > Enable the USB Debugging toggle.
- Download and install Android SDK Platform-tools on your PC.
- Moreover, you should also install the proper Android USB driver from your device’s OEM.

These were the important prerequisites to keep in mind. Now let’s proceed further to sideload the OTA update Zip via ADB sideload.
Booting Device to Stock Recovery
It doesn’t matter which method you end up choosing; booting to stock recovery is needed in both of these cases. There are two ways of doing so. You could use hardware key combinations or the ADB commands for the purpose. Regarding the hardware keys, each device follows a different combination. So, please do a Google search for that. Or if you wish, you can also try the below ADB Command to boot to recovery and install the OTA file.
Using ADB to boot to Stock Recovery
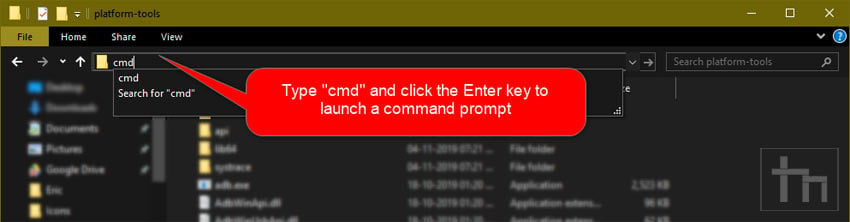
- Open the platform-tools folder, type cmd in the address bar, and click the Enter key. This will launch the Command Prompt.
- Now connect your device to your PC via a USB cable. Make sure USB Debugging is enabled.
- Type the following command in the Command Prompt:
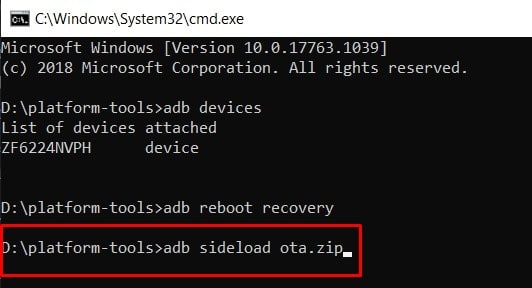
adb reboot recovery
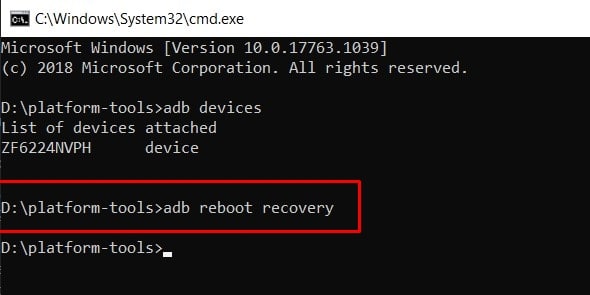
- On some devices, this command will directly boot your device to recovery, while others might boot to a No Command screen. If you encounter this issue, press and hold both the Volume Up and Power keys and release the Power button as soon as the device turns off. This will boot your device to the stock recovery mode.
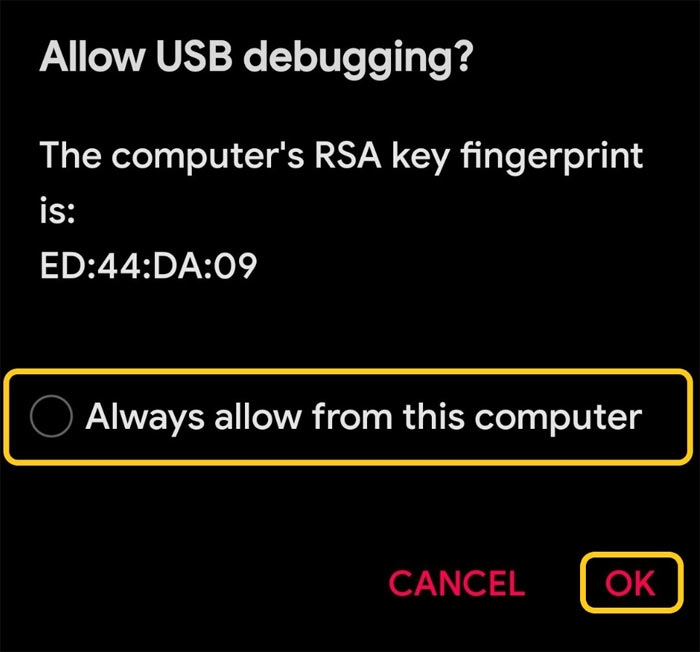
- Please note that when you execute an ADB command, you will see an RSA key prompt on your device’s screen asking you to Allow USB debugging. Tap OK to allow it.
Now that you have learned how to boot the device to recovery, let’s check out the steps to install OTA updates via ADB Sideload.
Steps to Sideload OTA Update Zip using ADB Command
- First off, transfer the downloaded OTA update.zip file to the platform-tools folder.
- Now, boot your device to stock recovery and connect it to your PC via a USB Cable.
- Inside stock recovery, use the Volume keys to highlight the ‘Apply Update from ADB‘ option and press the Power key to confirm this selection.
- Next up, type in the command below in the CMD window and hit Enter. Make sure to replace ‘OTA.zip’ with the actual name of the file that you have downloaded.
adb sideload ota.zip
- Now, wait for the update to get installed on your device. Once the installation is successful, you can reboot your device from the recovery itself (use the ‘Reboot system now‘ option for the same).
That’s it. You have installed the desired OTA package via the ADB Sideload method. Let us see how this could be done via the Android stock recovery. We have compiled a huge list of ADB Shell commands and Fastboot commands with detailed explanations and examples. You should check them out to make the most out of your Android device.
Install OTA Update via Stock Recovery
This method of installing OTA doesn’t require a PC. You could directly install the OTA update from the recovery itself. Here is how it could be done.
- Transfer the downloaded OTA file to your device’s internal or external storage. Don’t put it inside any folder, as the system won’t be able to find it.
- Next, boot your device into recovery by the method already described above.

- From recovery, navigate to the Apply Update from SD Card option using Volume Keys. Press the Power key to confirm your selection.
- Similarly, use the Volume keys to highlight the OTA.zip file and the Power key to install it. Once the process finishes, you could use the Reboot system now option to boot your device back to OS.
With that, we conclude this guide on installing OTA update packages via ADB Sideload and Stock Recovery methods. Both of them do their job pretty well, it’s entirely up to you which method you ultimately end up choosing. However, if you are facing any issues executing the above steps, kindly let us know in the comments section.