- Developer Options: Navigate to Settings > About > Software Information, the Build number 7 times, and enter your device PIN to enable the Developer mode.
- USB Debugging: When the Developer mode is enabled, go to Settings > Developer options, tap the toggle next to USB Debugging, and select OK when asked to allow USB debugging.
Being open-source, Android is a developer-friendly OS. Its open nature attracts a lot of development activities that are not limited to apps only. You can find various mods, ports, and custom ROMs for Android devices that add more value. Thanks to Android’s Developer options, which facilitate customization via custom recovery, root privilege, and ADB. By enabling USB debugging on your device, you can use ADB commands to tweak, modify, and manage your device.
Enable the Developer Options
To enable the Developer options, tap the Build number 7 times. Please keep in mind that the location of the Build number option on different Android versions and devices may differ.
- Android 9/10/11/12/13/14: Settings > About phone > Software information >Build number.
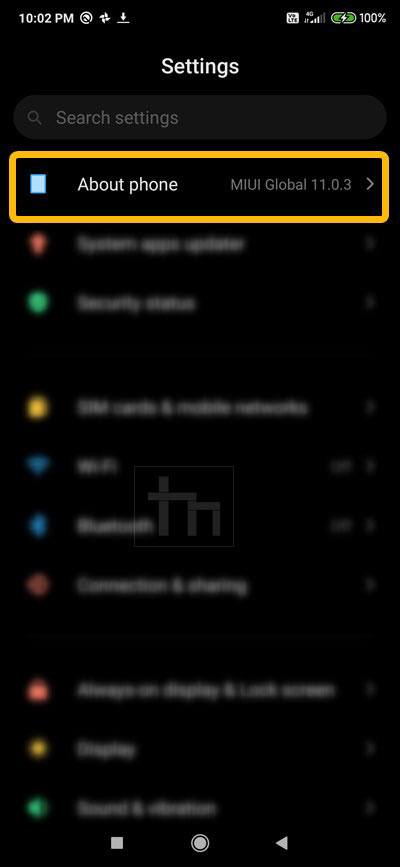
- Xiaomi: Settings > About phone > MIUI version > Build number.
- Realme/Oppo: Settings > About phone > Baseband & Kernel > Build number.
- Vivo: Settings > System management > About phone > Software version > Build number.
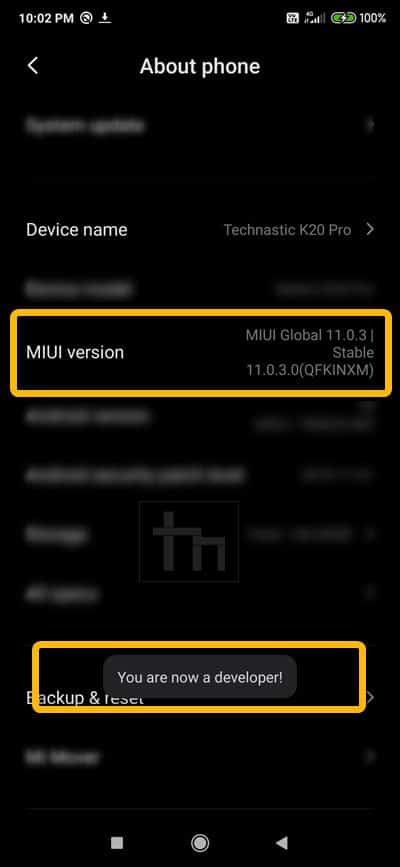
When you tap the Build number 7 times, you’ll see a toast message saying, “You are now a developer!“, or “Developer mode has been enabled.”
Here are the detailed steps to turn on the Developer options on Android with screenshots.
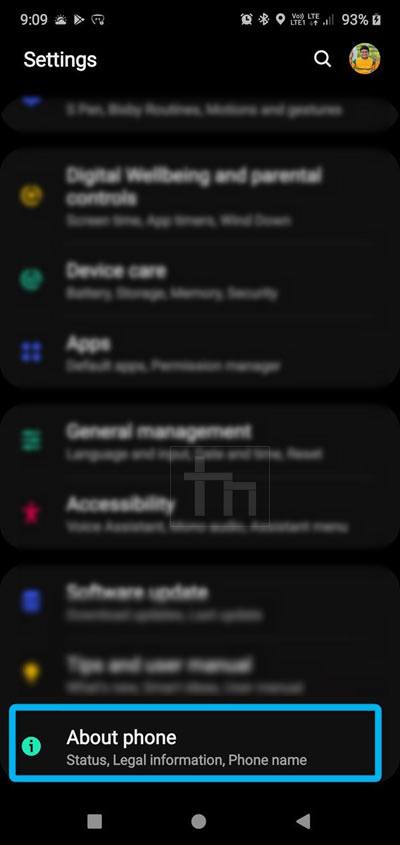
- Open Settings and tap About phone.
- Now go to Software Information> Build number and tap it 7 times.
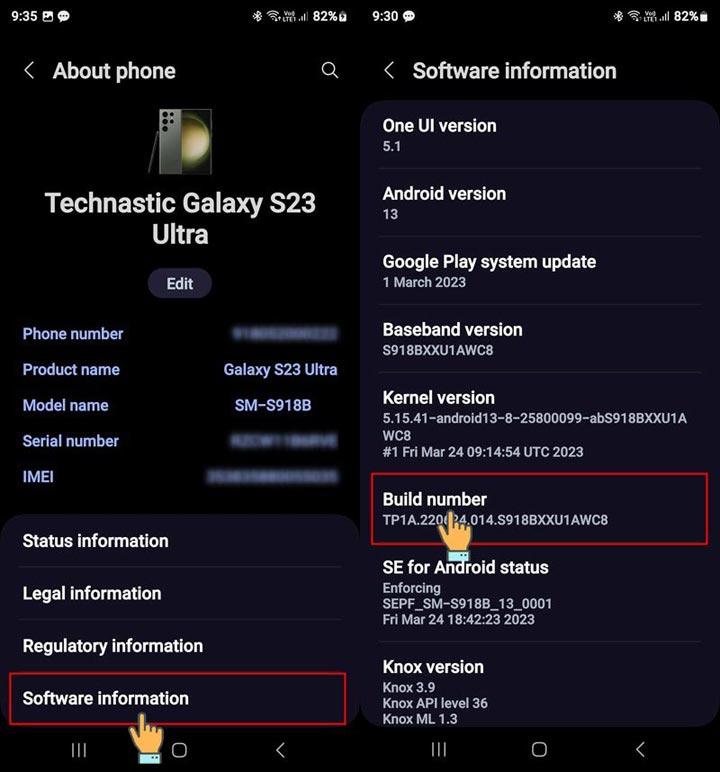
- You’ll then get a toast message notifying you that the Developer options have been enabled.

On Xiaomi Phones
In case you use a Xiaomi smartphone running MIUI, the steps to enable the Developer options are slightly different.
- Open the phone Settings and tap About phone.
- Then go to the MIUI version and tap it 7 times to turn on the Developer mode.
On Realme phones
If you own a Realme smartphone running ColorOS or Realme UI, follow these steps.
- Open device Settings > About phone.
- Tap on Baseband & Kernel, and then tap the Build number 7 times in a row.
- Enter your phone’s PIN when prompted,
- You’ll see a toast message saying “You are now in Developer Mode!“
- Return to Settings > Additional settings > Developer options and enable USB debugging.

On Vivo phones
If you own a phone from Vivo running Fun Touch OS, follow these steps to enable USB debugging.
- Open device Settings > System management > About phone.
- Tap on the Software version and then tap Build number 7 times in a row.
- Enter your phone’s PIN when prompted.
- You’ll see a toast saying “You are now in Developer Mode!“
- Navigate to Settings > System management > Developer options and enable USB debugging.

Enable USB Debugging
Once you have enabled the Developer options on your Android device, you can access the developer mode menu from your device’s Settings screen. You can now enable USB debugging and OEM unlocking on your device. Below is a list of the locations where you can find USB debugging on different Android versions.
- Android 9+: Settings > System > Advanced > Developer Options > USB debugging
- Xiaomi/Vivo/Oppo/Realme: Settings > Additional settings > Developer Options > USB debugging
Below are the steps to enable USB debugging and OEM unlocking on your Android phone or tablet.
- Having enabled the Developer options, return to the Settings page and tap Developer options.

- Now go to the USB debugging and OEM unlocking options and tap the toggle to enable them.
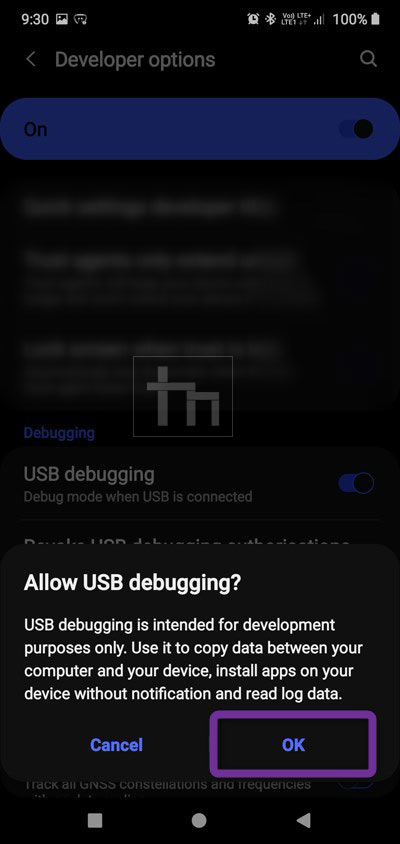
- When you see the confirmation pop-up, tap OK.
That’s it!
Disable ADB Authorization Timeout
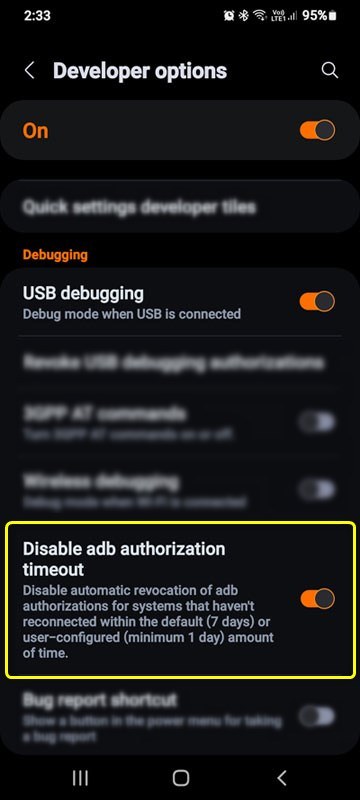
Please note that you need to authorize your computer on your device to communicate with your phone via ADB. Once you authorize a device, you won’t need to Allow USB debugging for 7 days. After that, the authorization is automatically revoked. However, if you execute ADB commands regularly, you might want to extend the authorization timeout.
If you want ADB authorization for a particular computer to stay enabled, follow the steps below.
- Go to Settings> Developer options.
- Look for Disable ADB Authorization Timeout and tap the toggle button to turn it on.
Read Next: 4 Methods to Turn Off the Developer Options on Android