Typically, ADB requires a USB connection between your device and computer. However, constantly plugging and unplugging your Android phone to execute ADB commands can be irritating. Thankfully, ADB over Wi-Fi eliminates this restriction. In this tutorial, we’ll learn to harness the power of ADB without a USB cable by setting up ADB over Wi-Fi on Windows, Mac, and Linux systems.
ADB over Wi-Fi uses the same protocol as ADB via USB, but instead communicates through a wireless network. It sends commands from the computer to the device’s operating system via a Terminal or Command Prompt window. This means that both devices must be connected to the same Wi-Fi network to establish a connection.
Once connected, you can execute any ADB command on your Android phone or tablet without a USB connection.
Steps to Set up ADB on a Computer and Android
Please note that the steps and screenshots in this tutorial are from the Samsung Galaxy S23 Ultra. Depending on your device’s OEM, the location of Developer options, Build number, and IP address may differ.
- Download the latest ADB driver and extract it on your desktop.
- Enable the Developer Options by going to your phone’s Settings > About phone > Software information. Then scroll down until you see the Build number and tap it seven times until you see the message “Developer mode has been enabled.”

- Alternatively, open device Settings, tap the search box, and type “Build number” to access it.
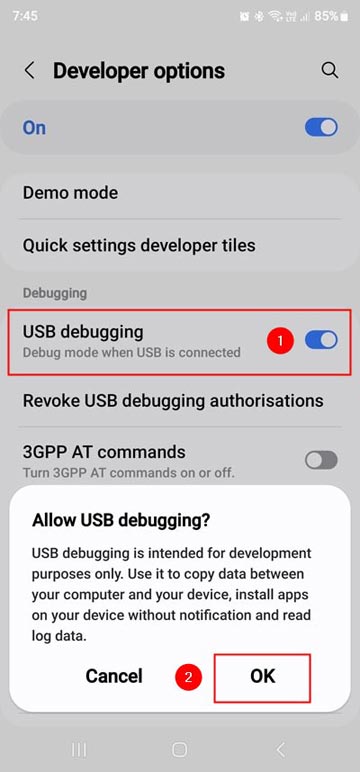
- Now go back to the Settings menu, scroll down to Developer options, tap it, and enable USB debugging.
- ADB can’t communicate with your Android phone or tablet with a locked screen. Go to Settings > Display and set the Screen timeout to 5-10 minutes.
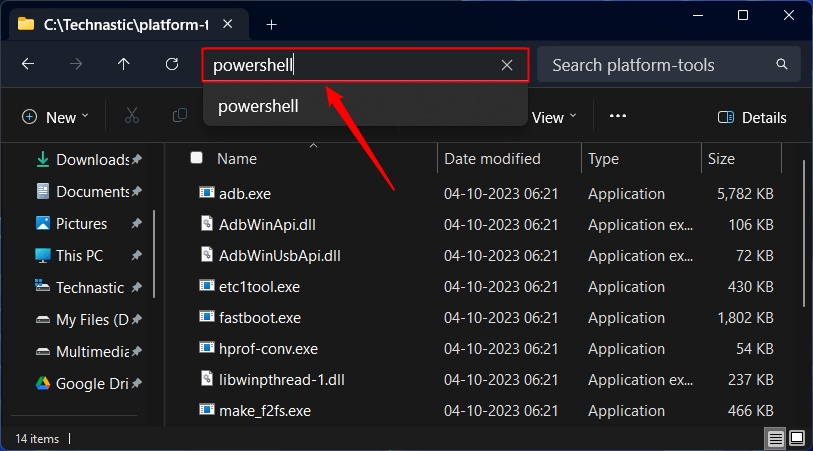
- Now, open the ‘platform-tools’ folder and launch a command window with the Android SDK platform tools path. You can do that in 2 ways:
- Right-click in the ‘platform-tools‘ folder window and select the Open in Terminal option from the context menu.

- Type “powershell” or “cmd” in the address bar of the ‘platform-tools‘ folder and hit the Enter key.
- Right-click in the ‘platform-tools‘ folder window and select the Open in Terminal option from the context menu.
- On Mac, you can open Terminal by searching for it in Spotlight Search or locating it in Applications > Utilities.
- It’s time to connect your Android device to your PC using a USB cable.
- Type the following command in the command window and press Enter.
adb devices
- Tap on Allow when prompted on your device to authorize ADB access on your Android phone.
- This will show a list of connected devices with their device ID or serial number. If your device is listed, then it is connected properly.

Steps to Set up ADB over Wi-Fi
Now that you have configured a tethered ADB connection, it is time to set up ADB over Wi-Fi so that you can use commands wirelessly. Follow the detailed steps given below:
- Ensure your Android device and computer are connected to the same Wi-Fi network.
- Go to Settings > About phone > Status information and note down the IP address of your Android device.

- Navigate to the folder where you have ADB installed. I assume you have the ‘platform-tools‘ extracted on the desktop.
- Launch a Powershell window with the path of the Android SDK platform-tools folder as shown below.

- Now, execute the
adb devicescommand, and when your device is shown as listed, issue the following command.adb tcpip 5555
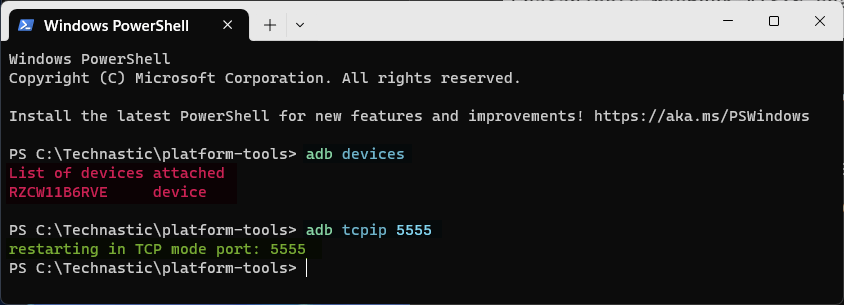
- ADB will restart in TCP (Transmission Control Protocol) to facilitate wireless connection between your phone and computer.
- It’s time to execute the
adb connectcommand followed by your phone’s IP address.adb connect 192.168.1.8
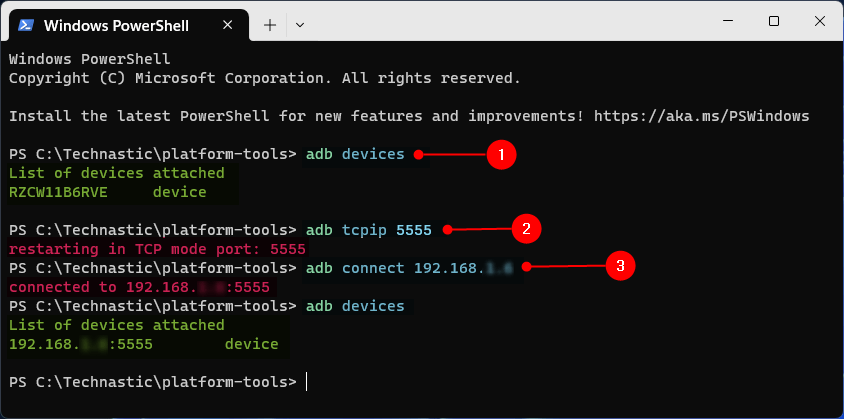
- ADB will be connected to your phone’s IP address.
- You can now unplug the USB cable. To check if your Android device can connect to ADB wirelessly, execute the
adb devicescommand again.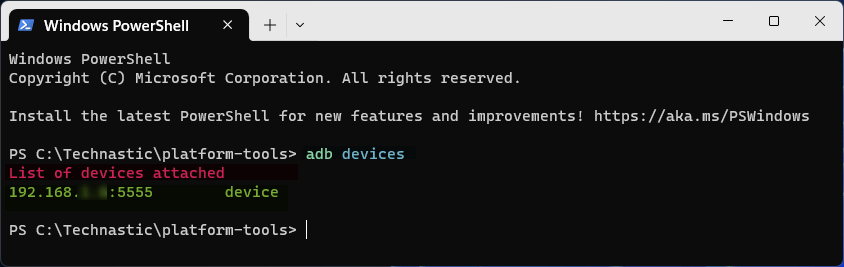
That’s it!
Common Issues with Setting up ADB over Wi-Fi
We have listed some troubleshooting tips in case you encounter issues setting up or using ADB wirelessly.
- Enable USB debugging on your Android device.
- Connect your PC and Android device to the same Wi-Fi network.
- Make sure the IP address you used is correct.
- Restart the ADB server using the
adb kill-servercommand. - Try rebooting your PC and Android device.
- Download and install the latest Android SDK Platform Tools on your computer.
- Try a different USB cable.
If none of the above solutions work, try WebADB to run ADB commands wirelessly or from your web browser.
Note: Since ADB is a plain text protocol, using ADB over Wi-Fi may not be secure. To avoid opening up your device to hackers, we recommend you use it in a personal and secure network environment.