We use Odin mostly to flash Samsung firmware binaries. However, Odin can also be used to re-partition, flash lock, decompress data, flash user data, and erase data on Galaxy devices. In this tutorial, we’ll explain the meaning of the NAND Erase option in Odin and how to use it to erase all data and re-partition a Samsung phone or Galaxy Tab. The Nand Erase option in Odin is a sensitive setting. Without proper knowledge, it can do more harm than good. It can wipe all partitions, including EFS, boot, recovery, kernel & system partitions.
What is NAND Erase in Odin?
NAND and NOR are 2 main types of flash memory related to computers, and they store the BIOS settings in the ROM of a computer. Since Android devices don’t have a BIOS, flash memory, or NAND relates to the bootloader and OS kernel work together to boot Android devices into the system.
NAND is neither an acronym of a term used to express a Boolean nor a logic gate “NOT AND“. Being a non-volatile memory, it keeps the essential OS data even when your Android smartphone is turned off.
Thus, when it comes to Android, NAND memory stores the following partitions of your Android device.
- boot
- kernel
- recovery
- system
- data
- cache
- .android_secure
- datadata
- wimax
- efs
- preload
When you create a nandroid backup, an exact mirror of all the above partitions and directory structures is created. Similarly, when you perform a NAND erase in Odin, you wipe all the partitions on your device. Simply put, you’ll end up with a device without an operating system. A piece of hardware is all you get as the boot, kernel, system recovery, data, EFS, etc., have already been wiped. Your Samsung phone or tablet won’t boot up except in Download Mode.
What is Re-partition?
As mentioned above, flash or NAND memory on Android devices is divided into partitions and block structures. These partitions are essential to the proper functioning of a device. The PIT file tells Odin how much space to allocate to boot, kernel, system recovery, data, and EFS. It is also responsible for the location and path of these partition blocks on the internal storage.
The PIT file determines the structure, location, and size of specific partitions. Since a NAND erase wipes all partitions, the only way to re-partition your device is to flash a PIT file strictly for your Samsung Galaxy device model and storage capacity. Flashing the wrong PIT may result in a semi-bricked device.
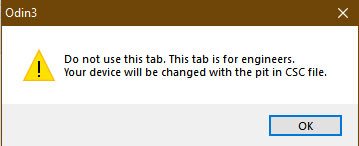
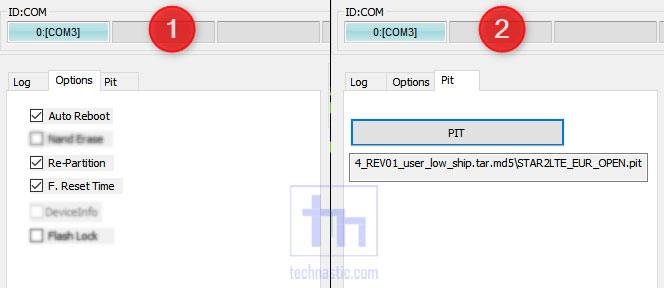
You must not enable the Re-Partition option in Odin unless you have the correct PIT file. When you click the Pit tab in Odin, it will show you a warning.
It means you don’t need to flash a PIT file in normal circumstances. In some situations, when your Samsung device’s partition table is corrupted, flashing the PIT manually can be the only way to fix the issue. If you find the IMEI number of your Samsung Galaxy phone missing, it might be due to a corrupt EFS partition. You can restore the lost IMEI by flashing the Partition Information Table. You can follow these steps to flash only the PIT file in Odin.
- Boot your device into the Download mode.
- Launch Odin and connect your device to the PC.
- Add the BL, AP, CP, and CSC binaries to the corresponding sections.
- Select the Re-Partition option.
- Click the PIT tab and add the correct PIT file for your device model.
- Hit the Start button on Odin and wait for the installation to be finished.
Please remember that the re-partitioning procedure will wipe your phone’s data, so take a backup before you proceed.
Steps to Re-Partition and NAND Erase
Finally, let’s see how we can perform a NAND erase in Odin and re-partition a Samsung device by erasing user data and all partitions. The steps described below will also help you restore the lost IMEI on your Galaxy smartphone.
Below are the steps to flash stock firmware on Samsung devices with the Nand Erase and Re-partition options.
Preparations and Downloads
There are a few things that you must do before you jump into the action.
-
- Download the firmware for your Samsung device and extract the ZIP file.
- Install the Samsung USB driver on your PC.
- Download the latest Odin tool and extract the downloaded ZIP file on your desktop.
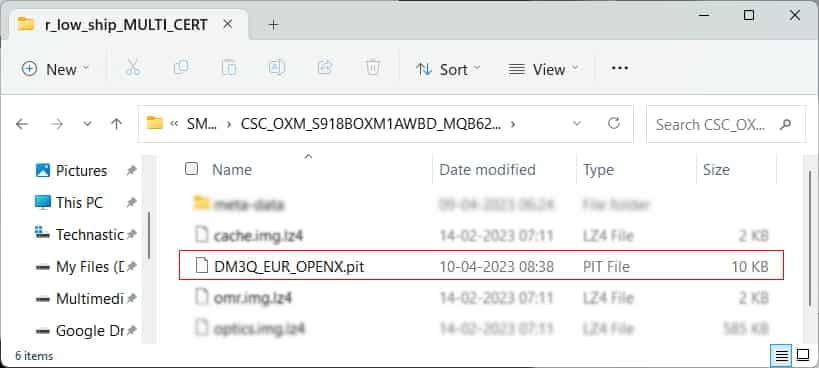
- You’ll also need the correct PIT file for your Samsung device. You can easily extract the PIT from the CSC binary. Just add a ‘.zip‘ extension after .tar.md5 and unzip it. You will find the PIT for your phone inside the extracted folder.
Instructions to Flash Firmware in Odin
Note: Please be warned that performing a firmware flash using the method below will wipe your phone’s data. It’s strongly recommended to back up your phone’s data beforehand.
- Boot your Samsung Galaxy device into the Android Recovery Mode.
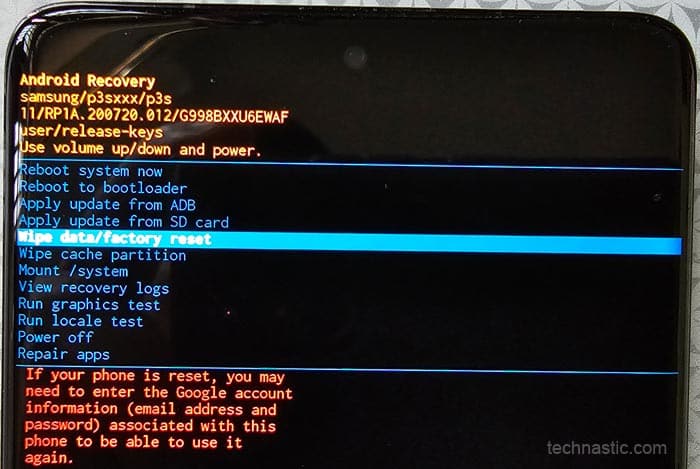
- Once you enter the recovery menu, highlight the Wipe data/factory reset option using the Volume Down button and select it by pressing the Power key. When you see the warning screen, select ‘yes’ to confirm and press the Power key to wipe your device.
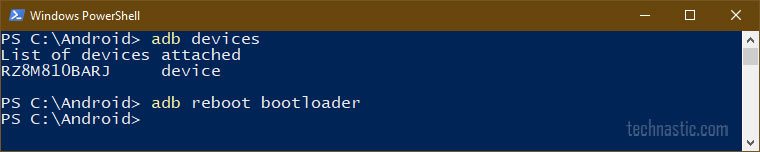
- Boot your Samsung device into Download Mode.
- Open the Odin folder and launch the Odin3_v3.xx.exe.
- Now, connect your device to your Windows PC using a USB cable. When Odin detects your Samsung device, the ID:COM port will turn blue. You’ll also see ‘Added!‘ message in the log box to indicate a successful connection.
- Click the BL button in Odin, navigate to the firmware folder, and add the firmware binary that starts with ‘BL‘ in its name. Then click the AP, CP, and CSC buttons and add appropriate binaries to them as well.
- Having added the firmware binaries, click the Options tab in Odin and select NAND Erase and Re-Partition.
- Then click the Pit tab in Odin and select OK when you see the warning pop-up. Click the PIT button now, navigate to the PIT file, and add it.
- Make sure your final Odin setup looks like the following screenshot.
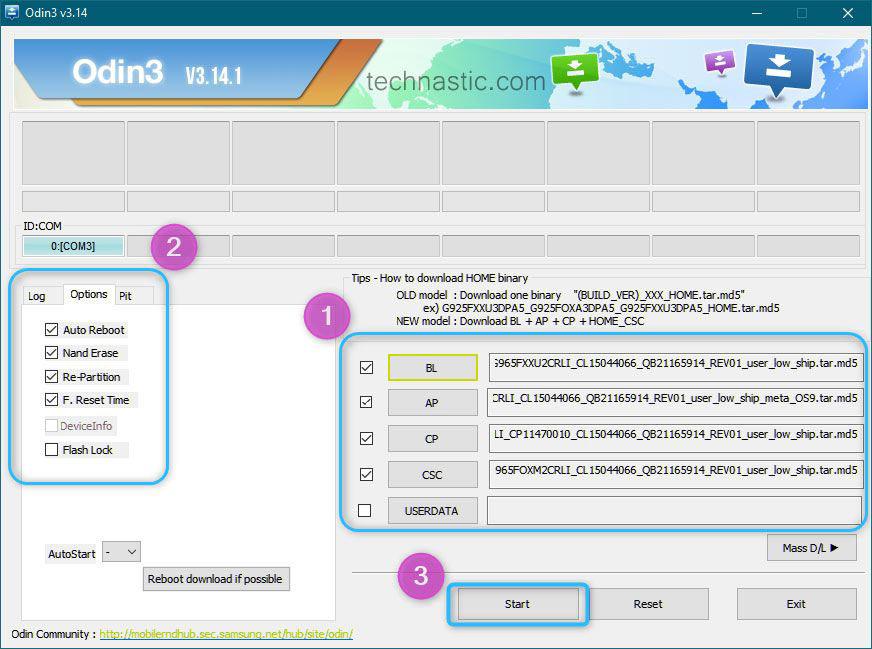
- If everything looks fine to you, it’s time now to make Odin do its job. Click the Start button.
- Doing so will initiate the firmware installation. You can check the progress of Odin Nand erase, re-partitioning, and firmware installation in the log box. You’ll also see the “Erasing NAND” message in Odin’s log.
- The whole process should take around 5-7 minutes, and after that, you’ll get a ‘PASS!‘ message in Odin and your Samsung device will reboot.
That’s it! Now, disconnect the USB cable and close the Odin window. You have successfully flashed the stock firmware on your Samsung device with Odin NAND erase and re-partition enabled. If you need help with anything while following this tutorial, comment below.