Whether Dark Mode saves battery is a matter of debate, but one thing stands clear: it eases the eye strain caused by the projecting lights from the display. As a result, Microsoft also recently introduced the Dark Mode feature on Windows 10. This could be manually enabled by going to Settings > Personalization > Colors > Choose your default app mode > Dark. But the next time you wish to turn off the Dark Mode, you will have to go through the steps again. However, there is a native scheduler that allows you to schedule the automatic Dark Mode on Windows 10 based on the time of day.
Scheduling Dark Mode on Windows 10
The steps to do so wouldn’t be carried out via any third-party app or software. Rather, we would be taking the help of Windows’ own Task Scheduler application. Also, enabling this dark mode wouldn’t affect applications like the Chrome browser. It themes the device’s sections like Settings, Explorer, etc. Here are the steps to schedule automatic dark mode in Windows 10, beginning with the former.
Steps to Schedule Dark Mode
- Search for the Task Scheduler app and subsequently open it.
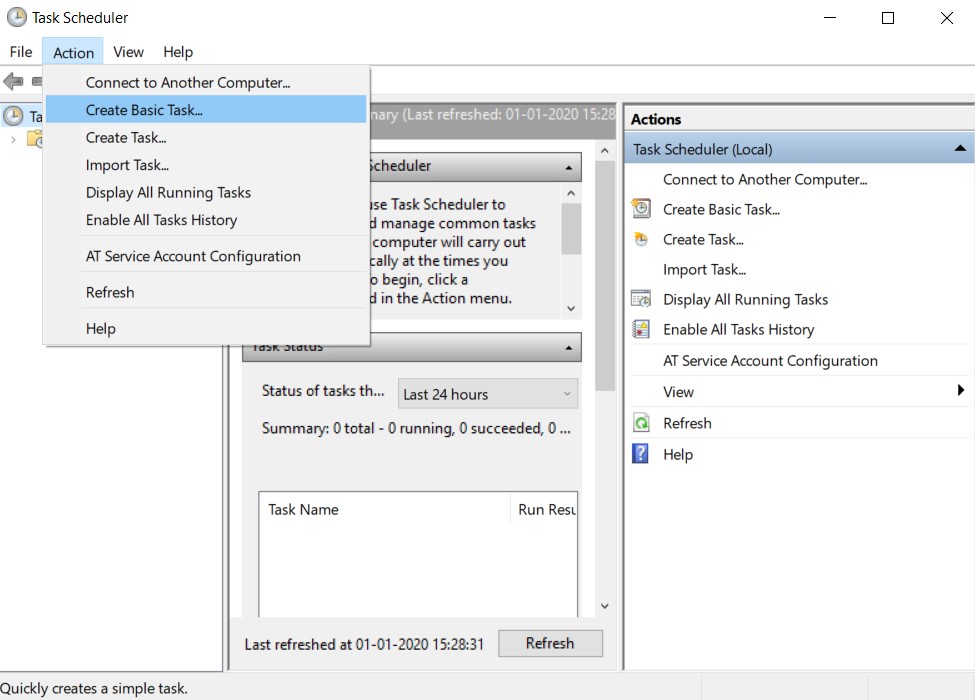
- Head to the Action tab and click on Create Basic Task.
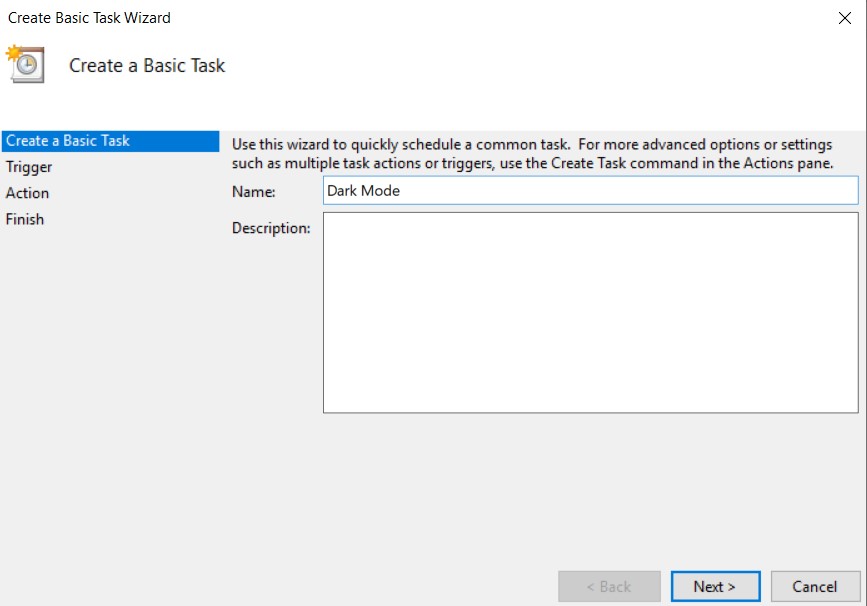
- In the Create Basic Task Wizard, give this task a name. For easy understanding, let’s name it Dark Mode. The description field is optional. You may leave it blank as well. Click Next.
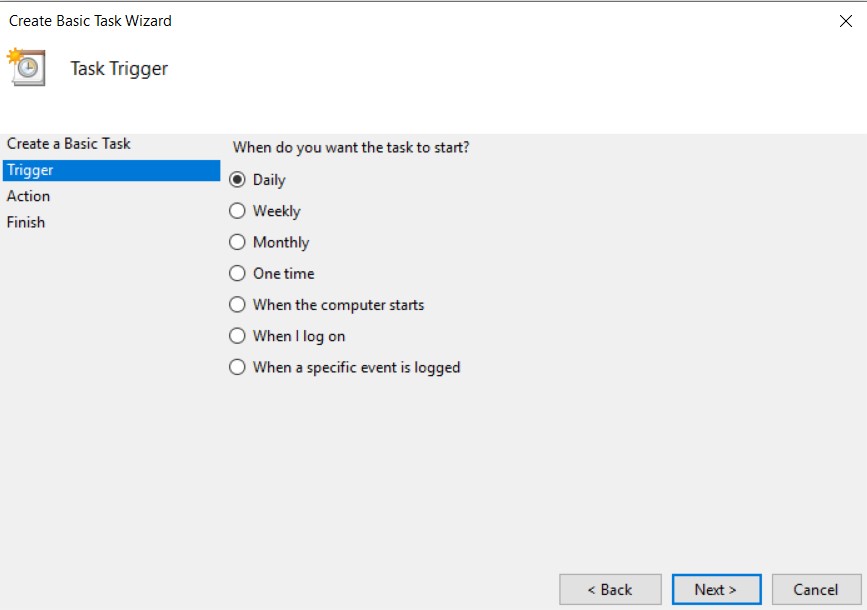
- You’ll now have to schedule this Dark Mode task in Windows 10. Chose Daily.
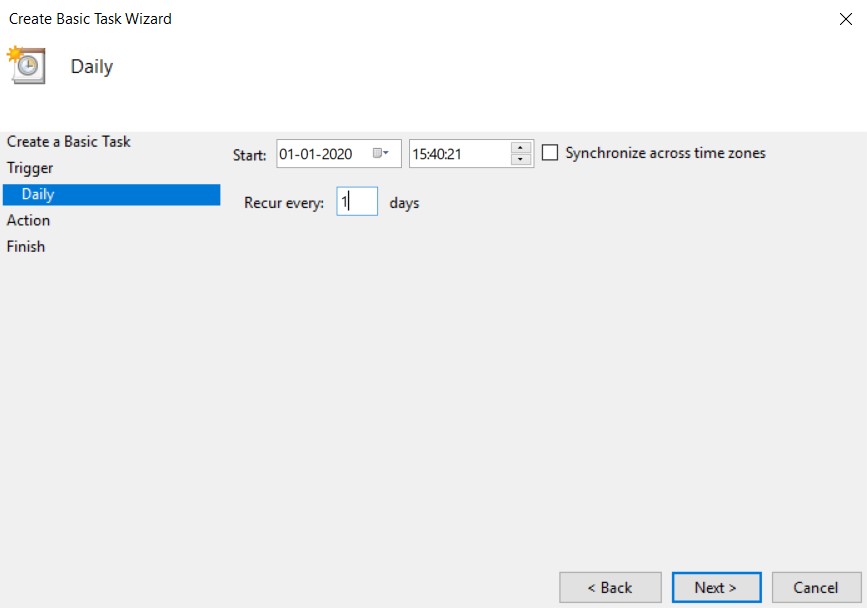
- Next, enter the time you wish to schedule the automatic enable of Dark Mode. Leave the date as it is and click Next.
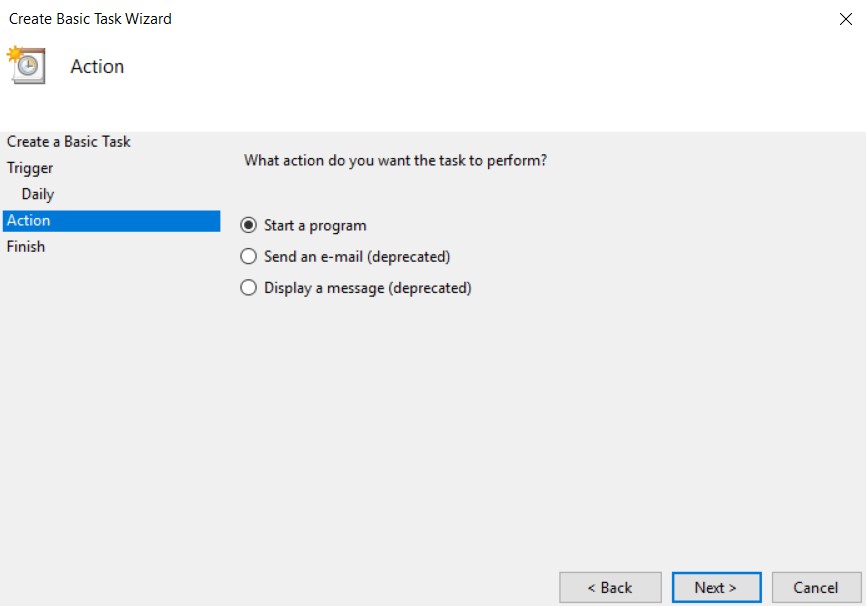
- Under the Actions to be performed dialog, choose the Start a Program option.
- Now, enter Reg in the Program/Script section. Then enter the below command in the Add Argument field and click Next.
add HKCU\SOFTWARE\Microsoft\Windows\CurrentVersion\Themes\Personalize /v AppsUseLightTheme /t REG_DWORD /d 0 /f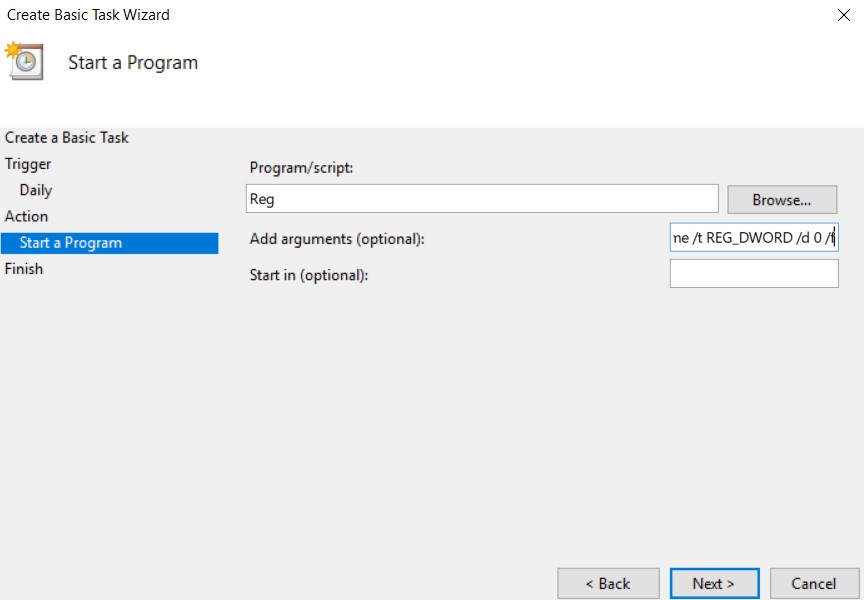
- Go through all the entered details once and click Finish to finalize your decision. However, for further modification, don’t click Finish yet.
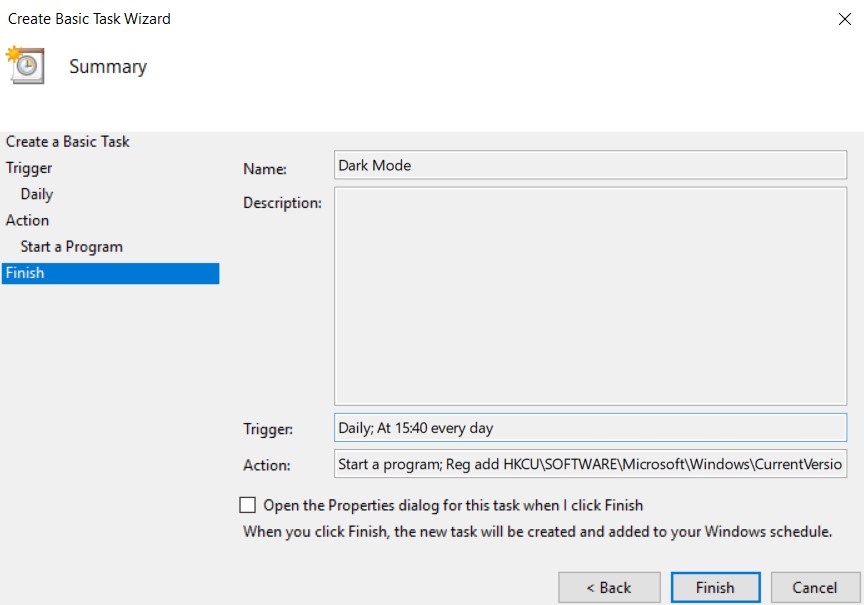
So these were the steps to schedule Dark Mode on Windows 10. Next time you turn on the PC, Dark Mode won’t be enabled. To overcome this situation, tick mark the Open the Properties dialog for this task when I click Finish option before clicking Finish.
Don’t Miss: How to Schedule Automatic Shutdown on a Windows PC
Now, in the Settings dialog box that opens, checkmark the option: Run task as soon as possible after a scheduled start is missed. Doing so will enable the dark mode the next time you open your PC after missing the schedule.
Modify the Dark Mode Schedule

If you wish to alter the setting of the Scheduled Dark Mode in Windows 10, here are the steps to be followed. You could customize the action, date, and time, or delete this schedule using the instructions below.
- Open the Task Scheduler app.
- From the left menu bar, click the Task Scheduler Library.
- Search for Dark Mode (or whatever name you gave to that task).
- You can now modify the selected task via the Action menu at the right. For further customizations to the selected task’s rule, click the Properties option and make the desired changes.
Creating a Light Mode Schedule
So you have determined the time to schedule the Dark Mode on your Windows 10 laptop or PC. But you probably wouldn’t want it to be kept enabled forever. For example, many users prefer to use the Light Mode during the daytime and switch to Dark at night. If you wish to do the same, do the following.
The first few steps are nearly identical to the point you entered the time, i.e., Step 5. In this section, enter the desired time to enable the Light Mode and turn off the scheduled automatic dark mode. Further modifications are required in Step 7. In the Program/Script section, enter Reg. Enter the below slightly modified command in the Add Argument field and hit Enter.
add HKCU\SOFTWARE\Microsoft\Windows\CurrentVersion\Themes\Personalize /v AppsUseLightTheme /t REG_DWORD /d 1 /fOn that note, we conclude this guide on how to schedule automatic dark mode on Windows 10. We also discussed the steps to disable this mode or make changes to it.
Read Next: Use Command History Feature of Command Prompt on Windows 10
