There are times when you have to leave your computer on during the night – most of us have faced a similar situation. Maybe you have to go out but can’t turn off your computer because a program is being installed. How convenient it would be if the computer would shut itself down after a certain time wouldn’t it? Well, you can schedule automatic shutdown on your Windows PC. Not many people use it but Windows has had a Task Scheduler for a few years. Good job advertising it Microsoft. This article will tell you how to get your computer to shut down at a specified time. This works for almost all versions of Windows from 7 to 10.
Use Run dialog
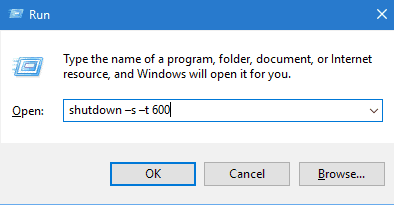
- Show Run by pressing Windows+R on your keyboard.
- Type shutdown –s –t number and tap OK. The number in the run command represents the time after which you want the system to shut down, measured in seconds. For instance, if you want your PC to automatically shut down in 10 minutes, the command to be entered is shutdown –s –t 600.
 The system will then prompt you about the auto shutdown time, as shown in the screenshot. Click on close and go have fun … or whatever.
Use Command Prompt or Powershell
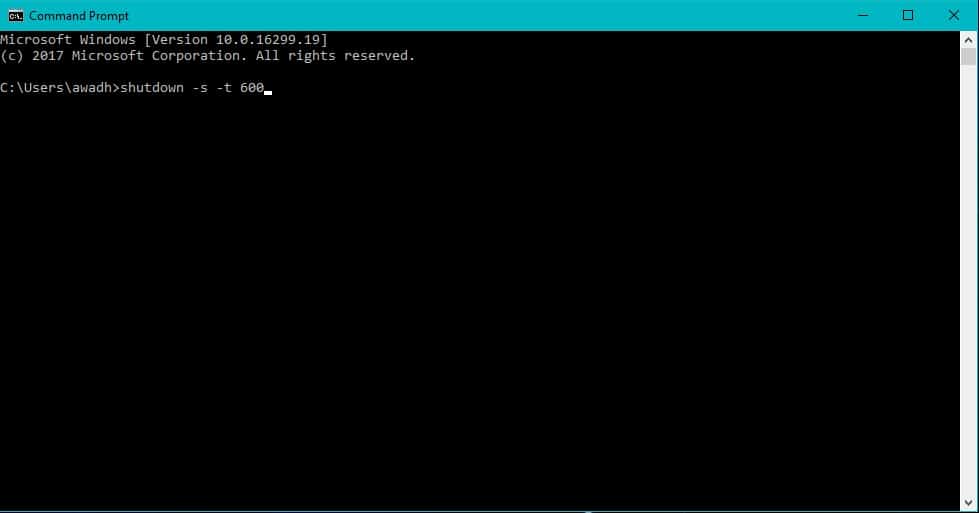
- Open Command Prompt. You can do this by right-clicking the Windows Start button in Windows 10. Alternatively, you can search for the Command Prompt or type cmd in the Run dialog and hit enter.
- Type the same command as you would’ve in the Run dialog in the previous method. That is shutdown –s –t number and press Enter.
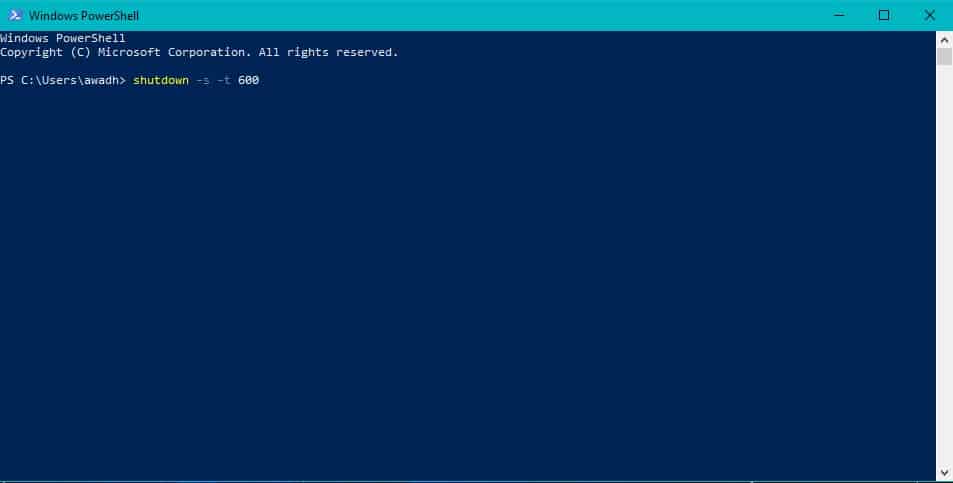
- To do this with Windows Powershell, open it by hitting the Windows key on your keyboard and typing ‘powershell’. On the latest versions of Windows 10, a right-click on the start button shows the option to open PowerShell instead of the Command Prompt. In the Powershell window, type in the same command, shutdown –s –t number, and hit Enter.
These methods add one more step to the first method and you end up typing the same thing anyway.
Use Task Scheduler
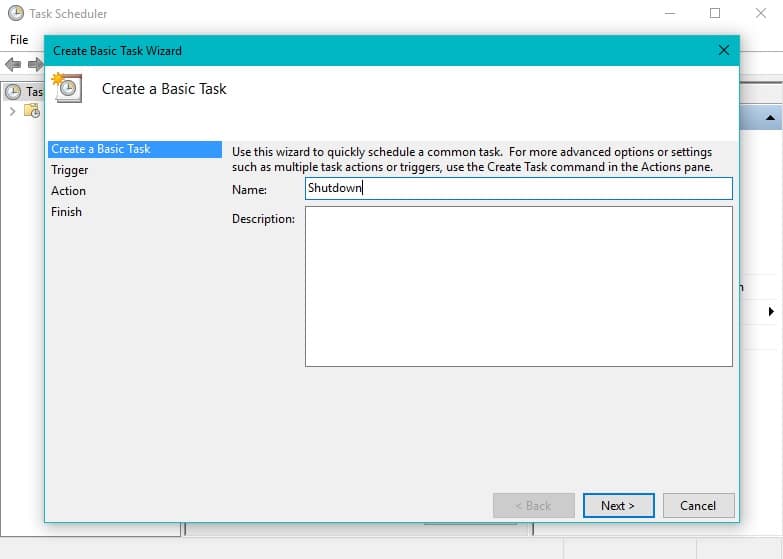
- Open Task Scheduler (by searching for it just like powershell).
- Click Create Basic Task on the right.

- Type Shutdown as the task name and click Next.
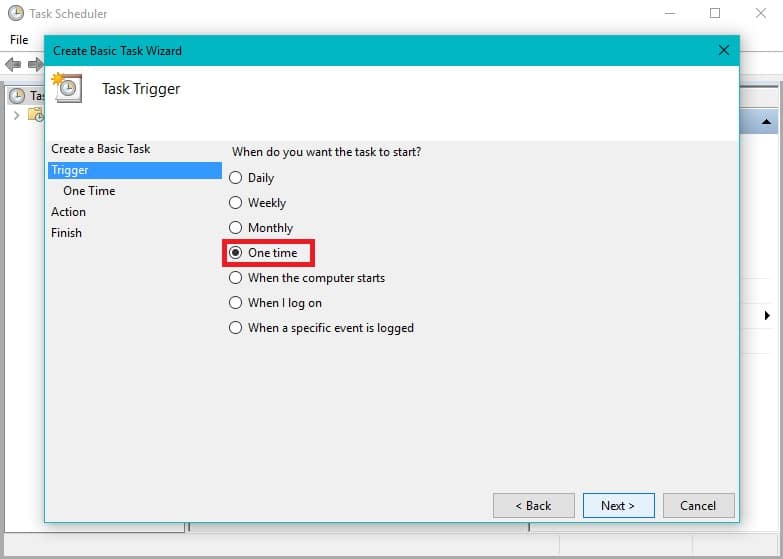
- Choose when to start the task. The available options are – Daily, Weekly, Monthly, One time, When the computer starts,When I log on, and When a specific event is logged. Click Next.
- Set the start time of the task and click Next.

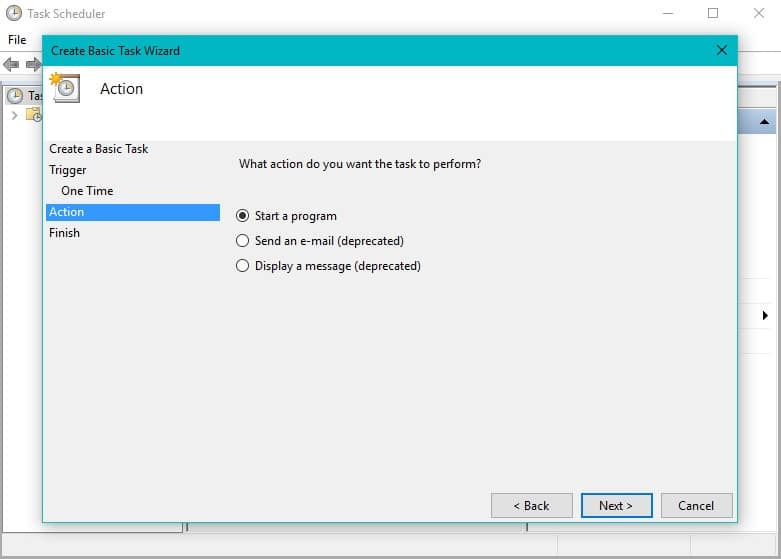
- Select Start a program and click Next.
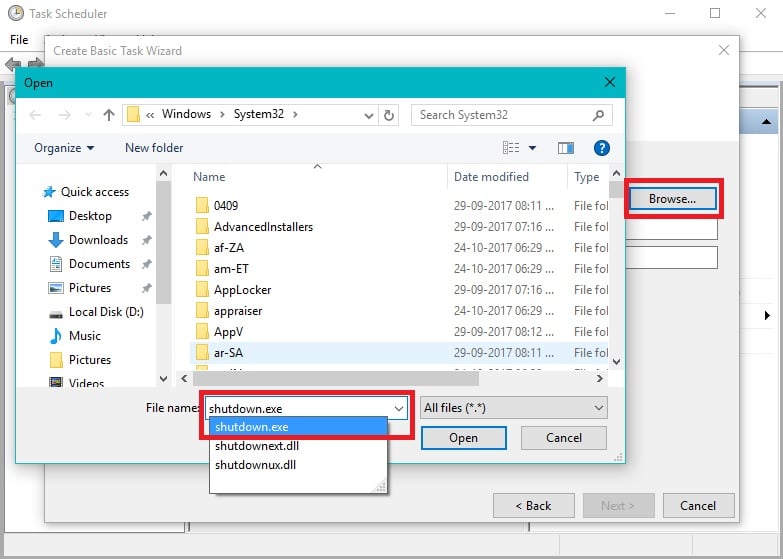
- On the next page, click the Browse button, then type shutdown.exe in the File name field and hit Enter. You can also scroll down and find the shutdown.exe file and double-click to select it.
- In the field labeled Add arguments type –s and click Next.
- Click Finish to complete the task creation and bring the task into effect.
That’s it, you now know how to schedule a shutdown in Windows 10. If you have any questions, reach for the comments below.