Windows PowerShell is the new avatar of the Command Prompt, offering new features and capabilities. With the Windows 10 Creators Update, Microsoft replaced CMD with PowerShell. If you cannot find the option to launch the Command Prompt from the Power User Menu and the Context menu, there are a couple of ways to make things right. In this tutorial, see how we can replace PowerShell with CMD in Windows 10 and 11.
There are more than 18 ways to open the Command Prompt in Windows. However, this article will discuss 3 methods to replace PowerShell with Command Prompt from settings, a Registry Editor tweak, and via the context menu.
1. Restoring CMD in the Power User Menu
This tip to replace PowerShell with the Command Prompt in the Power User Menu works only in Windows 10. Follow the quick steps below to restore the CMD shortcut in the Power User Menu on your PC.
- Click Start (Windows icon) and choose Settings.

- Next, click Personalization. You can access the personalization menu by right-clicking on the desktop screen and selecting the Personalize option.
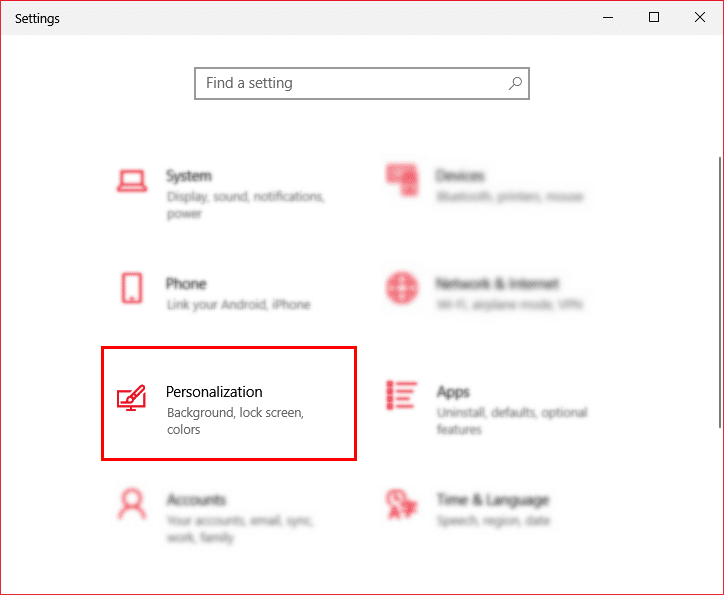
- Now click Taskbar in the left-hand pane in the Settings window.
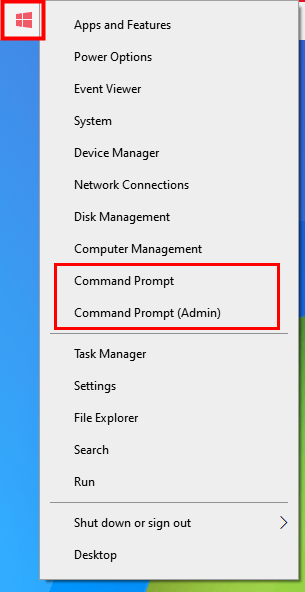
- After that, click the toggle button below ‘Replace Command Prompt with Windows PowerShell in the menu when I right-click the start button or press Windows Logo Key + X‘ on the right panel.

Once you have done that, the 2 options to open Powershell in the Power User Menu will be replaced by Command Prompt and Command Prompt (Admin) respectively as shown below.
2. Replace PowerShell with CMD in File Explorer
If you want to open Command Prompt instead of PowerShell in a folder or File Explorer, there are some Registry Editor tweaks to make this happen. Let’s begin.
- Press the Windows Logo key on your keyboard, look for the Notepad++ app in the Start menu, and open it.

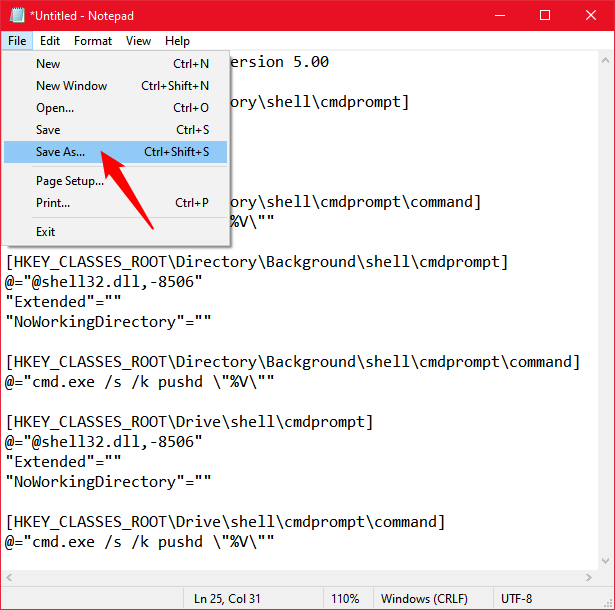
- Now, copy the following code and paste it into the empty Notepad file.
Windows Registry Editor Version 5.00
[HKEY_CLASSES_ROOT\Directory\shell\cmdprompt]
@="@shell32.dll,-8506"
"Extended"=""
"NoWorkingDirectory"=""

[HKEY_CLASSES_ROOT\Directory\shell\cmdprompt\command]
@="cmd.exe /s /k pushd \"%V\""

[HKEY_CLASSES_ROOT\Directory\Background\shell\cmdprompt]
@="@shell32.dll,-8506"
"Extended"=""
"NoWorkingDirectory"=""

[HKEY_CLASSES_ROOT\Directory\Background\shell\cmdprompt\command]
@="cmd.exe /s /k pushd \"%V\""

[HKEY_CLASSES_ROOT\Drive\shell\cmdprompt]
@="@shell32.dll,-8506"
"Extended"=""
"NoWorkingDirectory"=""

[HKEY_CLASSES_ROOT\Drive\shell\cmdprompt\command]
@="cmd.exe /s /k pushd \"%V\""
- Click File and choose the Save As… option.
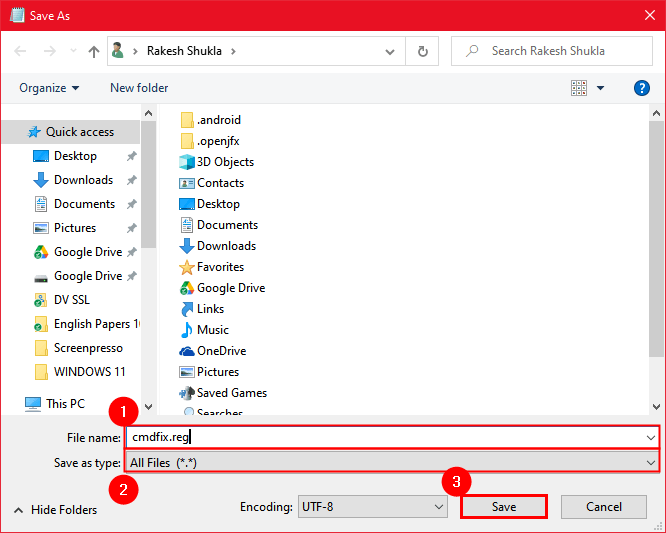
- When you click the Save As… option, you’ll be prompted to assign a file name and type. Click the File name section and type ‘cmdfix.reg‘ as the file name. Then click the drop-down icon in front of the Save as type box and select All Files. Finally, Save the file to your preferred location.
- Once you have saved the file, navigate to cmdfix.reg and double-click it. When prompted, choose Yes.
- Next, you’ll see a pop-up window asking if you want to add the new configuration to the registry. Choose Yes.

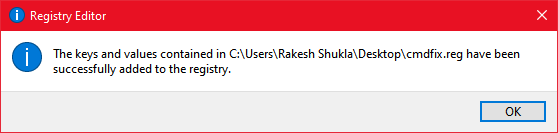
- The newly created cmdfix.reg will be added to the registry.
You have successfully replaced PowerShell with CMD in the Windows 10 or 11 right-click context menu. Do not forget to check out our detailed tutorial on customizing the Windows context menu. You should now be able to open the Command Prompt instead of PowerShell in a folder.
To undo the changes made by this registry editor tweak anytime later, paste the following text into a new Notepad file.
Windows Registry Editor Version 5.00

[-HKEY_CLASSES_ROOT\Directory\shell\cmd2]

[-HKEY_CLASSES_ROOT\Directory\Background\shell\cmd2]

[-HKEY_CLASSES_ROOT\Drive\shell\cmd2]

[-HKEY_CLASSES_ROOT\LibraryFolder\Background\shell\cmd2]
Make sure you name this notepad file as ‘Defaultcmd.reg‘ and select ‘All Files‘ as the file type before saving it. Double-click the file, and select Yes. Don’t forget to restart your computer at this point.
Don’t Miss: 250+ Keyboard Shortcuts for Windows 10 and 11
3. Edit Registry Entries to Replace PowerShell with CMD
While the trick mentioned above should work fine, there’s another way to replace PowerShell with Command Prompt in Windows 10 and 11. This method involves manually editing the registry entries.
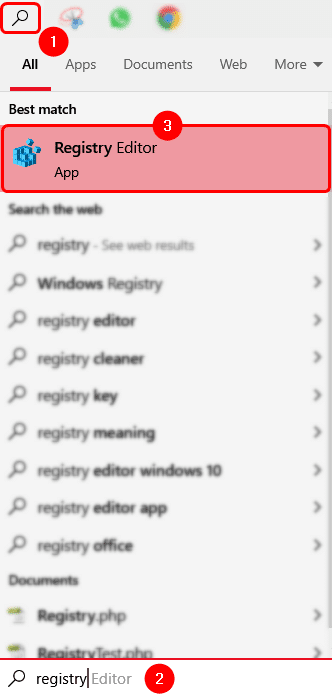
- Click the Search icon, type “registry” in the text box, and click Registry Editor.
- Alternatively, you can open the Run window by pressing Windows Logo Key + R, and type “regedit” to open Registry Editor.

- Now, navigate to HKEY_CLASSES_ROOT\Directory\shell\cmd.
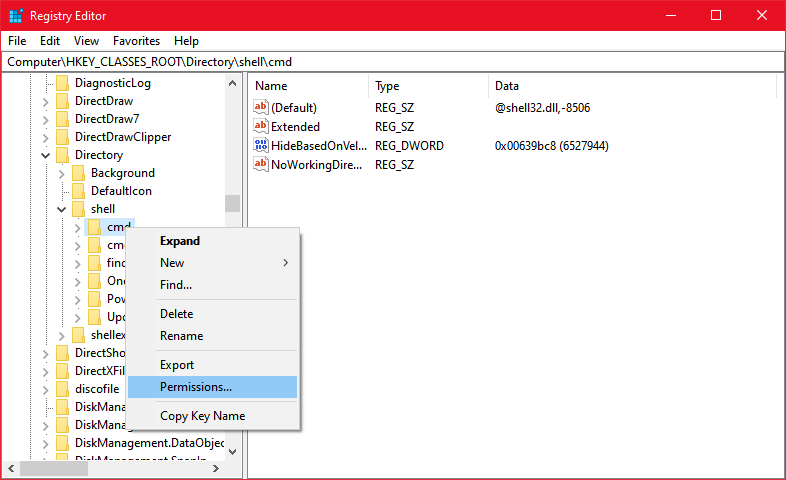
- Right-click the cmd folder and choose Permissions from the context menu.
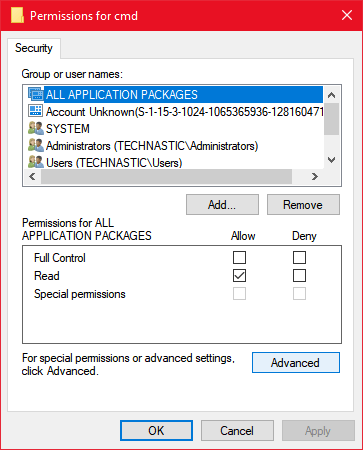
- When a small window entitled Permissions for cmd pops up, click the Advanced button.
- The Advanced Security Settings window will appear. Click the Change option to change the permission settings for the Owner.
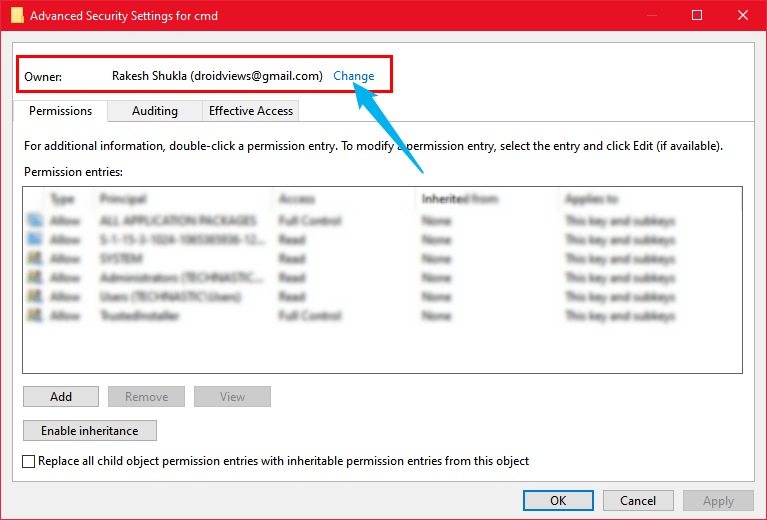
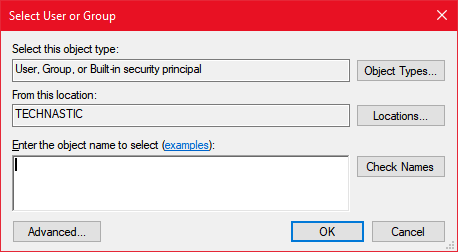
- In the Select User or Group window, click the Advanced button.
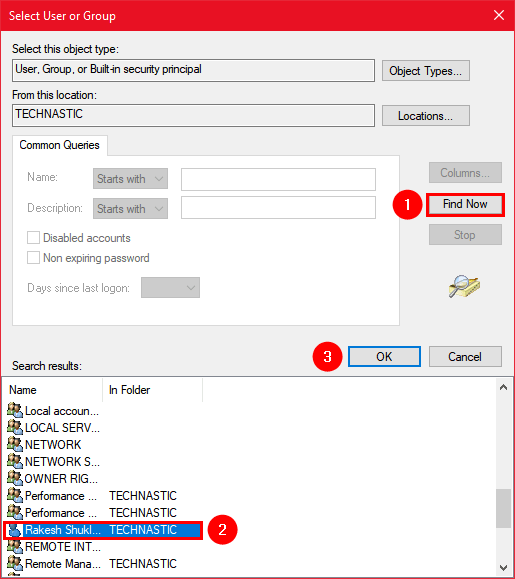
- In the window that pops up next, click the Find Now button. Then select your user group from the search results and click OK.
- When you return to the Advanced Security Settings for cmd window, check the Replace owner on subcontainers and objects option. Then click Apply and OK respectively.
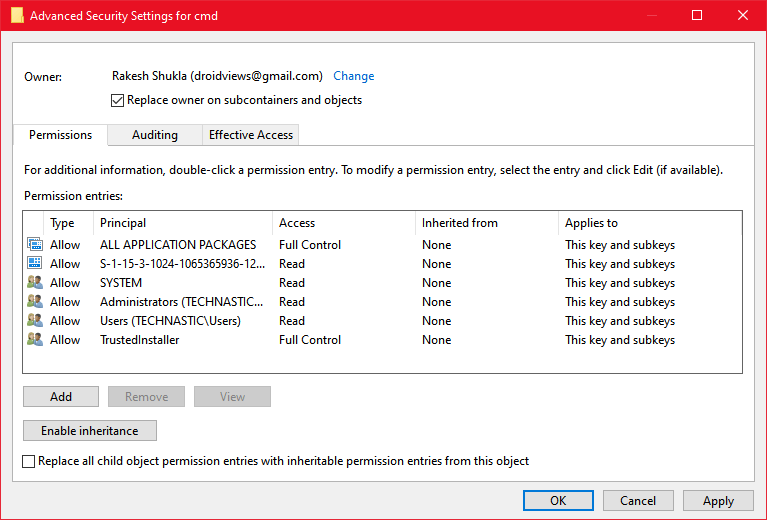
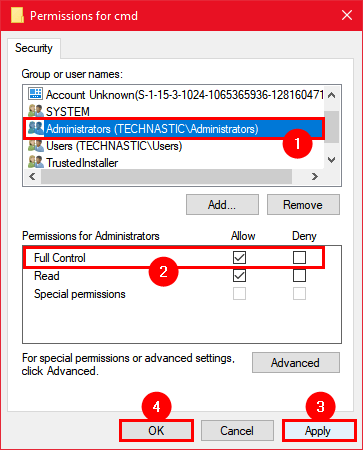
- Finally, you’ll return to the Permissions for cmd window from where you initially started. Now, select Administrators under Group or user names, and check the Allow box next to Full Control under Permissions for Administrators. Click the Apply button, followed by OK.
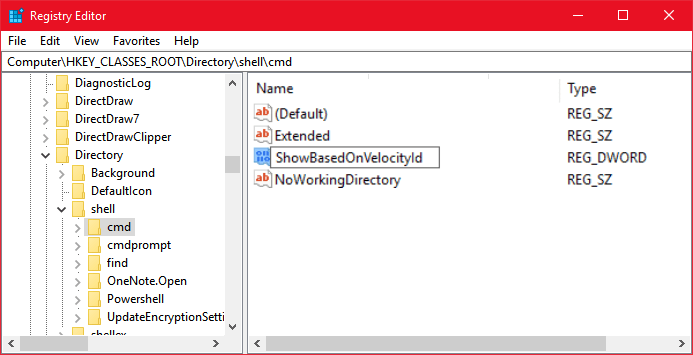
- Navigate to HKEY_CLASSES_ROOT\Directory\shell\cmd path in the Registry Editor, right-click the HideBasedOnVelocityId entry. Choose the Rename option.

- Rename the entry to ShowBasedOnVelocityId.
- As soon as the name of the DWORD entry is changed, PowerShell will be replaced by CMD in the right-click menu in Windows 10 or 11, but you will have to restart your PC first.
Done! Now, open a folder and press the Shift key + right-click. You should be able to open Command Prompt instead of PowerShell in a folder. You’ll have the option to open both PowerShell and Command Prompt in the context menu in the File Explorer.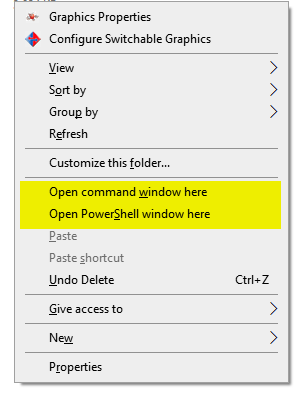
In case you want to remove the Open PowerShell window here option from the File Explorer context menu, do as directed below. The steps are almost the same as you went through a while ago to replace PowerShell with the Command Prompt in the right-click menu.
- Open Registry Editor and navigate to HKEY_CLASSES_ROOT\Directory\shell\PowerShell.
- Right-click on PowerShell and then select Permissions from the context menu.
- Now repeat Steps 5-10 from above.
- After that, right-click on ShowBasedOnVelocityId and rename it to HideBasedOnVelocityId.
- The Open Powershell window here option will be removed from the context menu.
- Reboot your Windows computer to make the changes you made take effect.
Replacing Command Prompt with PowerShell
If you want to replace the Command Prompt with PowerShell in the File Explorer right-click menu, follow the quick steps below.
- Open the Registry Editor and navigate to HKEY_CLASSES_ROOT\Directory\shell\cmd.
- Right-click on ShowBasedOnVelocityld and rename it to HideBasedOnVelocityld.
- Now, navigate to HKEY_CLASSES_ROOT\Directory\shell\PowerShell, right-click on HideBasedOnVelocityld, and rename it to ShowBasedOnVelocityld.
- Finally, restart your PC.
If you get stuck at any step and need help or have something to share about the topic, leave a comment below.
Read Next: How to Enable God Mode on Windows 10 & 11