You must have felt the need to lock your private files behind a password at some point. Locking your private files can be important if you live with nosy roommates or share your PC with family members. These days, doing that on a smartphone is pretty darn easy using file-locking apps. On a PC, locking an app is still somewhat of a dream. Locking files and folders has been possible for more than a decade. That’s usually through third-party software. Today, we’ll show you how to lock a folder on Windows 10 with a password without any third-party software.
Warning: While this is a tried and tested method, we still can’t take any responsibility for lost files or folders. It’d be best to test this out first on a folder that isn’t important. Also, it is possible that someone who understands the process can reverse engineer the process. So this isn’t meant to keep tech-savvy folks out, just nosy family members or friends you don’t trust.
Useful Tip: How to Shutdown Windows 10 without Installing Updates
Locking a Folder on Windows 10
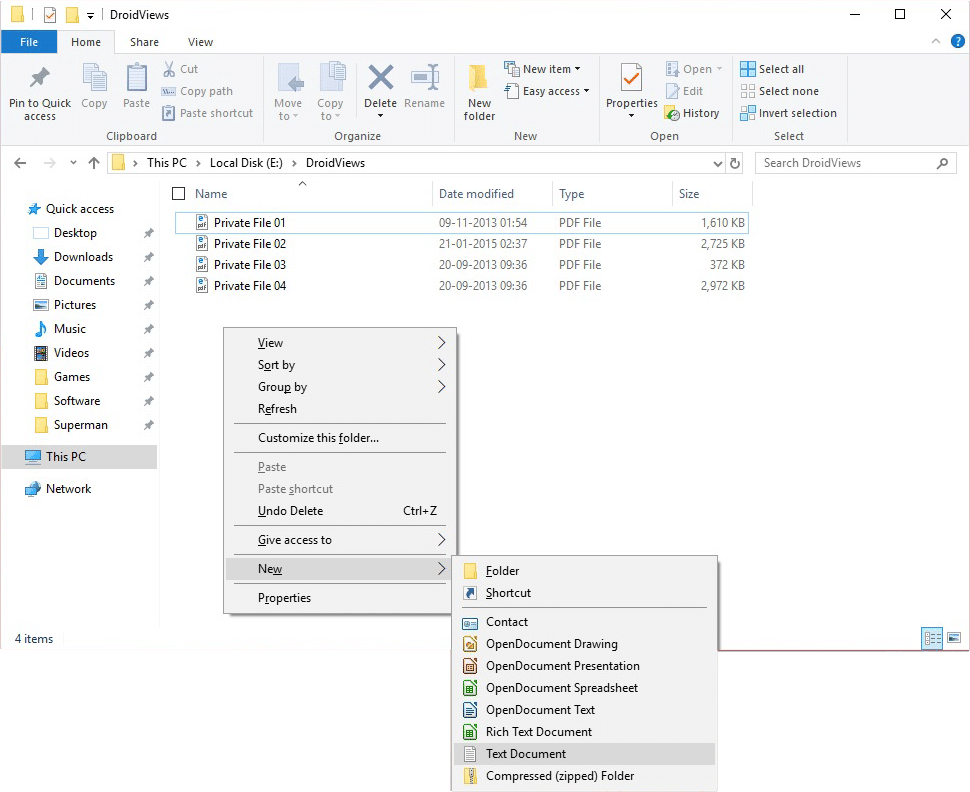
- Right-click inside a drive or folder where you would like to place your locked folder and select New > Text Document from the context menu. You can even do this on the desktop if you want.
- Name the file anything you want or just hit Enter. The filename doesn’t matter.
- Once created, double-click on the text file to open it. Alternatively, open Notepad from the Start menu and skip directly to step 4. This way, you won’t have to delete the newly created text file later.
- Copy and paste the text below into your newly created text document.
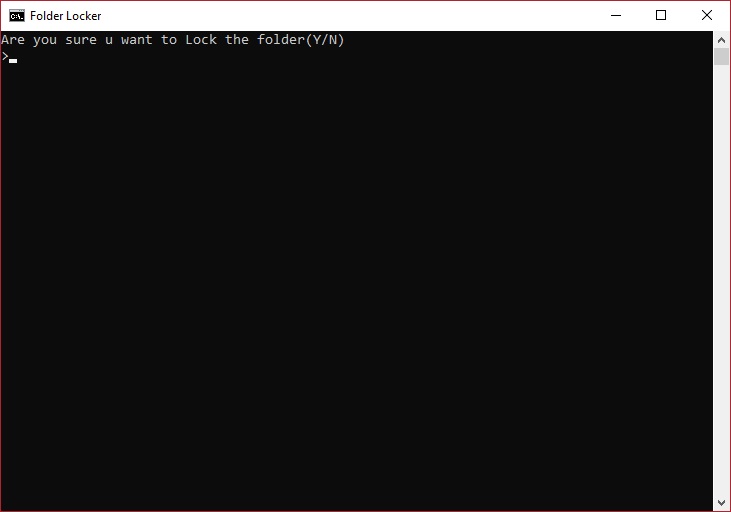
@ECHO OFFtitle Folder Lockerif EXIST "Control Panel.{21EC2020-3AEA-1069-A2DD-08002B30309D}" goto UNLOCKif NOT EXIST Locker goto MDLOCKER:CONFIRMecho Are you sure u want to Lock the folder(Y/N)set/p "cho=>"if %cho%==Y goto LOCKif %cho%==y goto LOCKif %cho%==n goto ENDif %cho%==N goto END

echo Invalid choice.

goto CONFIRM

:LOCK

ren Locker "Control Panel.{21EC2020-3AEA-1069-A2DD-08002B30309D}"

attrib +h +s "Control Panel.{21EC2020-3AEA-1069-A2DD-08002B30309D}"

echo Folder locked

goto End

:UNLOCK

echo Enter password to Unlock folder

set/p "pass=>"

if NOT %pass%==Your-Password-Here goto FAIL

attrib -h -s "Control Panel.{21EC2020-3AEA-1069-A2DD-08002B30309D}"

ren "Control Panel.{21EC2020-3AEA-1069-A2DD-08002B30309D}" Locker

echo Folder Unlocked successfully

goto End

:FAIL

echo Invalid password

goto end

:MDLOCKER

md Locker

echo Locker created successfully

goto End
:End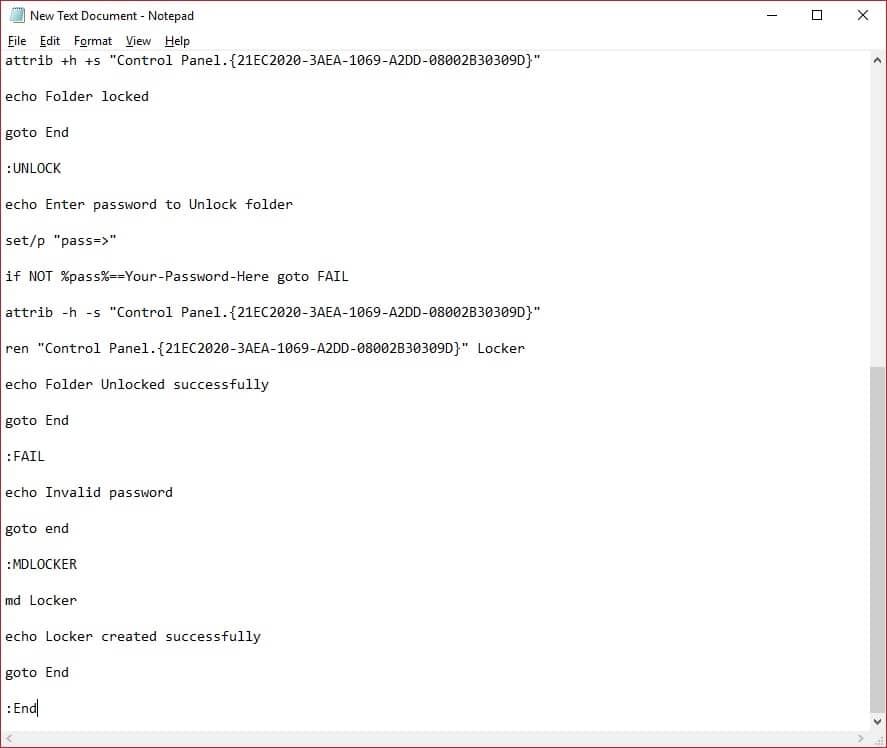
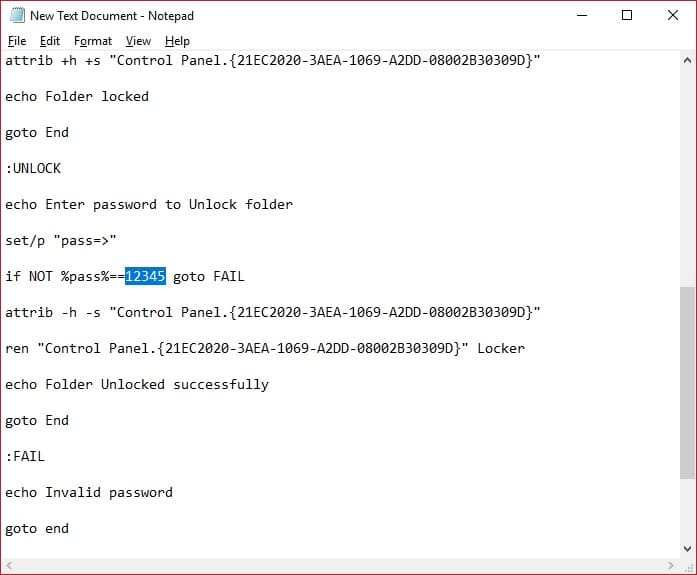
- In the text file, find the text Your-Password-Here. Replace Your-Password-Here with the password you want to set for the locked folder. For instance, if you want the password to be 12345, replace Your-Password-Here with 12345 as shown below.

- Click File > Save As… and then in the pop-up window select All files from the drop-down menu next to the label Save as type.
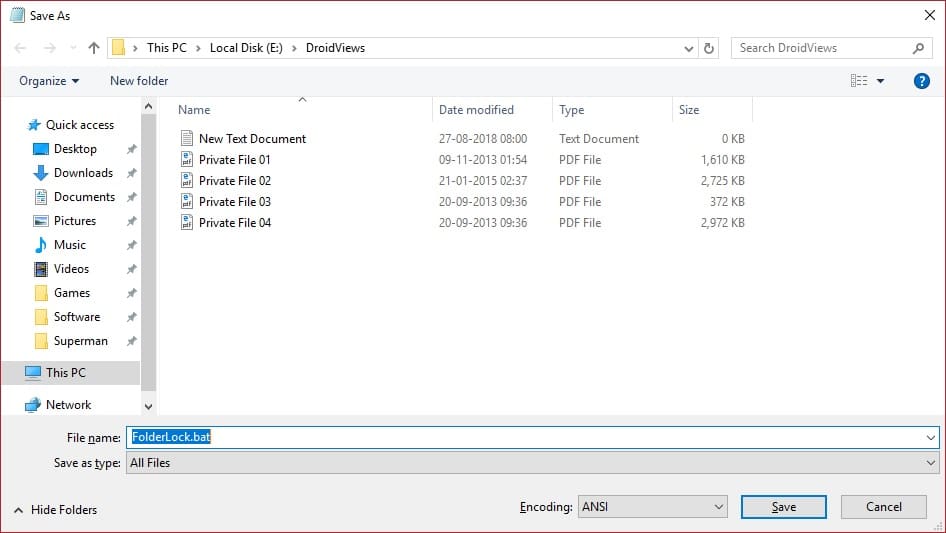
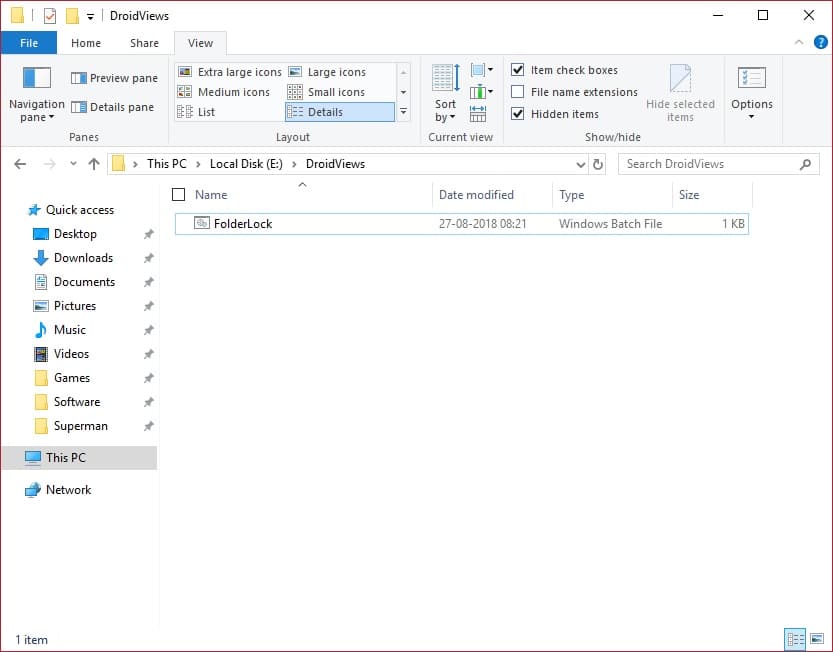
- Now type FolderLock.bat in the File name field and click Save. You can now delete the text file you created earlier. Also, you can name the file FolderLock.bat or anything else you want with the extension .bat. For the sake of this article, we’re going with FolderLock.bat.
- Now, double-click the FolderLock.bat file, and a new folder named Locker will be created.

- Drag and drop all the files you want to hide and lock into the folder. When you’re done, double-click the FolderLock.bat file again, and this time you’ll be asked if you want to lock the folder. Type ‘Y‘ in the command prompt window and hit Enter.
- You’ll notice the Locker folder is no longer visible. It can’t be seen even if you turn on the option to show hidden files. Even if you try accessing the folder via the address bar, Windows will return the message that it could not locate the folder.
- The only way to access the folder again is to double-click the FolderLock.bat file. This time, it’ll ask you to enter the password you had set earlier. Type in the password and hit Enter, and you’ll notice the folder appear.
When done with your folder, double-click the FolderLock.bat file again and re-lock it. That’s it! You have successfully locked a folder on your Windows 10 and now have a hidden safe inside your PC. To save more space, you can also compress the folders on your Windows 10 PC.
Read Next: 5 Reasons Why Linux is Better Than Windows