Odin is a portable utility for Windows PCs to flash firmware files (BL, AP, CP, and CSC) on Samsung Galaxy phones and tablets. Using this firmware flash tool is pretty straightforward. You need to download the latest Samsung Odin, firmware binaries, put your device into Download mode, add the firmware files to Odin, and install the firmware. You might need Odin to downgrade firmware, change CSC, fix bootloop, update software, and flash a custom ROM or recovery.
If these simple steps are not enough for you and you still need a detailed explanation of every step so that you can flash the firmware on your Samsung Galaxy phone or Galaxy Tab, we have you covered.
Download Odin and Firmware
If you use a Samsung smartphone or tablet, you’re probably aware that Odin is the best way to install or update its firmware.
- Download the latest Samsung Odin and extract the zip.
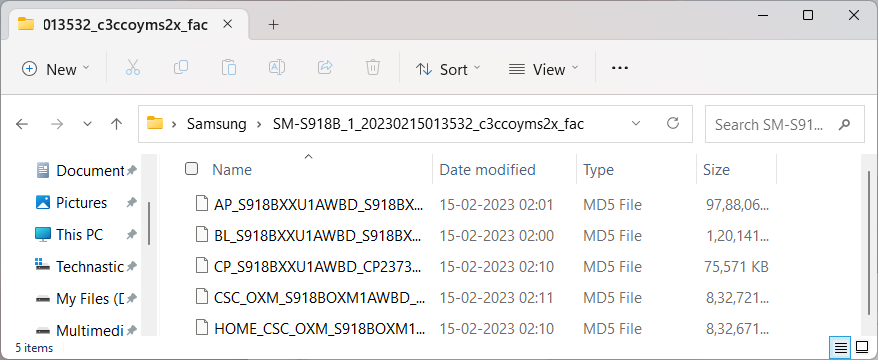
- Download Samsung firmware and extract the downloaded zip file to get the 5 firmware binaries: AP, BL, CP, and CSC.
- Back up your device data before flashing the stock firmware onto your Samsung Galaxy phone or Tab.
- Charge your device to ensure it has at least 50% or above battery juice.
- You’ll also need a compatible USB cable.
Since the Odin flash tool is compatible only with Windows, you cannot flash your Samsung device without a computer.
Steps to Flash Samsung Firmware with Odin
Having made the preparations mentioned above, you are all set to flash the firmware binaries on your Samsung Galaxy smartphone or Galaxy Tab.
- Open the Odin3 v3.14.4 folder and run the Odin3_v3.14.4.exe as an administrator. Click the OK button on the warning pop-up to launch Odin.
- Now, boot your Samsung device into Download Mode.
- Turn off your device.
- Connect it to your computer using a USB cable.
- As soon as the charging animation stops, press and hold the Volume UP + Volume Down keys simultaneously for 5-7 seconds.
- You’ll see a Warning screen.
- Press the Volume Up key to enter the Download mode.
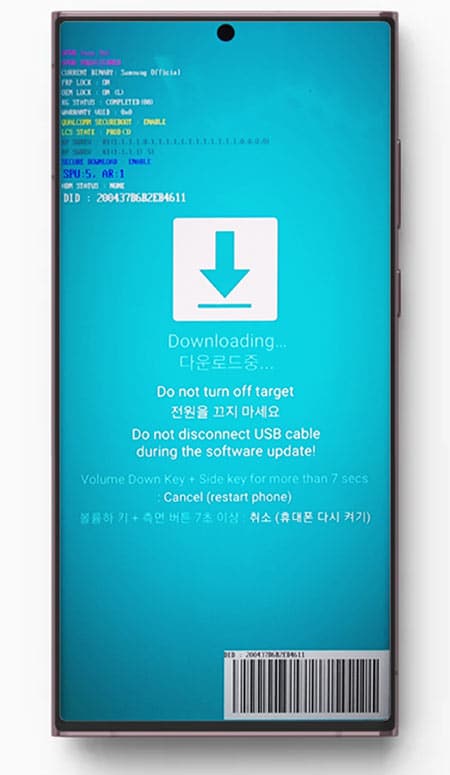
- Do not disconnect the USB cable.
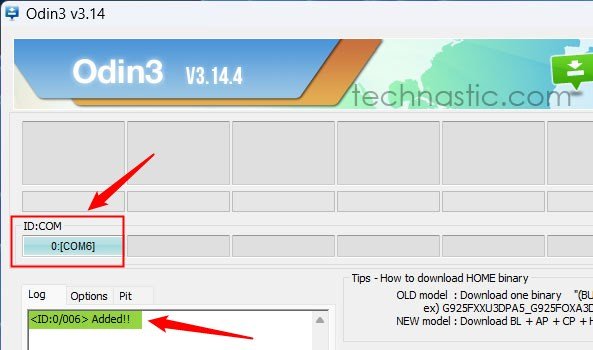
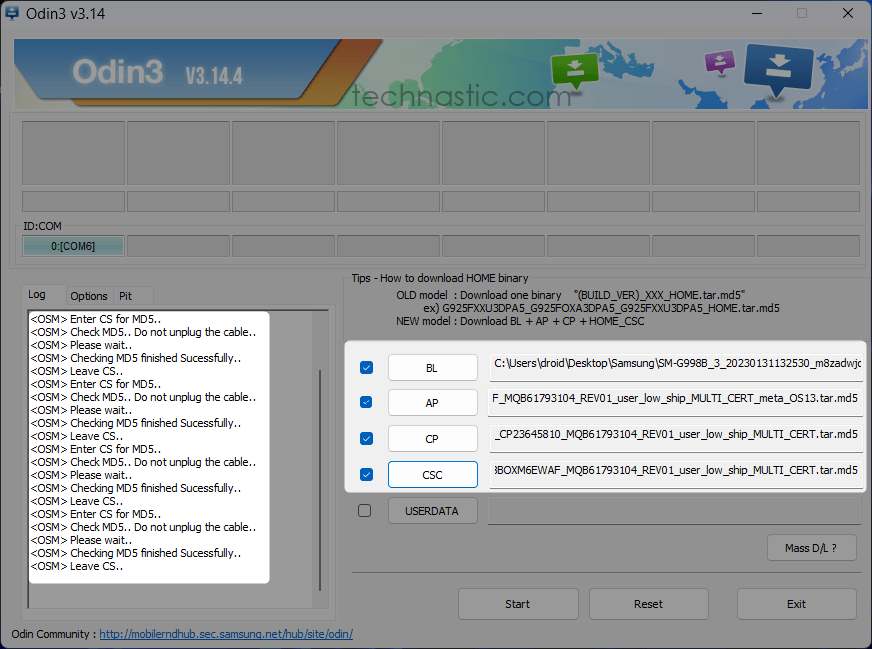
- Once Odin recognizes your Samsung phone, you’ll see ‘Added!!‘ in the Odin log.
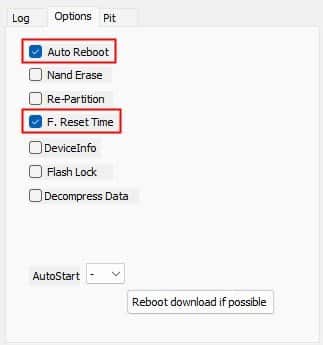
- Click Options next to the Log tab in Odin and ensure that the Auto Reboot and F. Reset Time options are selected.
- Now, add the firmware binaries to the Odin flash tool.
- Click the BL button, navigate to the folder where you extracted the firmware files with .tar.md5 extension, and add the binary that starts with ‘BL_’ in its name.
- Next, click AP and add the firmware file with ‘AP_‘ in its name.
- Then click the CP button and add the CP binary to it.
- Finally, click the CSC button in Odin and select the CSC or HOME_CSC file. If you want a fresh installation, go with the CSC file. However, if you don’t want Odin to wipe your phone’s data, select the Home_CSC file.
- Odin will check the MD5 checksum for each firmware file. When all 4 firmware binaries have been added, the Odin window will look like this.
- Finally, ensure your Odin screen looks as shown below, and click the Start button to initiate firmware flashing.
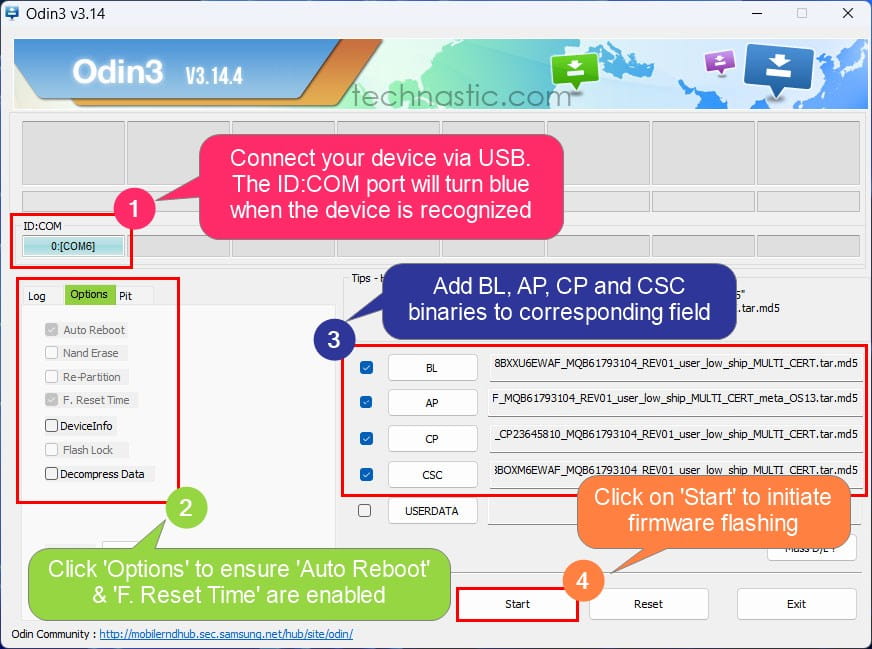
- Odin will start installing the firmware files, and the process will take around 3-8 minutes, so wait patiently.
- When the firmware flashing is finished, you’ll see PASS! in the Status Box in Odin. In the Log section, the last entry will be ‘All threads completed. (succeed 1/failed 0).
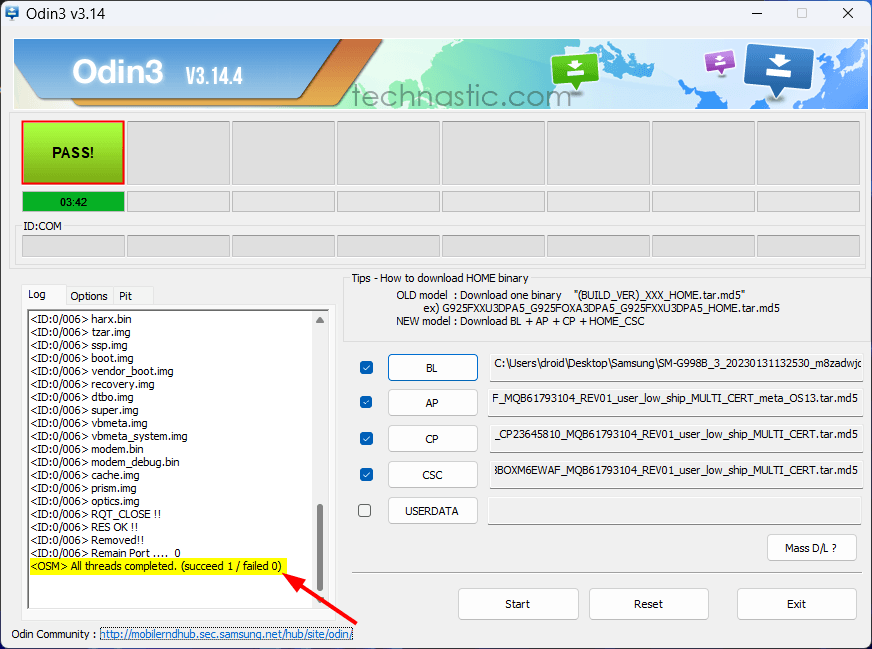
- You can now disconnect your device. Your phone or tablet will reboot automatically. The first boot will take longer than it usually takes to restart your device, so do not panic.
If you encounter issues while flashing the firmware, read the solutions to fix the Complete(write) operation failed error in Odin.
How to Fix Boot Loop after Odin Flash
In most cases, Odin flashes go successfully, and Samsung devices boot up normally. However, sometimes firmware flashing on Samsung devices ends up in a boot loop. Usually, it happens when users choose the Home_CSC file so that the device data is not wiped. If you try to install patched firmware using the normal version of the Odin tool, your device might not boot up properly. Sometimes, a Samsung phone or tablet might get stuck on the Samsung logo screen after an Odin flash.
Whatever the reason, you can fix the boot loop by trying the following solutions in the sequence they are mentioned.
- Wipe the cache partition from recovery mode
- Perform a data factory reset via Recovery mode
- Reinstall the stock firmware using Odin
Wipe Cache Partition from Recovery Mode
- Boot your Samsung device into Recovery mode. Since your device is stuck in a boot loop, turn it off by holding the power button for 5-7 seconds.
- Then connect your phone or tablet to a computer and press and hold the Volume Up + Power keys simultaneously.
- When you see the Samsung logo, release both keys.
- Once you enter the Recovery mode, use the volume keys to navigate and the power button to select an option.
- Use the Volume Down key to highlight the Wipe cache partition option and press the Power button.
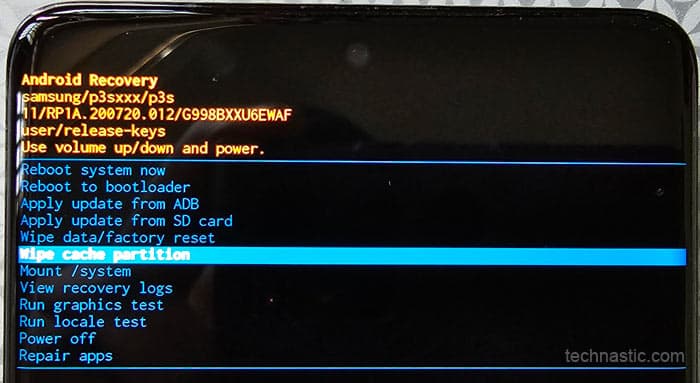
- On the next screen, confirm your choice by selecting Yes.
- Now, select the Reboot System Now option.
Your Samsung device should boot normally now.
Perform a Data Factory Reset via Recovery Mode
If wiping the cache partition did not fix the boot loop issue on your phone, try performing a hard reset via the Recovery mode. This method will wipe all data stored on your device.
- Boot your Samsung phone into Recovery mode using the steps mentioned under the previous method.
- This time, go to the Wipe data/factory reset option and press the Power button.
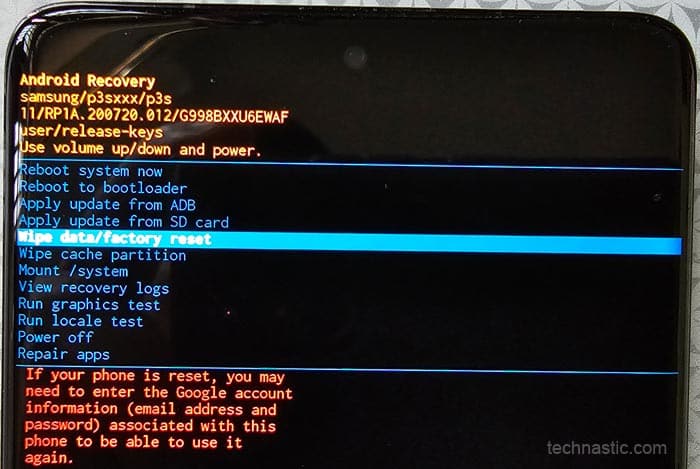
- Select Yes on the next screen to initiate the reset.
- Finally, restart your phone by selecting the Reboot System Now option.
This should fix the boot loop issue on your Samsung phone.
Reinstall the Stock Firmware Using Odin
If you are still stuck with a Samsung phone with a black screen and Samsung logo, installing the stock firmware with Odin is your last resort. Just follow the Odin firmware flashing steps described at the beginning of this tutorial. However, you must use the CSC (not the Home_CSC) file with other firmware binaries this time.