Windows is not a very customizable operating system. It lets you install themes, but they are a bunch of wallpapers. You can change the size of your taskbar icons and even make the Windows taskbar fully transparent. But if you’re expecting something major you might be disappointed. Microsoft seemed to be moving towards a more personalized desktop experience with widgets on Windows Vista. Not everything went according to the plan though. Widgets were eventually killed off with the arrival of Windows 8 and its live tiles. But Windows is the most popular desktop OS, so there are always some third-party apps you can use to customize your Windows experience. One such app is Rainmeter, which you may not have heard of.
Rainmeter is a powerful desktop customization tool that lets you create a dynamic information-rich heads-up display. With Rainmeter you can view your RSS feed, monitor system usage, see the weather, and much more. If you’re eager to learn or have the ability to Google, you can even create an Iron Man-like HUD. for your Windows desktop. It is what desktop widgets could have been had Microsoft not abandoned them. Rainmeter has a ton of customization options that let you personalize every pixel of your desktop to your liking. It’s powerful, beautiful, and fantastic which might lead you to the question, “Why haven’t I heard of it?”
The answer would be that unfortunately, it is not very user-friendly. If you want your PC to switch between dark and light themes at a designated time, you can do that with Windows 10 auto night mode.
Install Rainmeter
Installing Rainmeter is as simple as installing any program on a Windows PC. Download the Rainmeter setup file from the download link above and double-click on it once downloaded to launch the installer. You can choose to do a standard install or a portable install, in which case everything will be installed in a single folder. If you’re not planning on taking your entire Rainmeter set up with you on a flash drive, it is best to do a standard install. Once installed, check the box in the installer window next to Run Rainmeter, then click Finish.
Rainmeter Terminology
Now that you have it installed, you’ll see some stuff on your desktop, similar to the screenshot above. Before you start, it is best to learn the Rainmeter terminology. Luckily there is not a lot of it but it can still get a bit confusing. So here’s a quick summary of what these terms are.
- Skins: Usually, one would imagine skins refer to how a Rainmeter widget looks like. but that’s not the case here. The term “skin” refers to what the widget is rather than what it looks like. They’re small apps that live on your desktop but underneath your Windows. So skins are basically what we call “Widgets”.
- Skin Suites: Skin suites are a bunch of similar-looking widgets by a creator. For example, the widgets/skins you see on your desktop when launching Rainmeter for the first time constitute an “illustro” skin suite. It is the default skin suit that ships with Rainmeter. You can mix skins from different suites, but it wouldn’t necessarily look very cohesive, so in general, you want to stick to a specific suite.
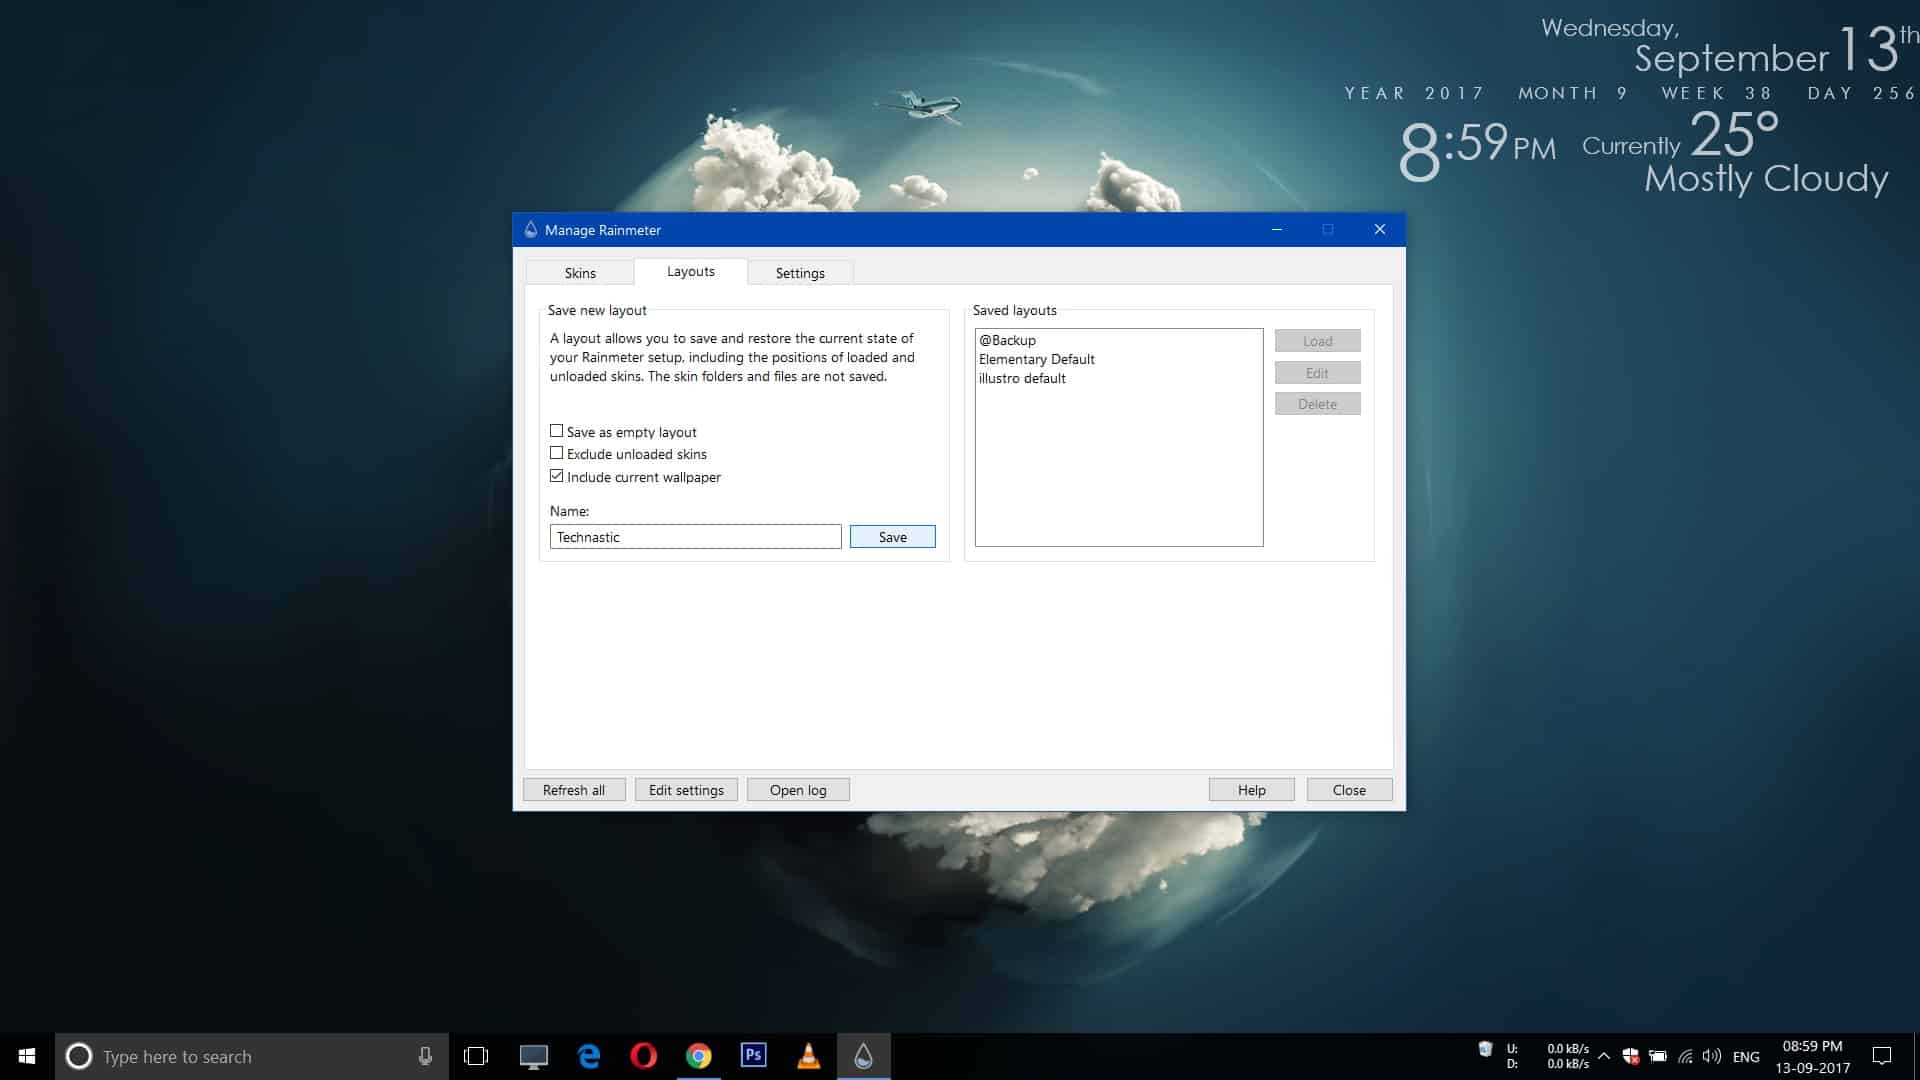
- Layouts: A layout defines the position of the skins on your desktop. Generally, skin suites already have a pre-defined layout that you can choose to load while installing. You can also save your current layout and reload it later.
Basic functions
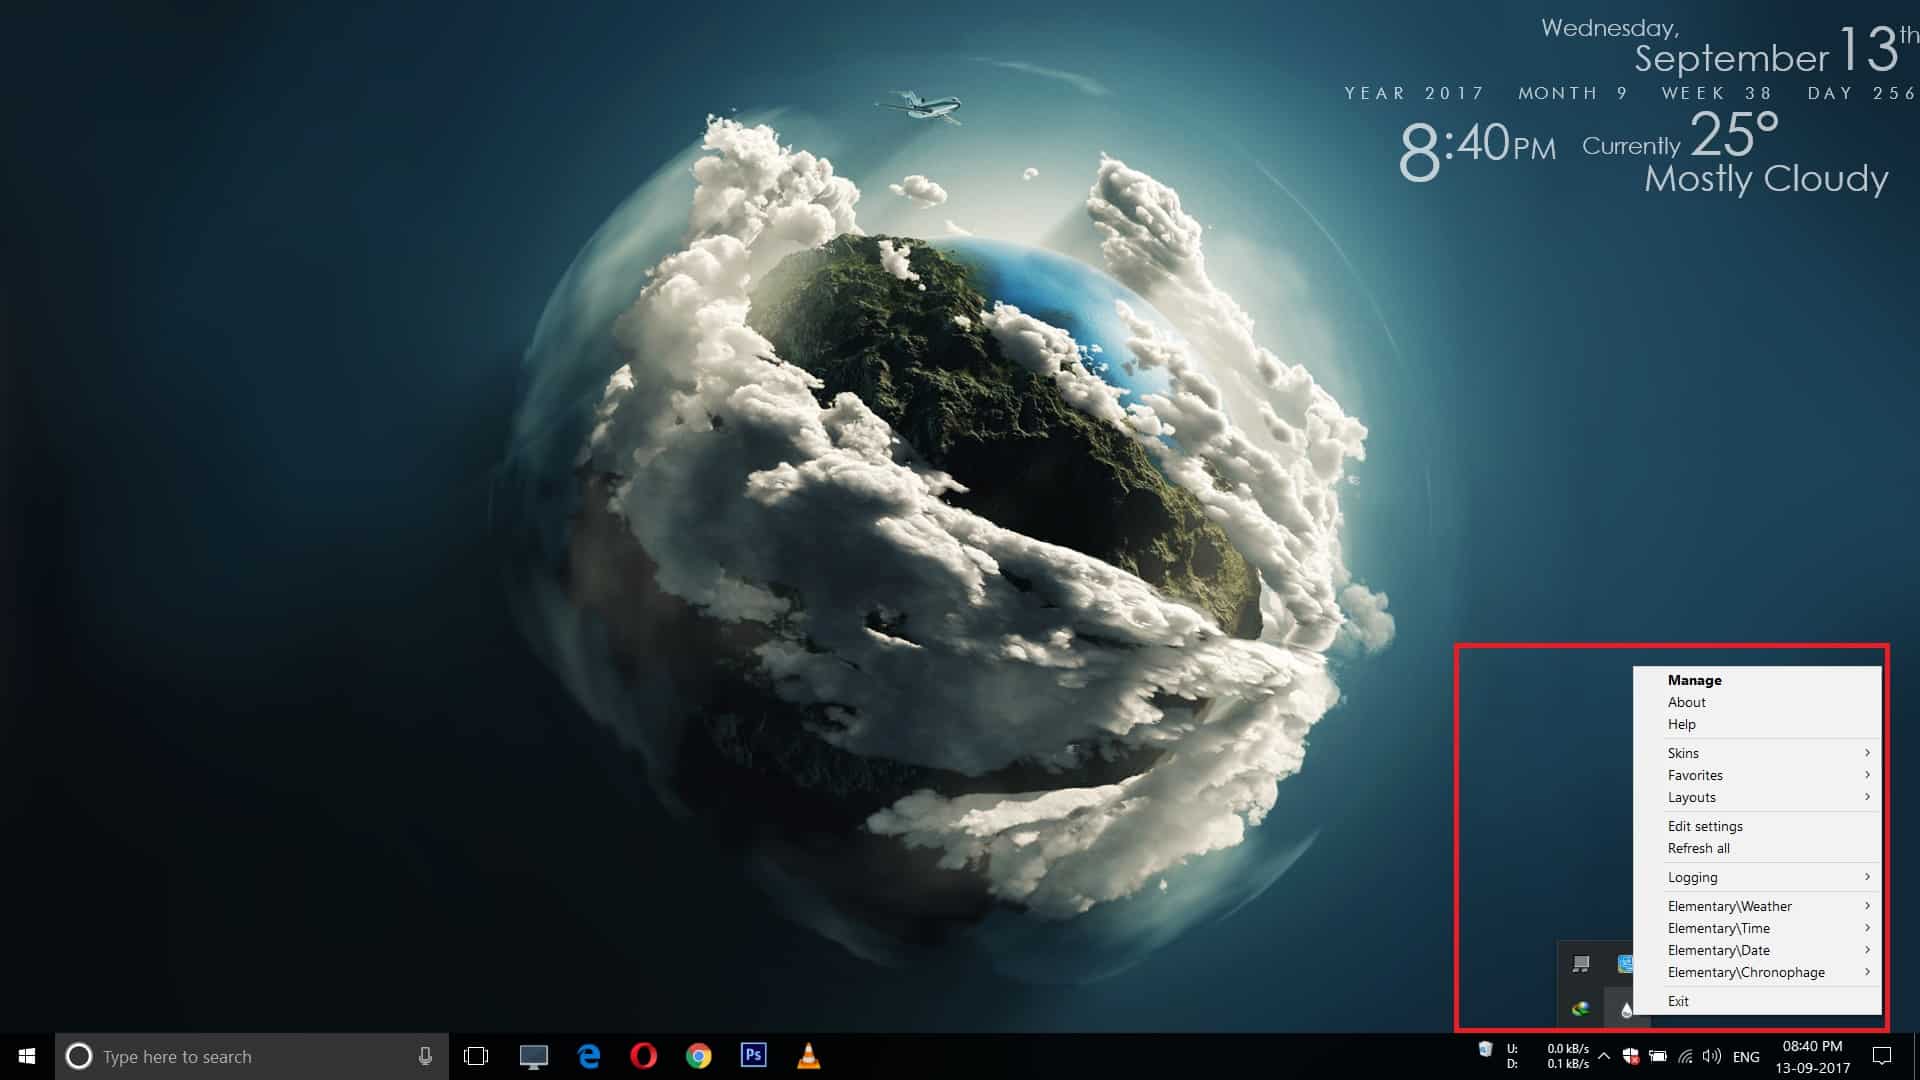
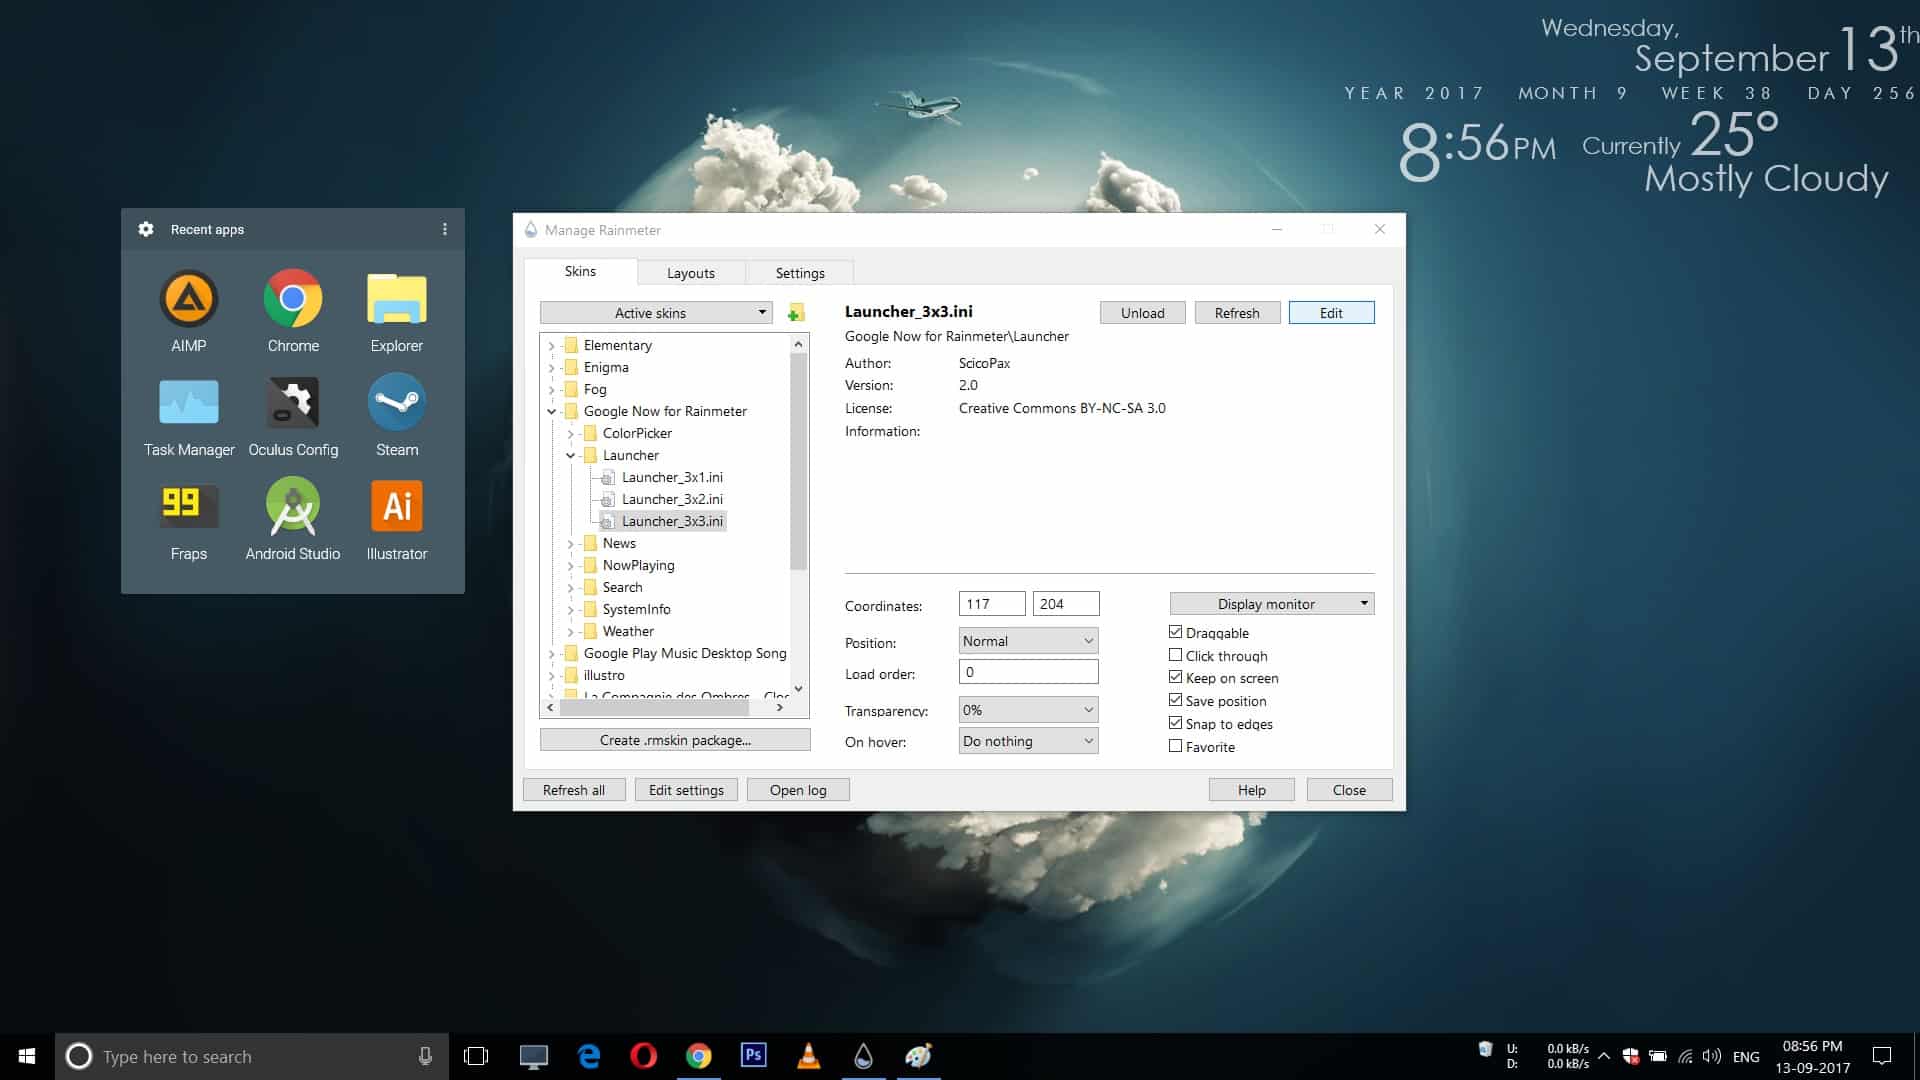
Once familiar with the terms, using Rainmeter is not very difficult. At least the basic things like loading or unloading skins (or skin suites) are not that hard. When Rainmeter is running, you will see a raindrop icon on your system tray that you can click anytime to manage your skins. You can also right-click on a skin to access several options, including the option to unload the skin.

In the Rainmeter manager window, you can see all your installed skin suites in a column on the left. Here you can select individual skins from different suites and click the Load/Unload button to load or unload them.
Skins can be dragged around the desktop so you can easily place them wherever you see fit. Once you are satisfied with a layout, save it by going to the Layout tab. Here, you can give a name to your layout, before you click the Save button.
Install Rainmeter Skins
You can check out the Rainmeter forums, the DeviantART group, or the subreddit to find a huge community of fans who make and share their skins. Here is a hand-picked list of the 5 best Rainmeter skins for Windows 10. Downloaded skins usually come with a .rmskin file which you can double-click. This will bring up a pop-up window where you can click Install to install the skin.
If a skin does not contain a .rmskin file, it will usually be in a .zip or .rar format. To install such skins, follow these steps.
- Download the .zip or .rar file containing the skins you want.
- Extract the contents of the folder to \Documents\Rainmeter\Skins on your computer.
- Once extracted, right-click the Rainmeter icon in your system tray.
- Click Refresh All.
The skin should now be available in the Rainmeter manager window. That was all the basic stuff you needed to know about Rainmeter. You can now spend hours customizing your Windows desktop like you never thought possible.
Read Next: How to Install Amazon Alexa on Windows 10