In this tutorial, we will be listing the steps to access the WindowsApps folder in Windows 10. The WindowsApps folder contains files and data related to the apps installed from the Windows Store, cache files, and data of progressive Windows Apps, Universal Windows Platform, Electron, etc. Earlier, these files were present under Program Files. However, now they have all been moved inside the subfolder labeled WindowsApps.
To modify or access any system-level files, administrative privilege is required. This is something that most of you might very well be aware of. However, the rules are slightly different if you wish to access this folder. Even if you are the admin of your PC, you can’t directly access the WindowsApp folder in Windows 10.
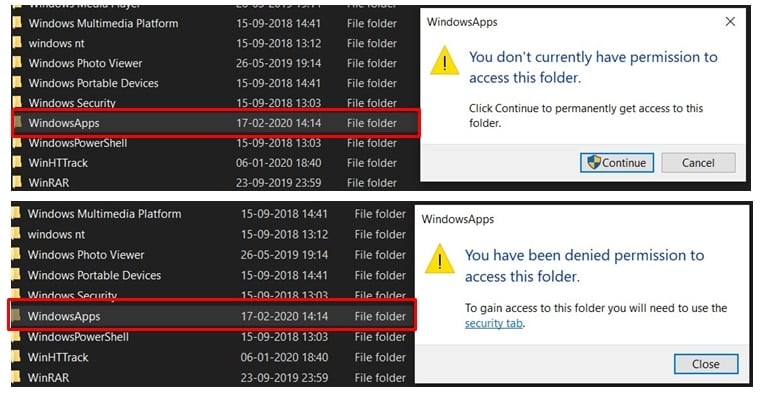
If you are logged in as an administrator, you may try it right away. First, make sure the Hidden Files option is enabled (click on View in the top menu bar, and you’ll see that option). Now, head over to C:\Program Files and double-click the WindowsApp folder. You will get a pop-up: You currently don’t have permission to access this folder. It will prompt you to click Continue to access this folder. Doing so will throw another pop-up: You have been denied access to this folder.
So, to access this folder, you will have to change the permission and ownership from System to Admin. That is, you are taking over the administrative rights from the System. Now that the background is clear, let us look at the steps to access the WindowsApp Folder in Windows 10.
Accessing the WindowsApps Folder
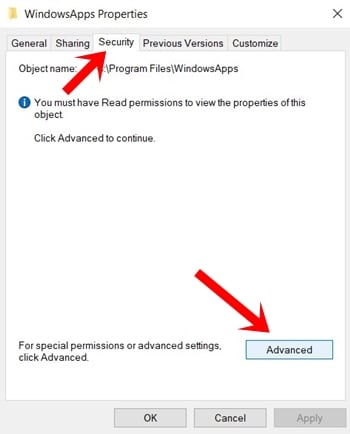
- Log in as an administrator, head over to C:\Program Files, right-click on the WindowsApp folder, and select Properties.
- Next, select the Security tab and click on Advanced.
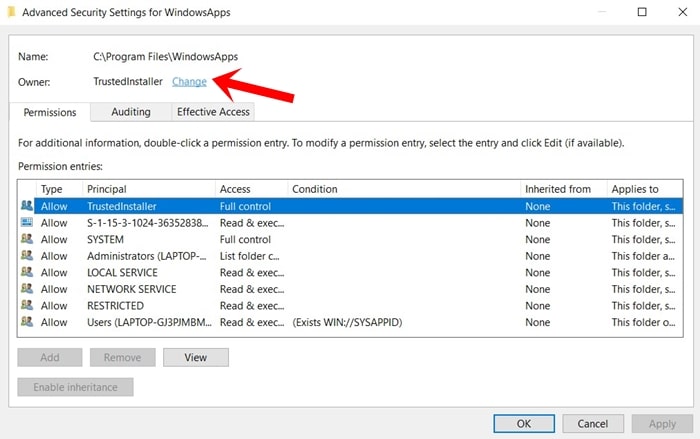
- Under the Permission entries section, select TrustedInstaller and click on Change next to Owner.
- Type in your account username in the object name box. If you aren’t sure of the username, head over to C:\Users and you’ll see a folder named after your account username. That name needs to be entered here. Make sure to enter the correct username. Otherwise, you won’t be able to access the WindowsApp folder on your Windows 10 PC.
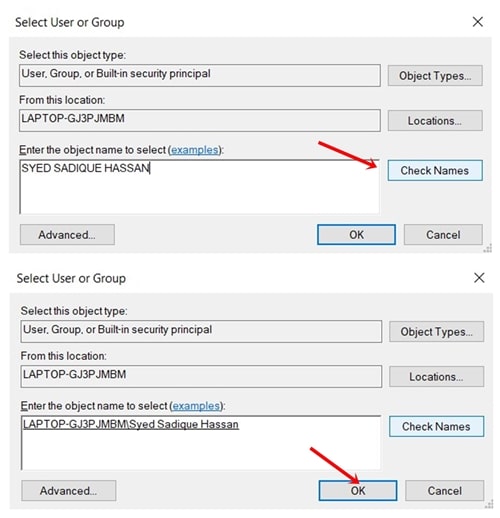
- Next, click on Check Names. The object name field should now be updated with your computer’s location. Once done, click OK.
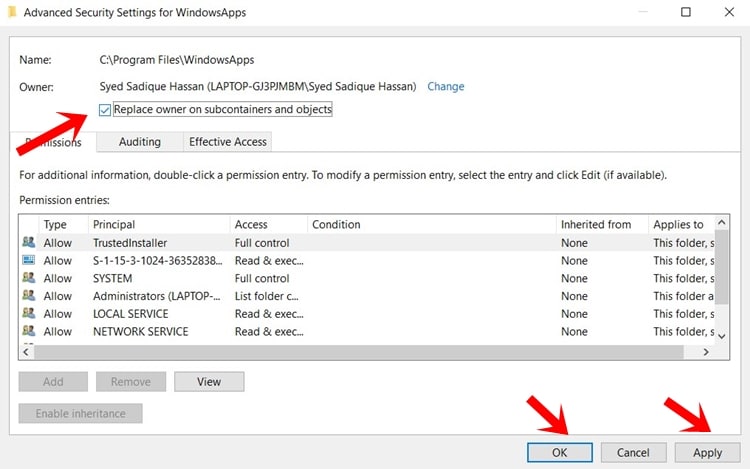
- Check the box next to Replace owner on subcontainers and objects. Finally, click Apply > OK.
- That’s it. You can now easily access the WindowsApp folder in Windows 10.
Finally, Windows will now change the ownership of every file. Moreover, this trick isn’t just limited to this folder. These rules apply to any folder owned by your System and whose rights you wish to transfer to yourself (admin). However, if you face any issues while accessing the folder, drop your queries in the comments section below.
Read next: Useful Windows Taskbar Tips and Tricks