The year was 1999 and the movie was Matrix. It was then that the divided human society finally united to agree that the slow-motion effect is pretty cool. It took a while but finally, the slow-motion effect wasn’t something limited to professional movie makers. But it wasn’t until our smartphone cameras gained the ability to record high fps videos that slow motion reached everyone’s hands. Most flagship smartphones today, whatever OS they run, are capable of capturing slow-motion videos. Some even go as far as capturing video at 960 fps for that ultra-slow-motion effect. But that usually means you have to know beforehand that there is something you want to capture in slow motion. What if you already have some footage and looking at it you think, “Hey this would look cool in slo-mo”? Microsoft’s Photos app can help you create or make slow-motion videos or add slow-motion effects to videos on Windows 10.
It ships pre-installed with your copy of Windows 10 no matter which version of Windows you use. That means you won’t have to install any third-party apps or heavy pieces of software like Adobe Premier. The slow-motion in Photos is not as great as a full-featured video editing app, but it’ll do for quick and dirty edits. You will need to update the Photos app to the latest version if you haven’t. This version of the app is only available for users who have the Windows 10 Fall Creator’s update installed. You can go to Settings > System > About and check the version number of your Windows 10. If it’s at least 1709, you have the required version of Windows 10 and can update to the latest version of the Photos app if you haven’t already.

Add slow-motion effect to video in Windows 10
- Launch the Photos app, assuming you have the latest version of the app and Windows 10, and find the video you want to add the effect to and click on it. You might not see videos by default in the app if you haven’t manually added your video folder to the app in Settings. In that case, you can either first add the folder or use the Windows File Explorer to navigate to the video. Right-click on it and select Open with > Photos.
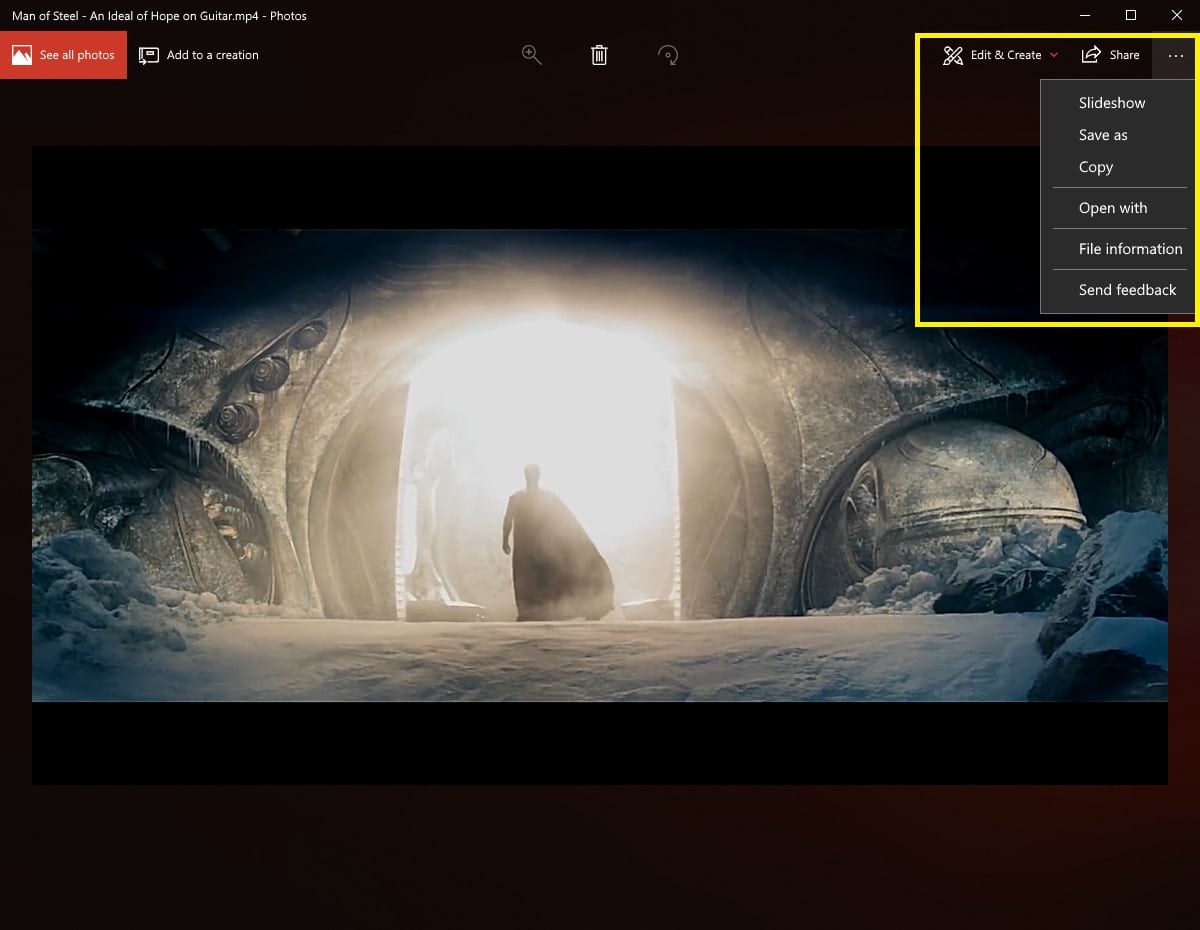
- Regardless of how you open the video in the Photos app, your video will begin to play and you will have three buttons on the top-right: Edit & Create, Share, and a three-dot menu button that contains options like Slideshow.

- Now you want to add a slow-motion effect to the video. Logic dictates that you should click on the button that says Edit & Create so let’s do that.
- In the drop-down menu, you will find an option to Add slo-mo (Whoa!). It is possible that you get surprised when you don’t find the option here. In that case, click on the three-dot menu button and you might find the said option hidden there.

- Click on Add slo-mo. You can then adjust the speed of the slow-motion effect by moving the slider on the top. You can select the part of the video where you want the effect to be applied using the markers at the bottom.
- When you’re happy with what you’ve done click on the Save a copy button at the top. Your video will be saved with the slow-motion effect applied. As is quite clear from the saving option, this does not alter the original video in any way and creates a copy of it with the slo-mo applied.


Note
You may wonder where the file got saved though since it doesn’t ask for a save location. The Photos app usually saves the edited copy in the same folder as the original file. This is also true in the case of slo-mo copies of a video.
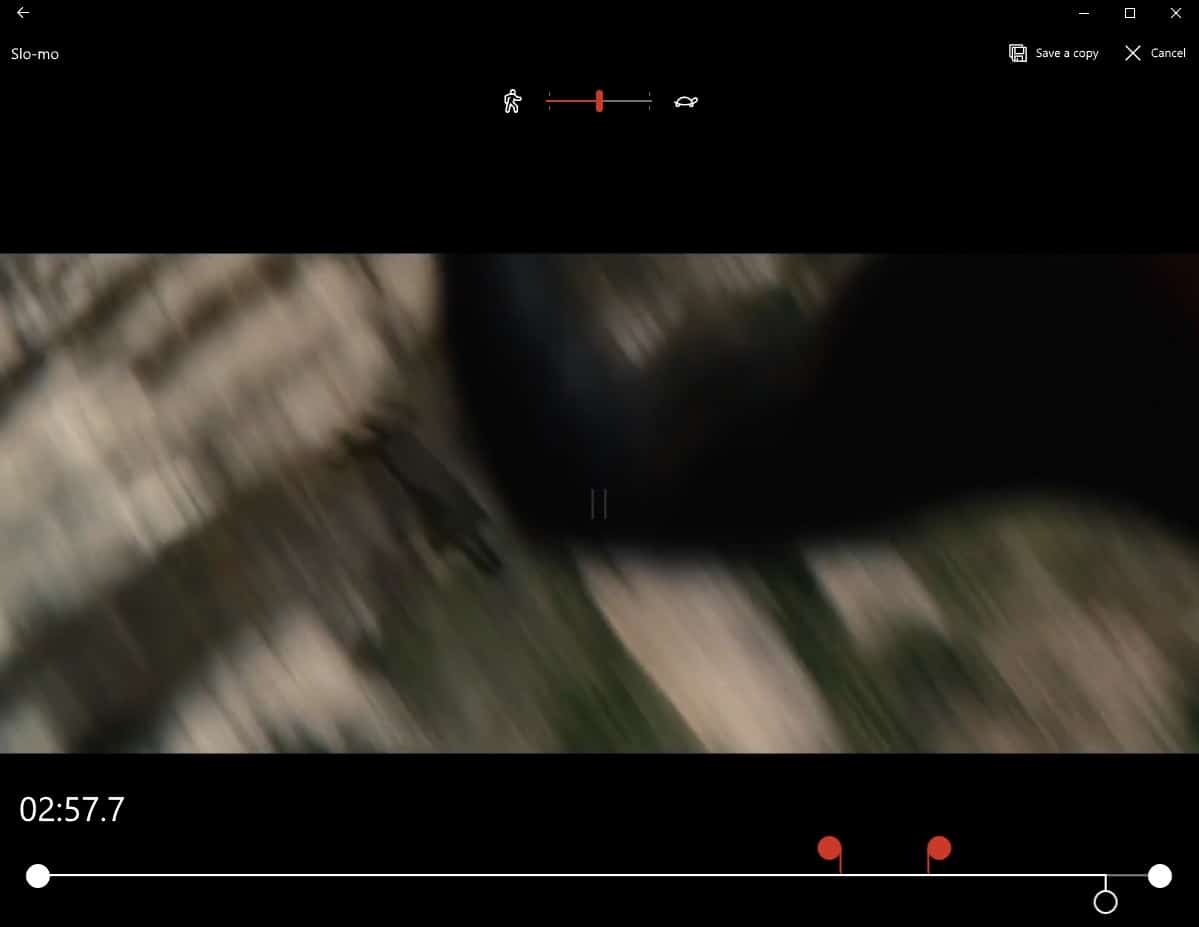
There are only three pre-set speeds you can choose from. These are – Normal (man icon), Slow (in the middle), and Super slow (tortoise icon). The video is already at normal speed so you don’t get selection markers if you select that speed. If you select Super slow, you only get a single marker using which you can only select the endpoint for the effect. The start point is always the start of the video. With slow speed selection, you get two markers that can be used to select a start and an endpoint.
If you want to enjoy a temporary desktop for testing apps on Windows 10, you should try the Windows Sandbox feature.