- Command Prompt:
ipconfig /flushdns - PowerShell:
Clear-DnsClientCache
DNS cache corruption might cause various network-related issues on a Windows PC. It can prevent you from accessing a website and worsen your browsing experience. However, flushing the accumulated DNS cache can immediately resolve the problem. In this tutorial, we’ll check out 6 working methods to clear the DNS cache on Windows 10 and 11.
The DNS (Domain Name System) resolves domain names to IP addresses to speed up web browsing. Flushing the DNS resets the saved information and fetches new data from the server.
Don’t Miss: How to Clear System Cache and Clean a Windows PC
1. Using the Flush DNS Command in CMD
If you want to clear your DNS cache on Windows, you can do so by using the Command Prompt. Follow these steps:
- Open a Command Prompt window.
- Execute the following command in the Command Prompt window.
ipconfig /flushdns
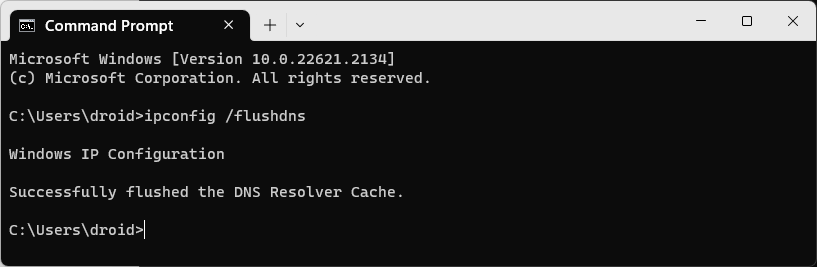
- When the DNS record is cleared, you’ll get the following output in the CMD window.
Windows IP Configuration
Successfully flushed the DNS Resolver Cache.
That’s it!
2. Using DNS Cache Command in PowerShell
You can also clear the DNS record in Windows 10 and 11 using a PowerShell command.
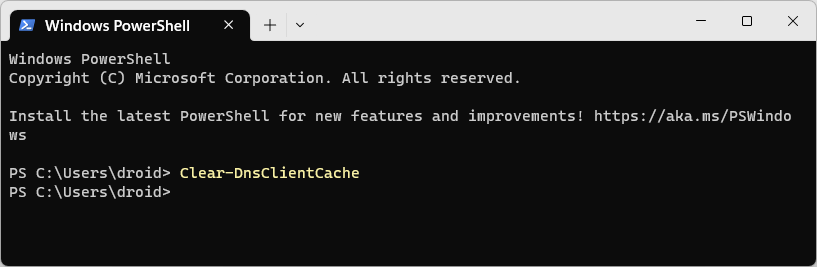
- Launch a PowerShell window.
- Type or paste the following command in the PowerShell window.
Clear-DnsClientCache
- Once you hit Enter, your DNS cache will be cleared, and you’ll be good to go.
3. Using the Run Dialog Box
Another quick way to clear the DNS in Windows involves using the Run dialog box. Here’s how to do it.
- Open the Run dialog box on your PC using the Windows + R keyboard shortcut to launch it.
- Type or paste the following command in the text box next to Open.
ipconfig /flushdns
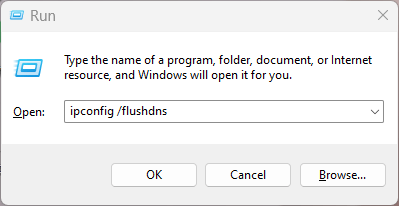
- Now, click the OK button. To run the
ipconfig /flushdnscommand as an administrator, press Ctrl + Shift + Enter keys after typing the command in the Run dialog.
4. Flush DNS using a Batch File
Flushing DNS via a batch file might seem complicated, but it works flawlessly. The good thing about this method is that if you create a batch file once, you can run it whenever you want to manage the DNS. Here is how to do it.
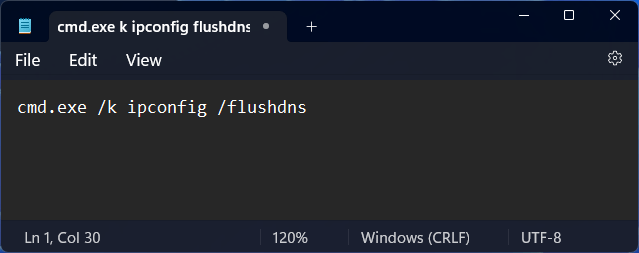
- Open the Notepad app. Use the Windows Search feature and type “Notepad” to find the app quickly.

- Now, type or paste one of the following entries in the Notepad file.
ipconfig /flushdns
or
cmd.exe /k ipconfig /flushdns
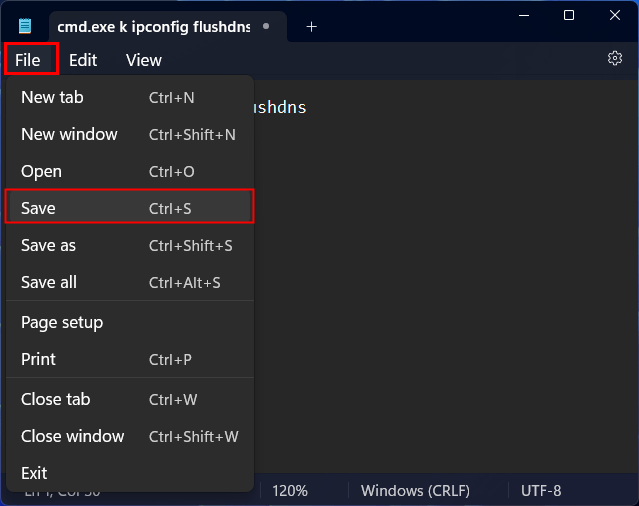
- Click File > Save or press Ctrl + S keyboard shortcut to save the file.
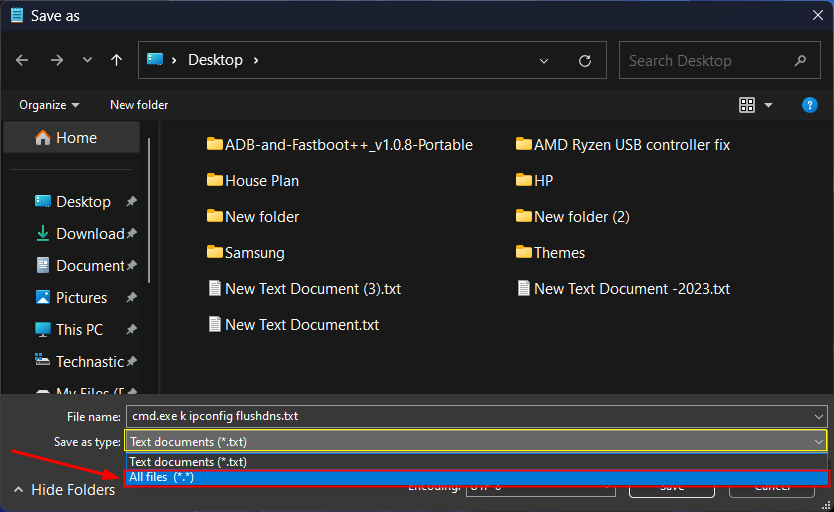
- When the Save as window pops up, click next to Save as type and select All files(*.*).
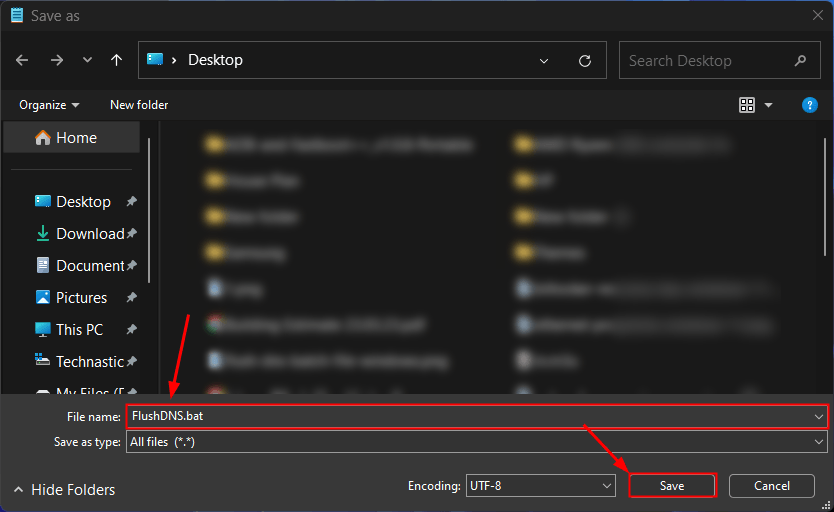
- Next, type FlushDNS.bat, ClearDNS.bat, or any other name (with ‘.bat‘ extension) that you prefer in the File name section and click the Save button.
- Navigate to the FlushDNS.bat or ClearDNS.bat file and double-click it.
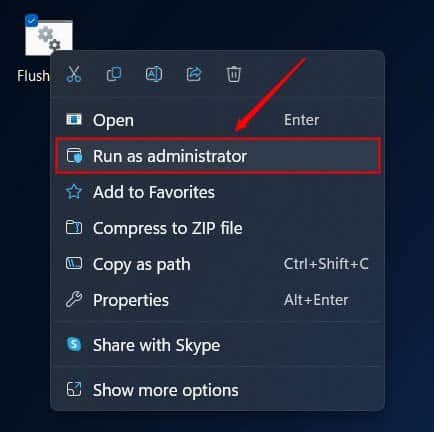
- Doing so will launch the Command Prompt and execute the
ipconfig /flushdnscommand.
5. Flush DNS Automatically via Registry
Using the Windows Registry editor hack below, you can schedule the flushing or clearing of the DNS cache. Let’s see how we can do this.
Warning: Before you proceed with the steps below, please create a system restore point and back up your registry settings using File > Export… in the Registry Editor window.
- Open the Registry Editor and navigate to the following path. Alternatively, you can paste the following path into the address bar of the Registry Editor window and press the Enter key to get to that location.
Computer\HKEY_LOCAL_MACHINE\SYSTEM\CurrentControlSet\Services\Dnscache\Parameters
- Right-click an empty area in the right-hand pane and select New > DWORD (32-bit) Value.

- When the new DWORD file is created, name it “MaxCacheTtl“.
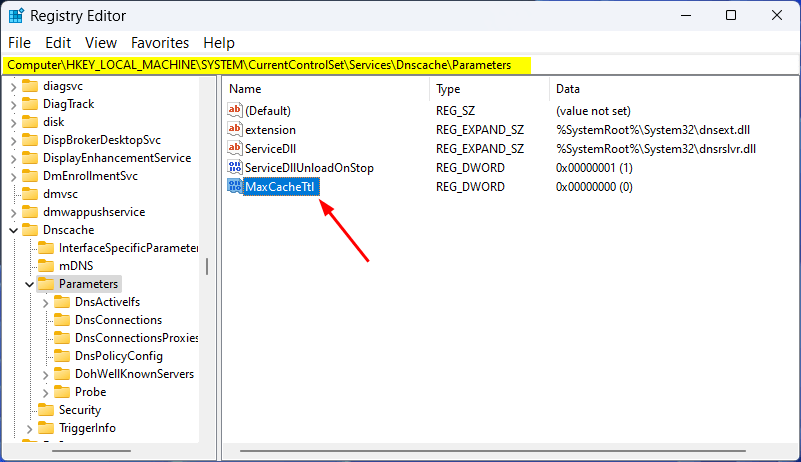
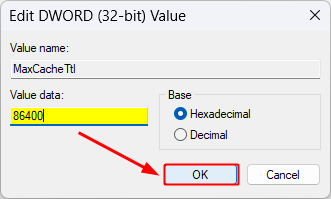
- Now, right-click MaxCacheTtl and select Modify to edit its properties.
- Change the Value data to 86400 or 172800 (seconds) to clear the DNS cache automatically every 24 or 48 hours, respectively. You can set this value as per your preference. Click on the OK button to save the changes.
- Now, right-click an empty area again and select New > DWORD (32-bit) Value.
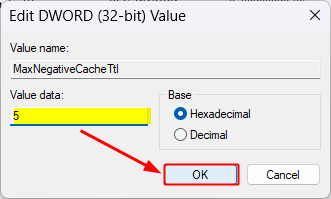
- This time, name this new file MaxNegativeCacheTtl.

- Double-click MaxNegativeCacheTtl, modify its Value data to 5, and click OK to save the changes.
You have successfully scheduled the automatic DNS flush on your Windows computer every 24 or 48 hours.
6. Stop DNS from Heaping up via Control Panel
Using this bonus tip, you can configure your Windows PC so the DNS cache doesn’t overpopulate. This way, you can avoid issues caused by the DNS dump.
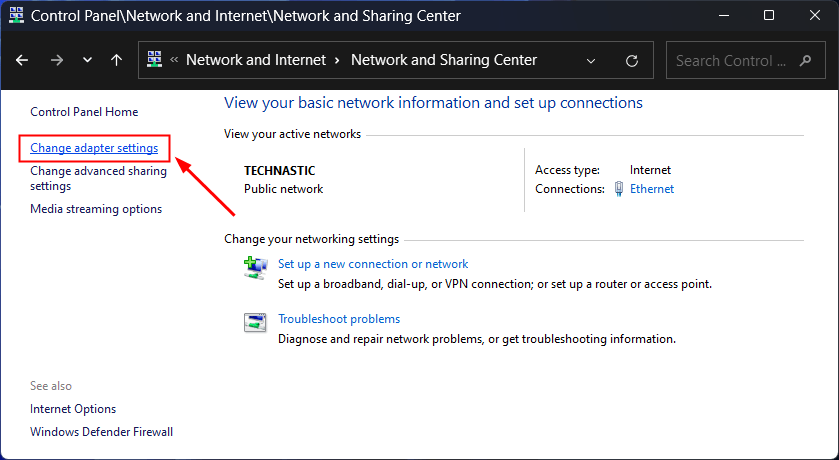
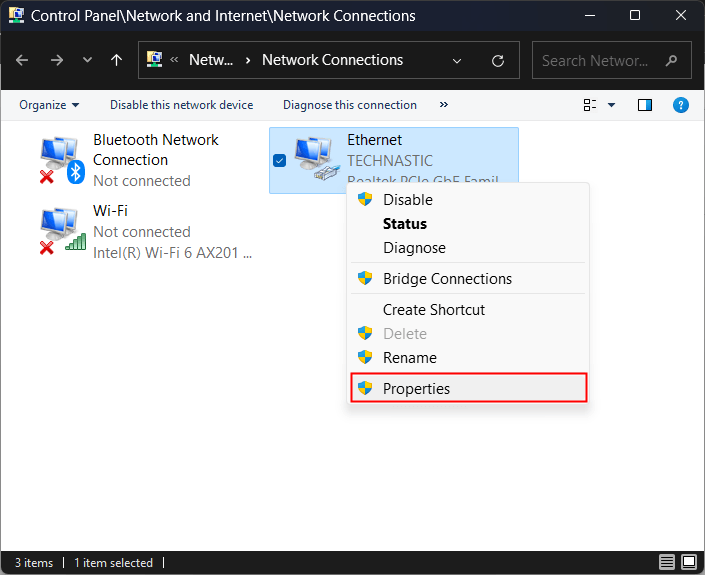
- Open the Control Panel.
- Click Network and Internet > Network and Sharing Center.
- On the left-hand side of the window, click Change adapter settings.
- Right-click your active network connection and select Properties.
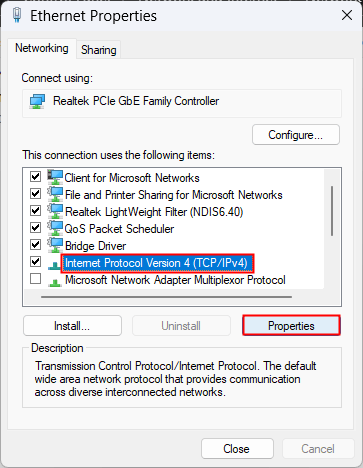
- Select Internet Protocol Version 4 (TCP/IPv4) from the list of items and click Properties.
- Under General, check the box next to Obtain an IP address automatically and uncheck the box next to Use the following DNS server addresses.
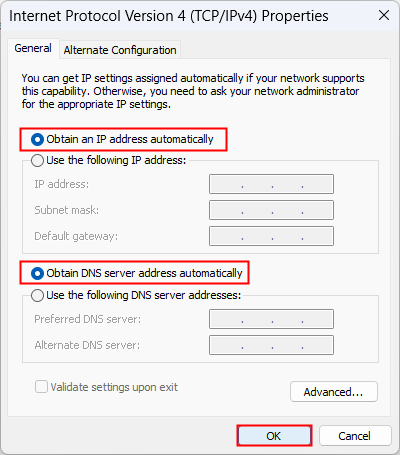
- Click OK to save your changes.
- Close the Control Panel window and restart your computer for the changes to take effect.
We hope this article helped you understand what flushing DNS means and how to do it quickly and effectively in Windows 10 and 11. Now that you’ve learned how to flush your cache, take some time to explore how to clear browser cache and cookies in the Chrome, Edge, Opera, and Firefox web browsers.