Sharing strong Wi-Fi passwords with uppercase, lowercase, numeric, and special characters can be painful. Suppose you can share your password via a Wi-Fi QR code. That’ll be much easier, right? In this tutorial, we’ll show you how to share your Wi-Fi QR code and connect to a Wi-Fi network without entering the password by scanning a QR code on Android devices.
Whether you want to connect your device to a network via a Wi-Fi QR or share your network’s Wi-Fi QR with others, we’ve got you covered. Not only that, you can also recover Wi-Fi passwords using your Android device.
Find and Share Wi-Fi Password QR Code
If you have an Android phone or tablet running Android 10 or greater, you can find the QR code for your Wi-Fi password as follows.
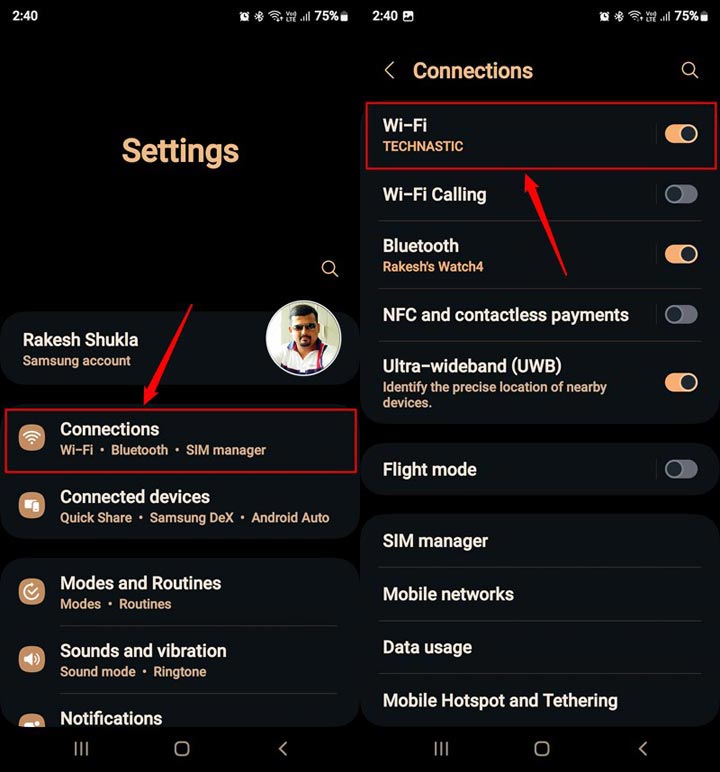
- Open Settings on your Android device. You can access your device settings from the app drawer or the Quick Settings panel.

- In the Settings menu, tap Connections > Wi-Fi.
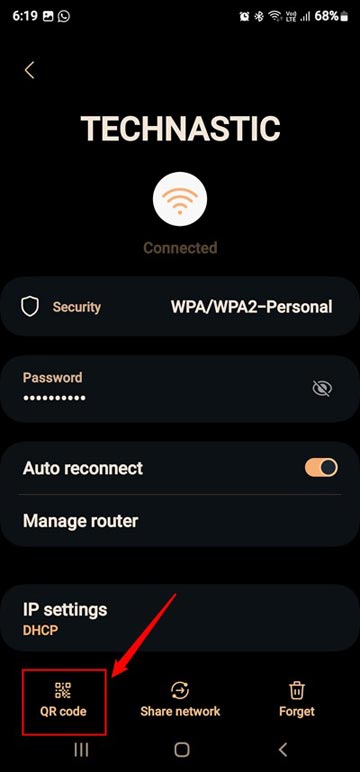
- Tap the Settings (⚙️) icon next to the Wi-Fi network name.

- Select the QR code option to generate your Wi-Fi password QR code.
- Now that you have your Wi-Fi QR code, you can tap the Save as Image option to save the QR code to your phone’s gallery. Moreover, you can select the Share option and share the QR code with others so that they can connect to your network without entering the password.

Sharing Wi-Fi Password via Nearby Share
Besides sharing your Wi-Fi password using a QR code, you can let others connect to your network using Android’s Nearby Share feature. Let’s see how to use it.
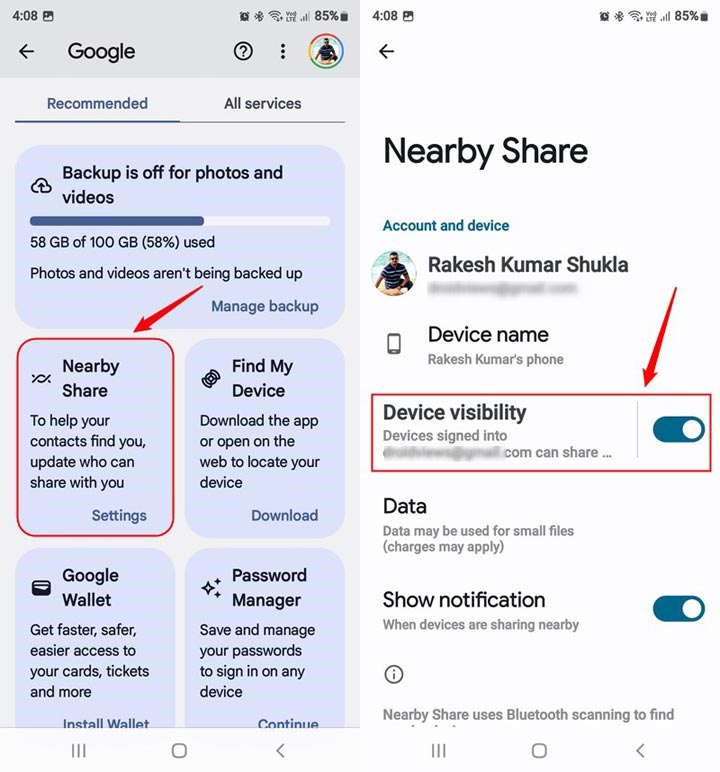
- Navigate to Settings > Google > Nearby Share and enable Device visibility on your Android device.
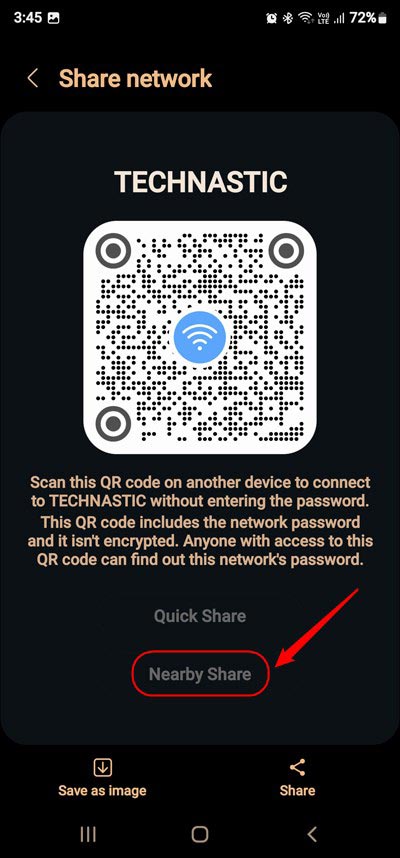
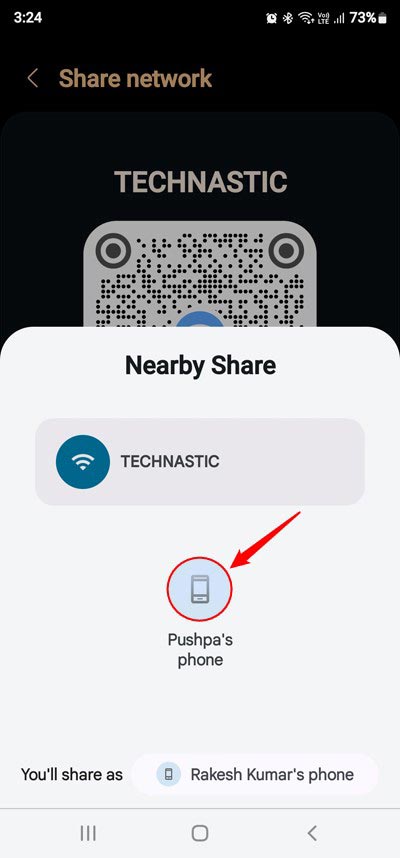
- Tap on the Nearby Share option on the Wi-Fi QR code screen.
- Make sure the Android device you want to share your connection with is near your phone, and Wi-Fi and Bluetooth are enabled on it.
- Once the other device is detected, tap on the device name.
- Accept the connection request on the other device.
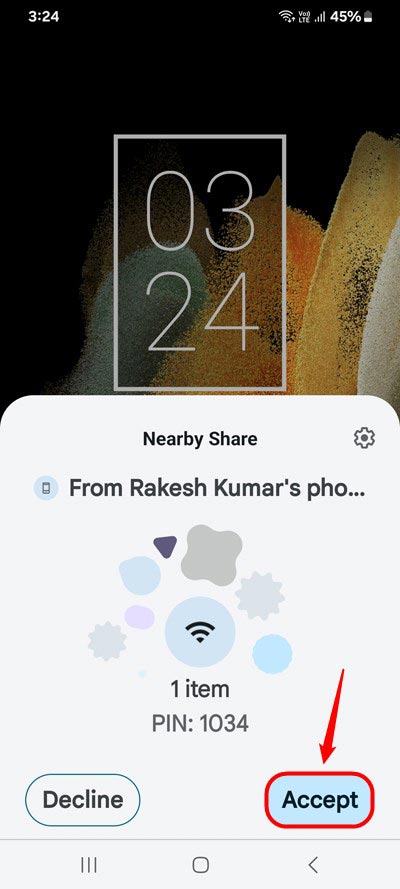
- When the Wi-Fi connection details are received on the other phone, tap the Save Network button. It will now connect to your Wi-Fi network automatically without entering the password.
- Finally, tap the Done button on your device.
Steps to Connect to a Wi-Fi QR
You can share your Wi-Fi network with others and connect your device to Wi-Fi by scanning someone else’s QR code. Let’s see how to do that.
- Navigate to Settings > Connections on your Android device.
- On the next screen, tap on Wi-Fi.
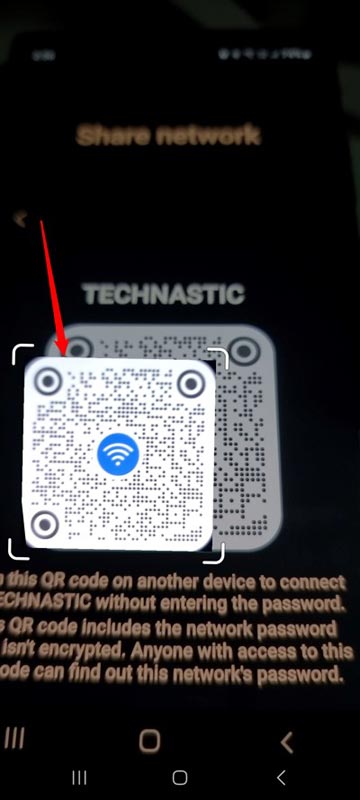
- Tap the QR Scanner icon in the top-right corner of your phone’s screen.

- You can now scan the Wi-Fi QR of another phone without entering the password.
Connect to Wi-Fi QR Code on Older Android Devices
If you own an Android device running Android 9.0 Pie or lower, you’ll need to use a third-party app to use this feature.
The first step in connecting to a Wi-Fi network via QR code involves getting acquainted with your Wi-Fi Network’s SSID and the Security Type. SSID stands for Service Set Identifier. In general terms, it refers to your Wi-Fi name. The Network SSID is case-sensitive. Remember the network name exactly as it is. However, if you aren’t sure, head over to your device’s Settings > Network and Internet > Wi-Fi and look at its name.
To check the Wi-Fi’s security, tap your Wi-Fi name under Network and Internet and see the Security section. More often than not, it should be WPA/WPA2 PSK. Once you have noted the Wi-Fi name and security type, head to the Play Store and download the QR Code generator and scanner app.
Generate a Wi-Fi QR using an App
- Install QR & Barcode Scanner from the Google Play Store and open it.
- Tap the Hamburger icon in the top-left corner of the app screen to access the app menu and select Create QR > Wi-Fi.

- Enter your SSID or Wi-Fi name and password in the corresponding fields. Similarly, under Network type, choose the Security that you had earlier noted.

- Finally, click the Create (✅) button at the top right corner of the screen.
- The QR for your Wi-Fi network will be generated.

- You can tap the Save option to keep a copy of the generated QR code in your phone’s gallery.
That’s it. You have successfully generated the Wi-Fi QR code for your network.
Connecting to a Network via QR
- Install a QR scanner from the Play Store. In this guide, we have used the QR & Barcode Scanner. You can use its scanning feature to connect to a Wi-Fi network via a QR code.
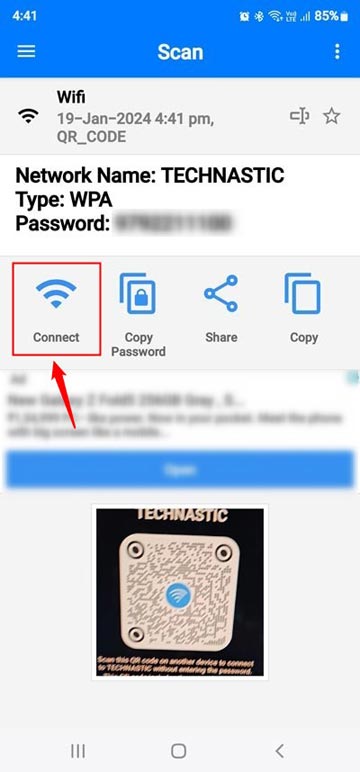
- Open the app and scan the generated QR present on the other device.
- You will get all the related information about the Wi-Fi network. You may then tap Connect to get connected to that Wi-Fi network.
So this was all about the steps to connect to a network via QR Code. If you are regularly into the sharing of Wi-Fi passwords with your friends and family, you may take this guide a step further. Go ahead and take a printout of this QR code. Stick it to your router, and the next time anyone wants to connect to your Wi-Fi, point them towards this auto-generated QR, rather than pointing to your phone’s screen every time.