If you don’t delete temporary files or files in your recycle bin regularly, your Windows computer might soon show signs of slowdowns. Storage Sense in Windows 10 is a feature that helps in automatically clearing temporary files and items from your recycle bin regularly. In this guide, we’ll show you how to toggle on the Storage Sense in Windows 10 to delete junk files in Windows 10. As you surf the web and use the internet, temporary files accumulate to help enhance your experience. However, over time the build-up of these files leads to the usage of storage space on your computer.
With Storage Sense in Windows 10, manually deleting temporary files will be a task of the past. You can even choose when to run Storage Sense automatically. The feature runs automatically when the disk space is low. However, you can choose from a few other options as well. Thus the feature can be run automatically every day, every week, or every month. So without any further ado, let’s check out how to enable the feature on your Windows 10 PC.
You can’t just delete junk files automatically but also switch between the light and dark themes on Windows 10 with auto-night mode.
Turn on Storage Sense to Free up Disk Space
Follow the steps below to enable or disable Storage Sense in Windows 10.
- Launch the Settings menu on your Windows 10 device by clicking the Start menu and the Settings icon.
- From the list of options, click System to bring up the system settings.
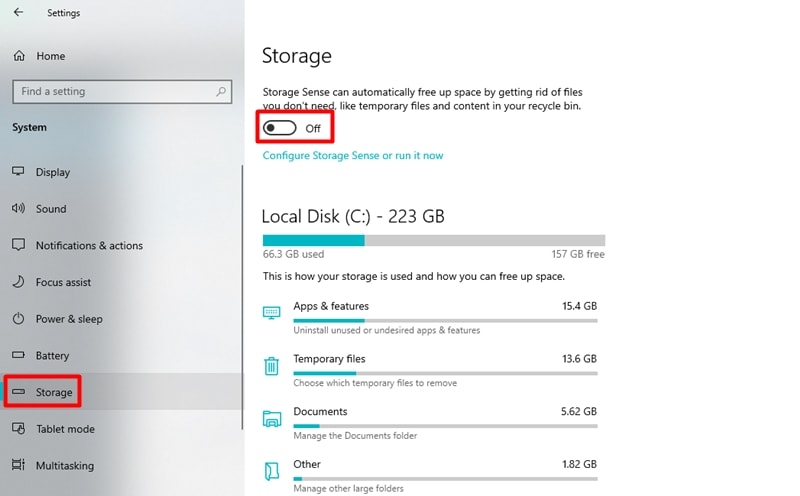
- In the sidebar, click the option labeled Storage.
- The option to turn on Storage Sense would be right at the top of the page.
- Simply click the Toggle Switch to turn on the feature.
Automatically Delete Junk Files in Windows 10
After you enable the feature by following the steps above, you can configure Storage Sense to run according to your preference.
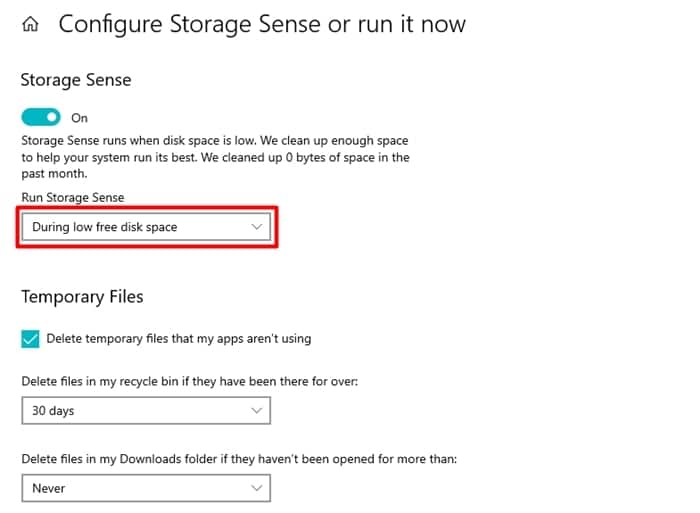
- Click Configure Storage Sense or run it now within the Storage settings.
- Under the Run Storage Sense label, click the drop-down menu and select when you want the feature to run and clear unnecessary files.
- There are four options to choose from — During low free disk space, every day, every week, and every month.
- Select the option that you think would work the best for your situation.
Temporary files aren’t always bad to have since they help speed up certain elements of your workflow. Thus, we’d suggest avoiding having Storage Sense from clearing these files. Nevertheless, if you do not want temporary files taking up any space on your PC, you may select the option to run Storage Sense daily.
Additionally, you can even select the number of days after which files in the Recycle Bin are deleted automatically via Storage Sense in Windows 10. You can even choose to delete files that you do not open from the Downloads folder automatically. However, this might lead to accidental data loss. Thus, we suggest leaving this option to its default setting which is Never. We hope this guide helped you set up and configure Storage Sense in Windows 10.
Read next: Access Different Windows 10 Settings via Shortcuts