Screenshots have become one of the most basic features across all operating systems. Windows computers have long had the PrtSc button that captures the screen. However, it only saves it on the clipboard, to be overwritten by something else later. On Ubuntu, the same button takes a screenshot. But a screenshot doesn’t always cut it. Say, you have a cool new window animation that you want to show off but can’t, not with screenshots. Videos may be too large and not effective. Sometimes you need to record the screen as a GIF.
What would you prefer? An animation, video, or a series of screenshots stacked on top of each other? While static images provide the benefit of being smaller in size, sometimes you need the big guns, that is a screen record. Windows 10 has a built-in screen recording tool that works in certain places. Ubuntu does not have anything of the sort. You can also use VLC to record the screen. But mostly, if you want a decent screen recording experience, either on Windows or Ubuntu, you have to rely on third-party tools.
Peek
The third-party tool we recommend using in Ubuntu is called Peek. It is one of the best screen recording utilities available on the platform. Compared to many other screen recording tools on all platforms, Peek has a focused and clean design. You don’t see anything but a Window border indicating the area of your screen that will be captured. This border also has a toolbar at the top featuring a drop-down menu to select the format, a record button, and a close button. This minimal design makes the workflow sumptuously simple.
How to install Peek
Installation is pretty simple if you have installed software on your Ubuntu machine before. Peek can be installed via their official PPA or the Snap app, a Flatpak, or AppImage. The developer, however, will be discontinuing the Snap app starting with the next update. Flatpak and AppImage will still be available, as well as the PPA. Peek’s official PPA provides up-to-date builds for supported Ubuntu versions. We recommend using the PPA since it means you will receive updates to the app automatically. This helps keep your software updated to the latest version. To install it, run the following commands in a terminal one by one and follow the on-screen instructions.
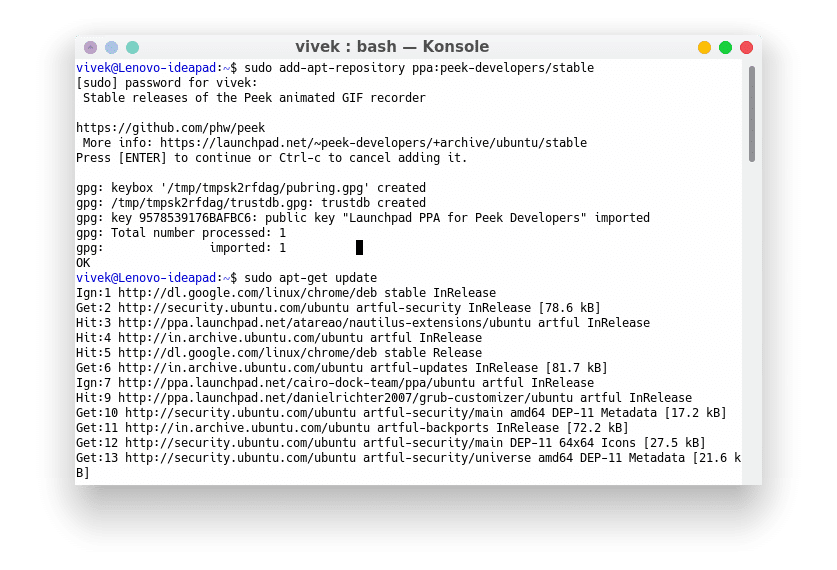
sudo add-apt-repository ppa:peek-developers/stable
sudo apt-get update
sudo apt-get install peek
How to record the screen as a GIF
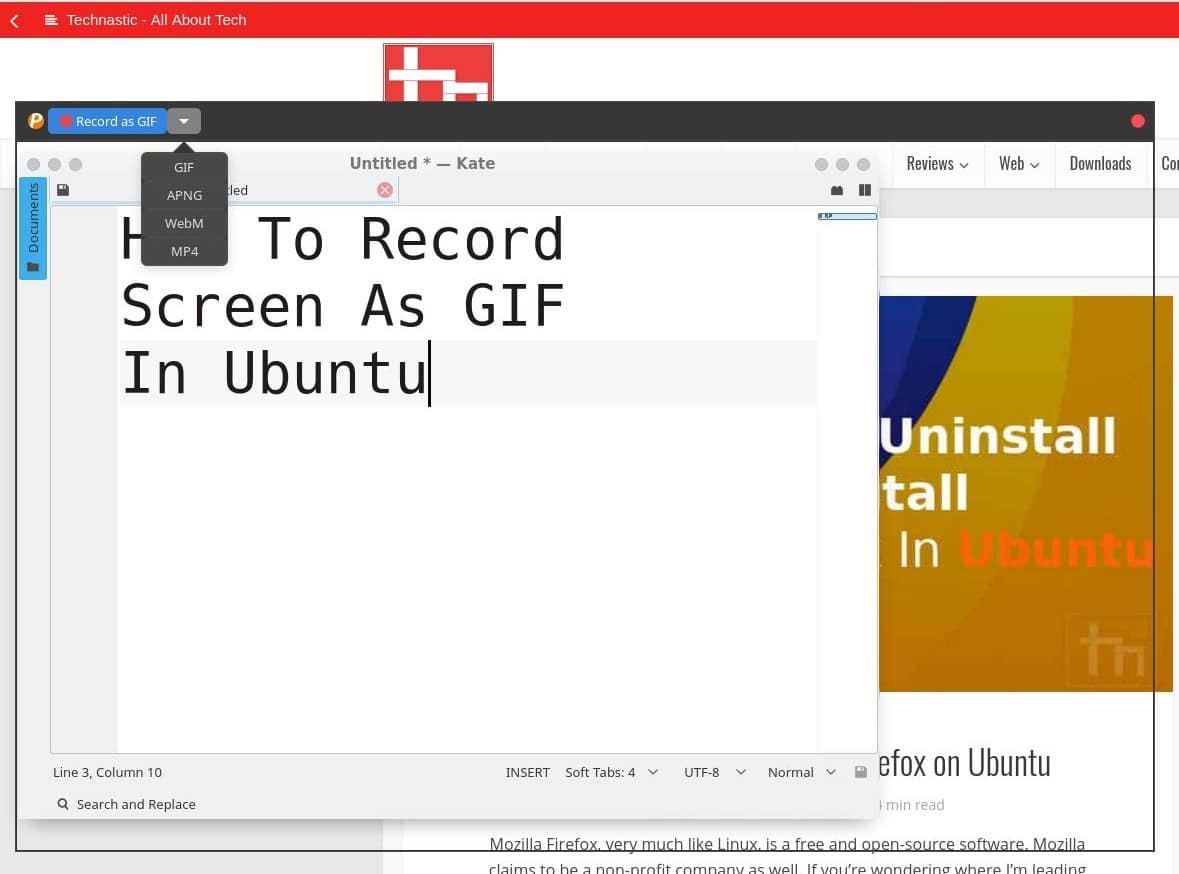
As mentioned before, Peek has a simple interface. It’s hard to think someone would not be able to figure out how to get what you need from it. You don’t need to figure it out, it is all right there. On the top left, you have the record button that says Record as xxx, where xxx is the currently selected format that the recording will be saved. Yes, Peek not only records the screen as a GIF but also as an MP4 or WebM video, and APNG. You can select the format of your choice by clicking on the downward arrow button next to the record button to reveal a drop-down menu.
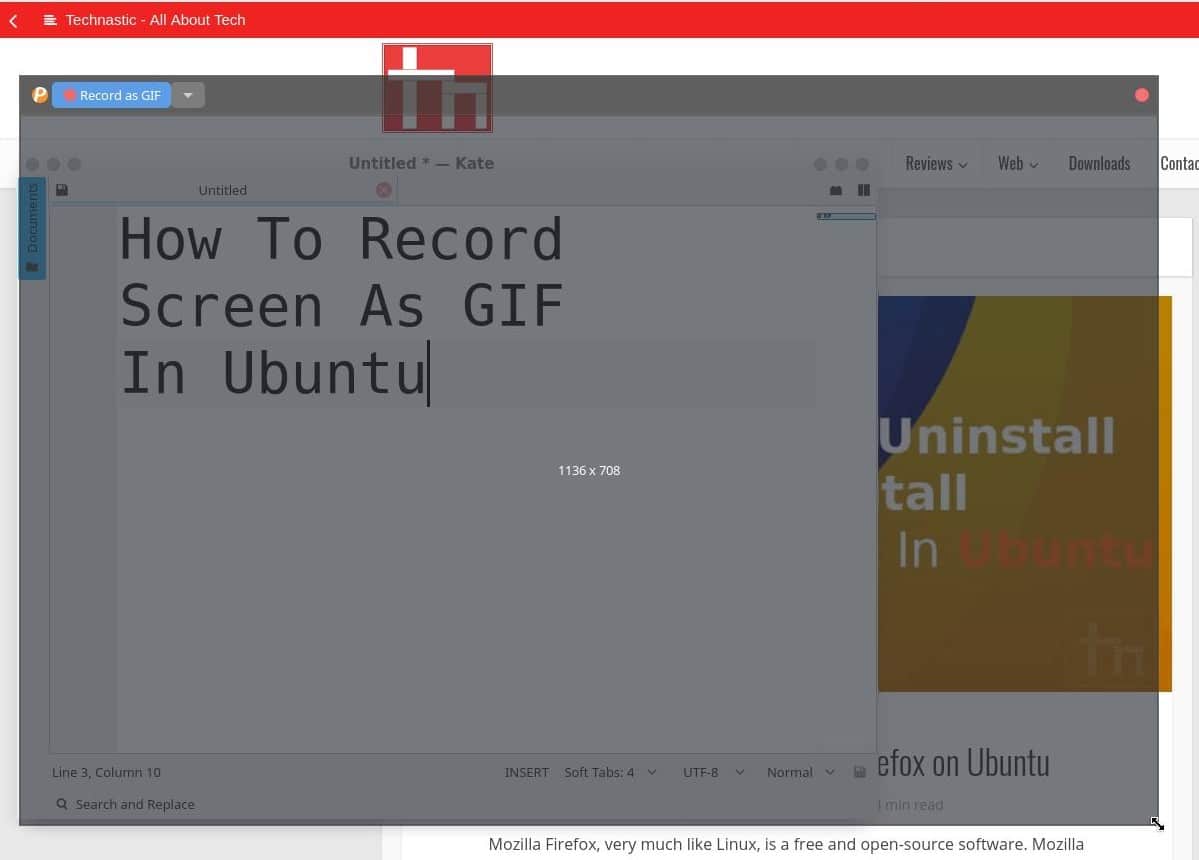
Before you start recording, you might want to adjust the size of the Peek window. It will record everything inside the window, so you don’t have to worry about cropping the GIF or video later. This also means you can’t record parts of your screen where a window isn’t allowed to expand, such as the top or bottom panels found in many desktop environments. You can access the Preferences, where you can change a few things, but sadly, there isn’t an option to enable recording the full screen. For now, full-screen recording remains a feature we can perhaps look forward to in later updates.
Related tutorial: How to Use GNOME Screen Recorder in Ubuntu