If you have purchased a PC or laptop with Windows pre-installed, it must have a single C Drive by default. It’s better to keep your Windows installation separate from other files. Therefore, it’s a good idea to partition the C Drive into 2 or 3 drives so we can manage files better. Whether your PC runs Windows 10 or 11, you can easily partition the C drive without formatting or losing data.
There’s no recommended partition size in Windows, but I prefer to split the hard drive into equal-sized partitions. Using the Disk Management tool in Windows, you can easily partition a hard drive, delete it, merge it with any other existing drive, or increase the C Drive space.
It’s easy to partition a hard drive on Windows 10 and 11 without a data wipe. However, you should still take a backup of everything before proceeding.
Steps to Partition the C Drive in Windows
The Disk Management tool has been a part of the OS since Windows 7. You can use it to create, delete, and extend the volume of a partition. You do not need a third-party partition manager tool to partition the C Drive in Windows 10 or 11. Let’s check out the steps to do the same.
- Open the Windows Disk Management tool. There are 2 ways you can do that.
- Right-click the Start menu icon and select Disk Management in the Power User Menu.
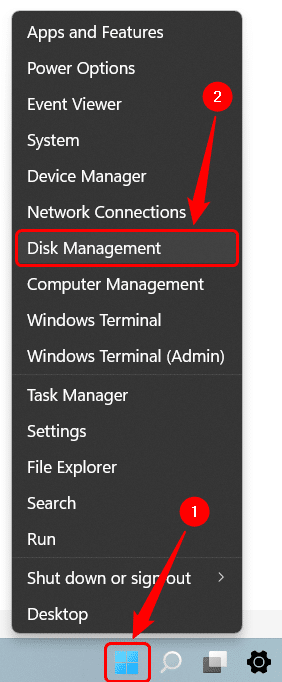
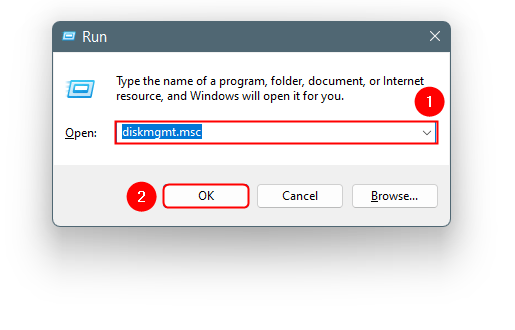
- Alternatively, you can launch Disk Management via the Run box. Press the Windows + R keyboard shortcut to open the Run dialog box. Then type or paste “diskmgmt.msc” and click the OK button.
- Right-click the Start menu icon and select Disk Management in the Power User Menu.
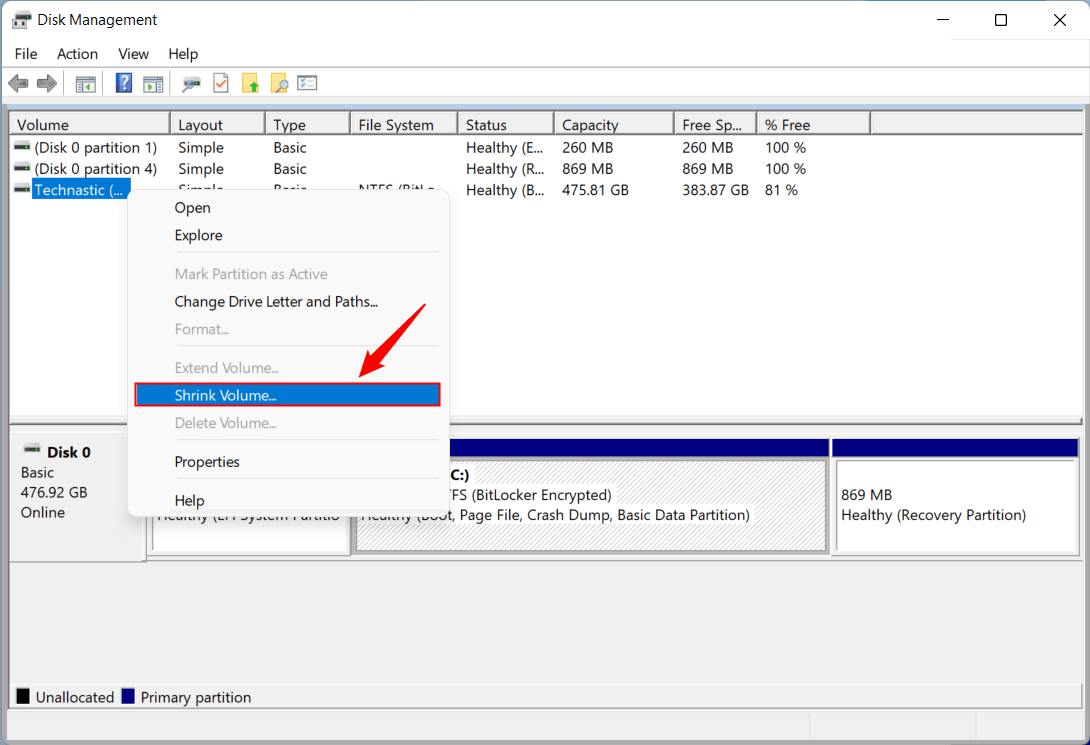
- When the Disk Management window opens, you’ll see the details of your hard disk as Windows (C:) along with other storage devices connected to your Windows PC. ‘Disk 0‘ represents the portion of the hard drive on which the Windows OS is installed.
- Right-click on Windows (C:) and select the Shrink volume option from the context menu. This option lets you choose the size of the C Drive to free the remaining space allocated to a new partition.
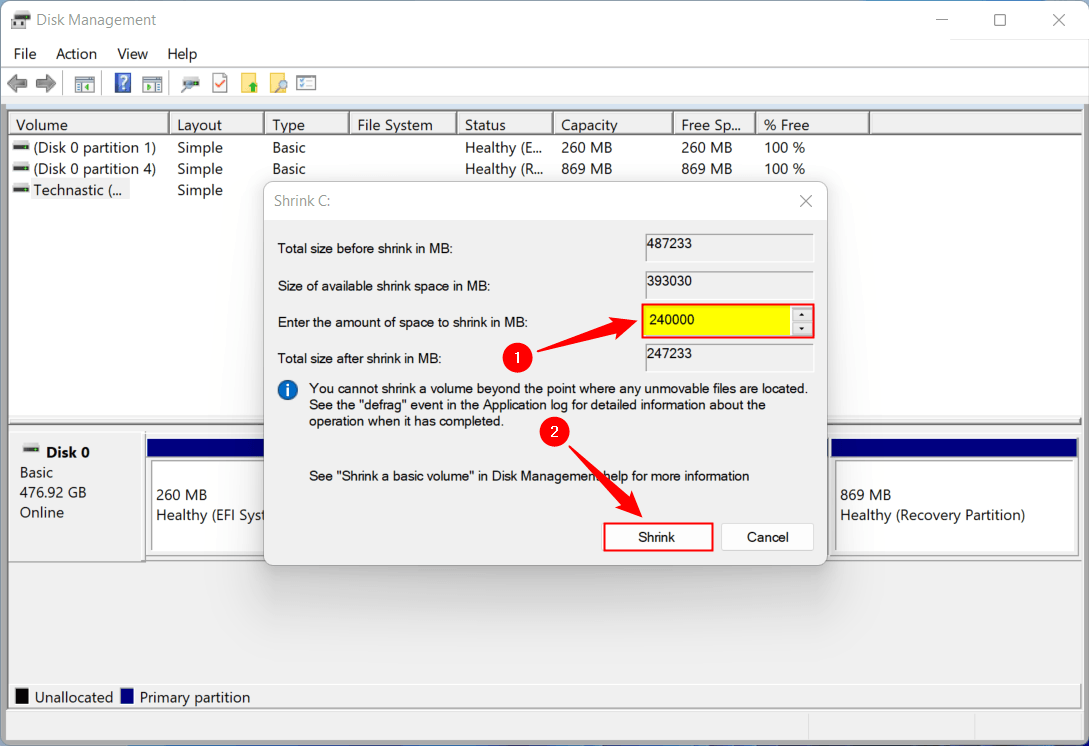
- The Disk Management wizard will calculate the total volume space, and you’ll be asked to choose the size (in megabytes) you want to allocate to the C Drive. Since my HP laptop has 475GB of storage left, I’ll allocate around 200GB to the new partition. You’ll need to do a little math to decide how much space you want to assign to different drives. Having allocated the space next to the Enter the amount of space to shrink in MB option, click the Shrink button.
- As soon as the shrinking of the selected space is done, you’ll see the remaining free space ready to be allocated to a new drive in the Disk Partition window, as shown below.
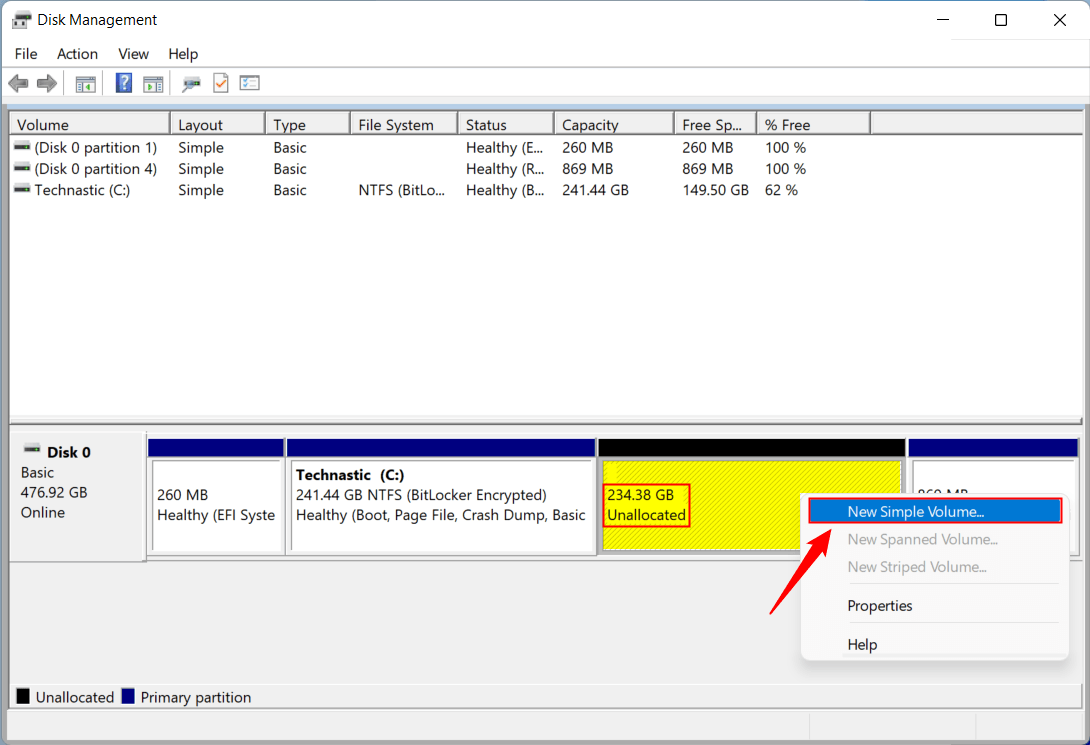
- Now, right-click the unallocated space area highlighted with yellow and select New Simple Volume.
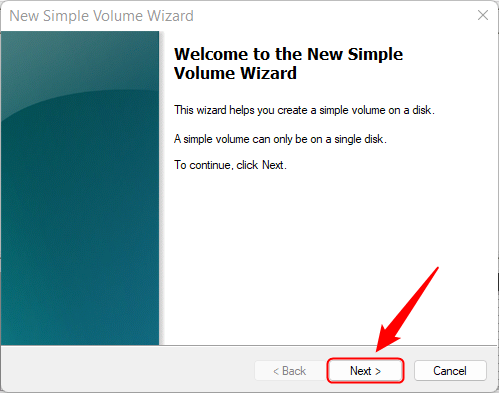
- When the New Simple Volume Wizard window pops up, click Next.
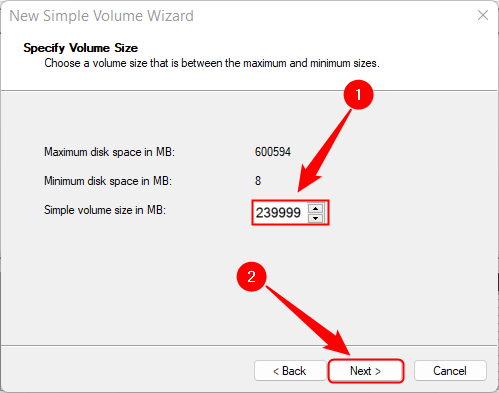
- A new pop-up window will appear prompting you to select the size of the new partition. Allocate the volume size in MB and click on Next.
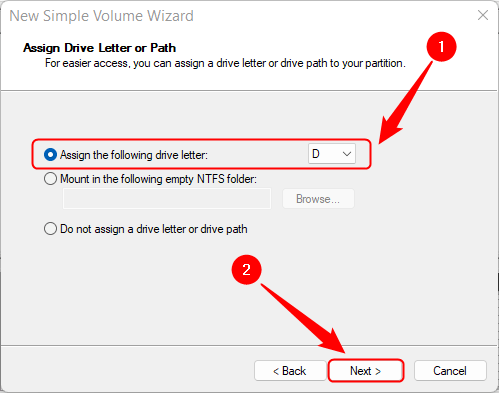
- Next, you need to assign a drive letter. By default, Windows automatically picks the next letter of the alphabet as the drive letter. However, you can still choose another letter from the drop-down menu. Click on the Next button to proceed.
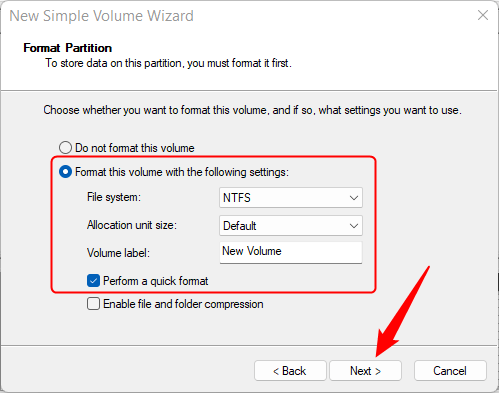
- The next step is to perform a quick format of the new partition. Don’t worry, it won’t affect the data stored on your C Drive. It’s recommended that you proceed with the default setup as shown below. You can assign a new label or name to the New Volume if you wish to. Also, check the box next to Perform a quick format option and click the Next button.
- Just format the new partition when prompted.

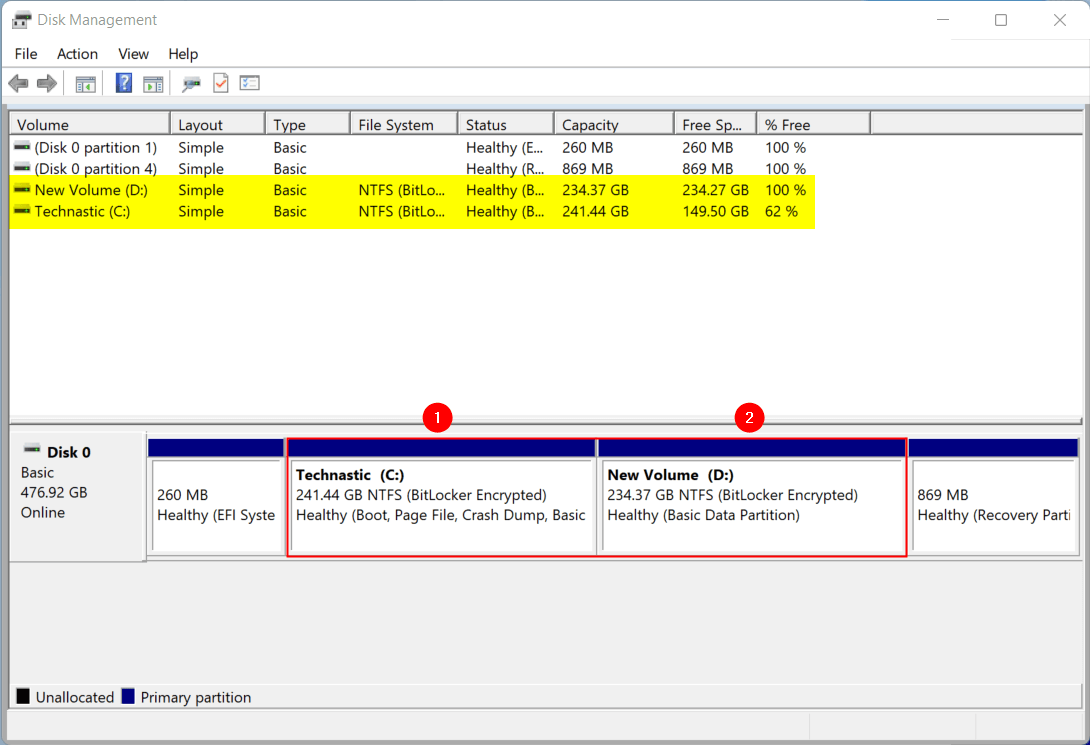
- If you didn’t make any mistakes following the above steps, you’ll see the new partition you just created listed in the Disk Management window.
You now know how to partition C Drive in Windows 10 and 11 without formatting.
Don’t Miss: How to Enable God Mode Folder in Windows 10 and 11
Steps to Increase C Drive Space in Windows
Having created a new partition, you can delete it, merge it with some other partition, or increase the size of the C Drive. Let’s see how we can do that.
- Open the Disk Management tool by right-clicking the Start menu icon and selecting Disk Management from the Power User Menu.
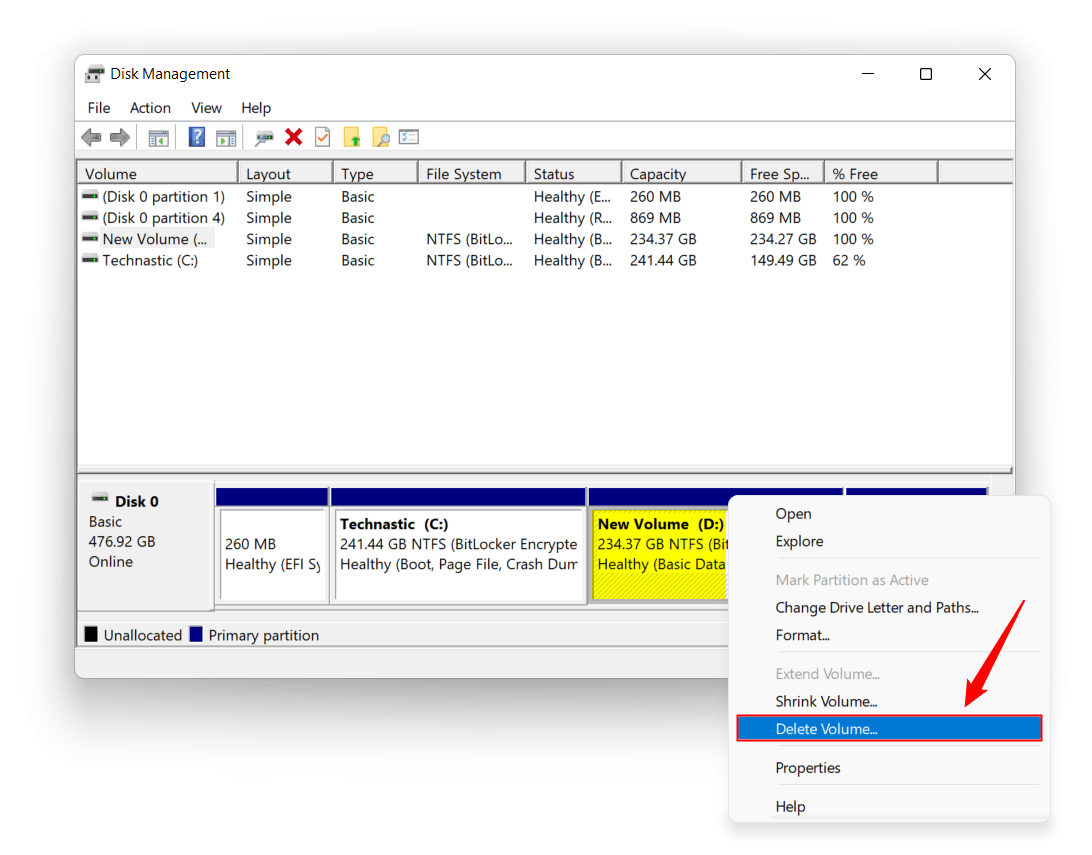
- Right-click the hard disk partition you want to delete and select the Delete Volume option from the context menu.
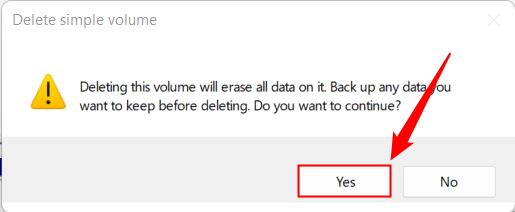
- You’ll receive a warning message telling you that all data on the partition will be erased. Click the Yes button.
- When the selected partition is deleted, you’ll see a new label showing unused space entitled “Unallocated“. You can allocate this unused space to C Drive or an existing partition on your Windows PC. For example, to increase the C Drive space, right-click on Windows (C:) and select Extend Volume.
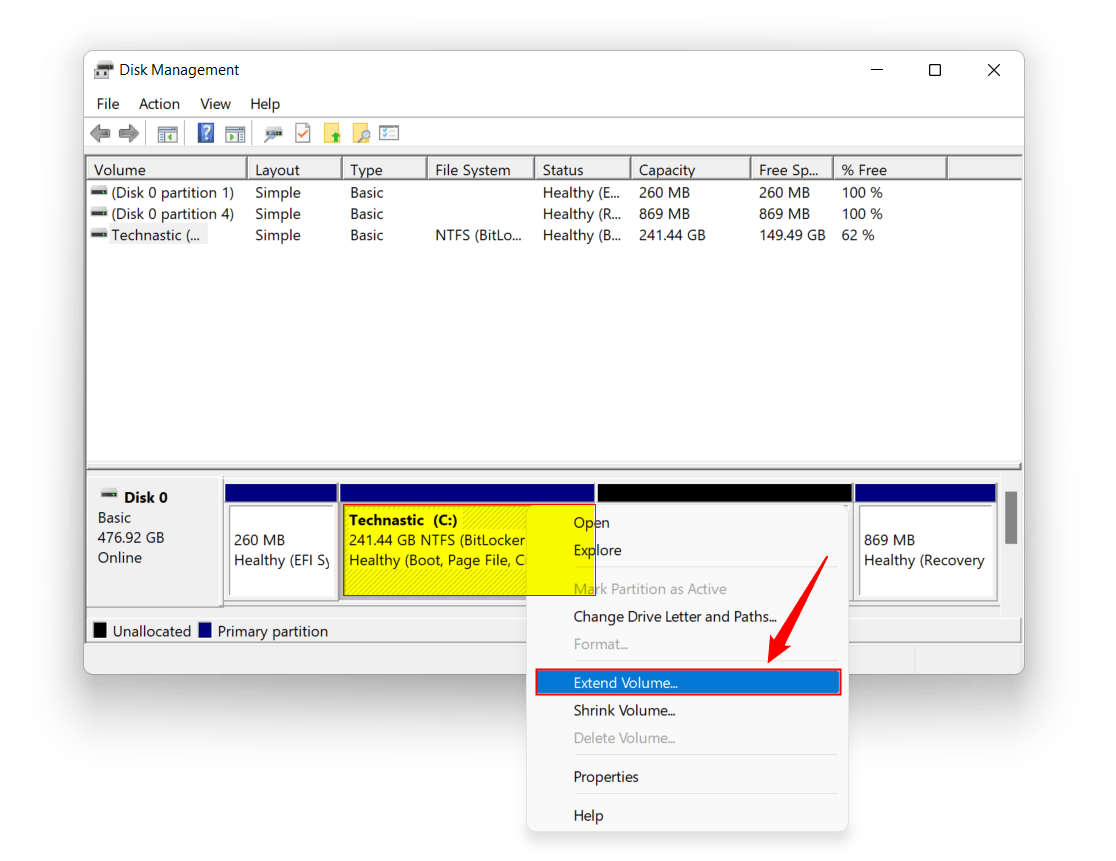
- You can add the total unused space to the C Drive or a part of it. For instance, if you have 200GB of unallocated space, you can add 100GB to the C Drive and the remaining 100GB to any other existing drive. Having selected the amount of space to be added to the C Drive, click Next, followed by the Finish button.

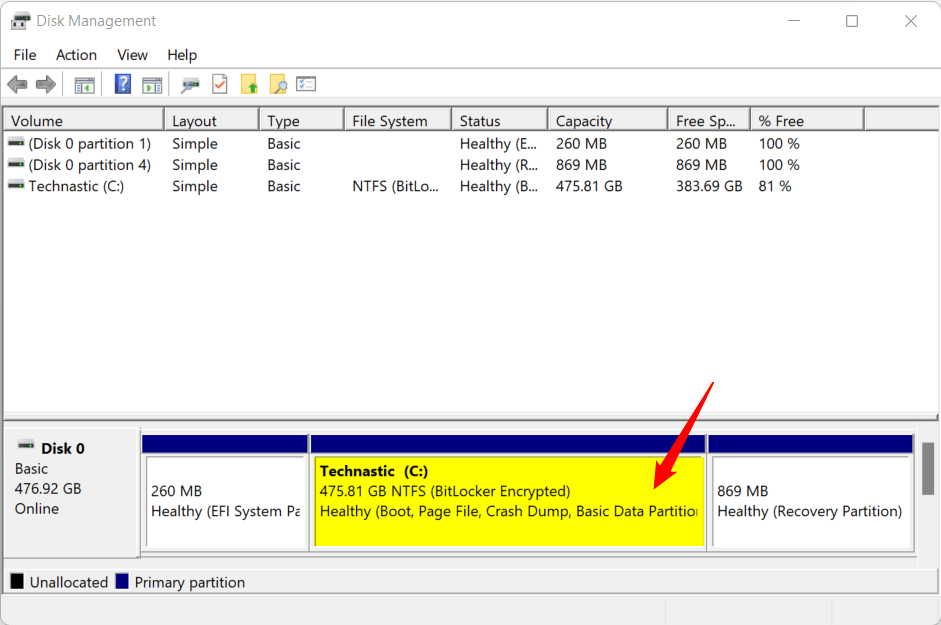
- That’s it, you have successfully increased the space on the C Drive.
Fix the Extend Volume Option Greyed Out Issue
So far, we have seen how to partition the C Drive in Windows 10 and 11 and delete a partition to add space to the C Drive. In case you have more than 2 drives on your Windows PC, you need to delete the drive next to the C Drive, otherwise, the Extend Volume option for this partition will remain greyed out. Suppose you have C, D, and E drives on your PC deleting or shrinking the E Drive won’t help you increase the C Drive space.
You must move the files and data stored on the D Drive to the E Drive and then delete them. The Unallocated space slot must be located adjacent to the C Drive otherwise, the Extend Volume option will be unavailable.
Below, you can see that when I deleted the D Drive, its space became available to be added to the C Drive using the Extend Volume option.

I hope this tutorial helped you learn how to partition the C Drive and increase its space in Windows 10 and 11 using the Disk Management tool.
Read Next: 5 Ways to Install Windows 11 on Unsupported Hardware