If you own an old PC or laptop that does not meet the minimum system requirements to install Windows 11, you’re not entirely out of luck. A Regedit hack that lets you install Windows 11 on unsupported hardware (CPU and TPM) without erasing data or formatting a drive. Just download the Windows 11 ISO and use Rufus to create a bootable USB flash drive. You can also use tools like WinPass11 and Force-Windows-11-Install from GitHub to install Windows 11 on any PC.
When I tried Windows 11 Installation Assistant and Windows PC Health Check apps to check if I could install Windows 11 on my old laptop with an Intel Core i5 processor, I got the following message:
“This PC doesn’t currently meet Windows 11 system requirements”
“The processor isn’t currently supported for Windows 11”
The CPU and an older version of the TPM (Trusted Platform Module) were the only deterrents to the free upgrade to Windows 11. If you’re having such issues, we have you covered. This detailed tutorial will cover the different methods for installing Windows 11 on unsupported hardware, including CPU or TPM.
If your PC is old and has a humble hardware configuration, forcing it to install Windows 11 might not be a good idea. Doing so may have negative consequences pre or post-installation of the new OS. Even if you manage to install Windows 11 on your old PC, it might have stability issues or run slowly. Moreover, once you install Windows 11 on unsupported hardware, your PC will not receive any future software updates. You may still receive security updates, though. Also, Windows 11 is a 64-bit-only OS, so your PC must be a 64-bit system.
There are several methods to install Windows 11 on PCs with unsupported hardware. You must implement a Registry hack that bypasses the system’s compatibility checks, regardless of the method you choose. You can do that manually or use tools like WinPass11 and Force-Windows-11-Install from GitHub.
Download Windows 11 ISO
The first thing needed to install Windows 11 on your PC is to download the Windows 11 Disk Image (ISO) file from Microsoft’s official website. You can use the ISO file to install Windows 11 by running the setup.exe via Windows Explorer or creating a USB flash drive using Rufus or Media Creation Tool W11.
Method 1: Use WinPass11 or Force-Windows-11-Install
If you can’t install Windows 11 because your PC or laptop doesn’t meet the TPM version and processor requirements, 2 utilities on GitHub can help.
WinPass11: Auto
Developed by ArkaneDev from GitHub, WinPass11: Auto is a great tool that lets you install Windows 11 on unsupported hardware. This one-click Windows 11 installer will work only if you’re already in the Windows Insider Release Preview channel. Download the WinPass11Auto, run the program as an administrator, and follow the on-screen instructions. It will download the registry tweaks and install Windows 11 even if your PC doesn’t meet the minimum system requirements.

Force Windows 11 Install
Force-Windows-11-Install is another great tool that you can find on GitHub. Developed by JosephM101 this tool uses an existing Windows 11 installer ISO and modifies it in a way that it bypasses system requirement checks while installing the OS. It contains a registry hack that bypasses the CPU and TPM check. The modified ISO created by Force-Windows-11-Install contains a patch that forces Windows 11 to install all feature updates on unsupported hardware.
Download Windows 11 from UUP Dump, create a bootable ISO, and follow this tutorial.
Method 2: Edit Registry to Bypass CPU and TPM Check
The main hurdles coming between an old PC and Windows 11 are inadequate processing power, the absence of a secure boot, and an older version of TPM.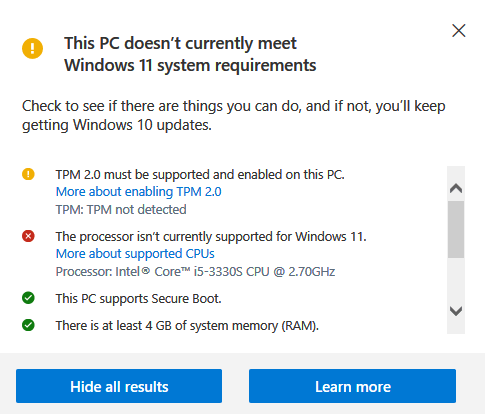
Fortunately, there is an easy Registry hack to make Windows 11 ignore such incompatibilities. This method involves adding some new entries in the Registry Editor, so it’ll be a good idea to create a system restore point beforehand.
Edit Registry to Bypass TPM and Secure Boot Check
TPM 2.0 and Secure Boot are major requirements for Windows 11. If your PC doesn’t have TPM or Secure Boot, you can make the Windows 11 installer to ignore this deficiency. All you need to do to achieve this is to make some changes in the Registry Editor.
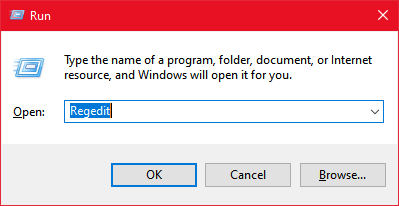
- Press the Windows logo key + R to launch the Run app, type “Regedit” in the text box, and click Open.
- When the Registry Editor window launches, navigate to the following location.
HKEY_LOCAL_MACHINE\SYSTEM\Setup
- Now, right-click on Setup and select New > Key.
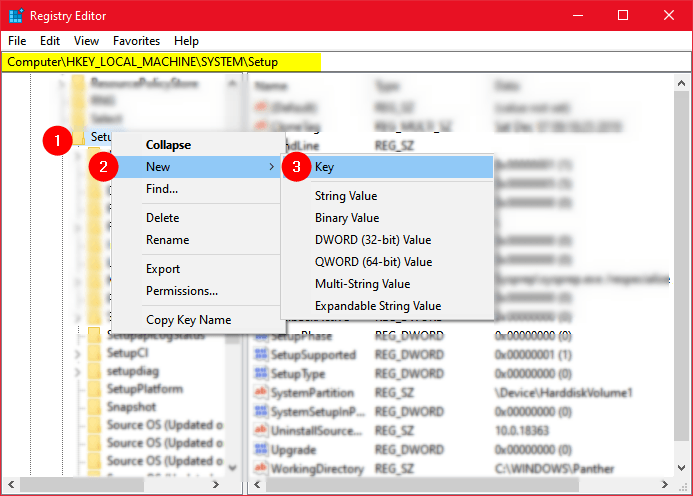
- When the new entry is created under Setup, rename the New Key #1 to LabConfig.
- Now, right-click LabConfig and select New > DWORD (32-bit) Value.
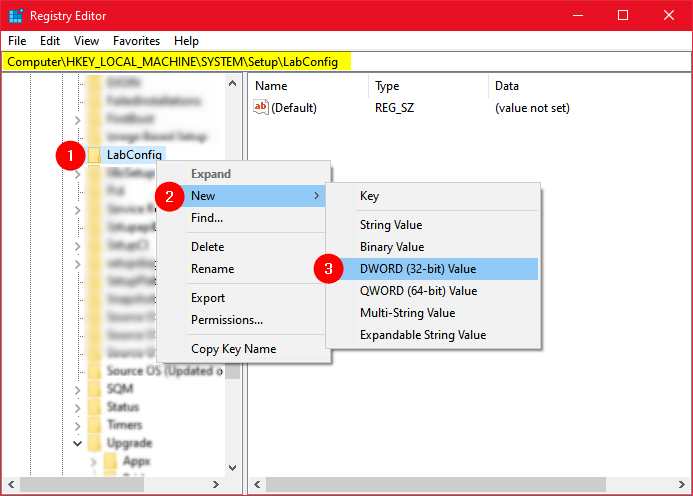
- Assign BypassSecureBootCheck as a name to this new registry entry. Double-click this entry and change the Value data to 1.
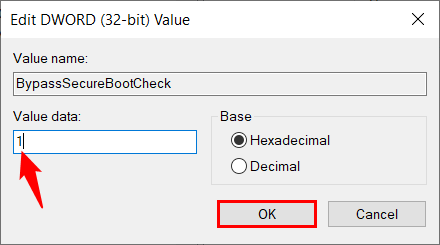
- Now, right-click on LabConfig again, select New > DWORD (32-bit) Value, create another entry, and name it BypassTPMCheck. Double-click the new file and set its value to 1.
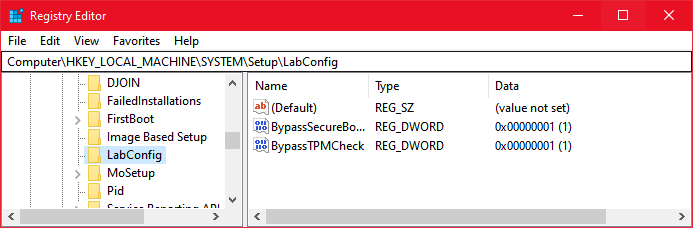
- Thus, you now have 2 new entries under HKEY_LOCAL_MACHINE\SYSTEM\Setup\LabConfig. BypassSecureBootCheck and BypassTPMCheck will prevent Windows 11 installer from checking for Secure Boot and TPM 2.0.
Regedit to Install Windows 11 on an Unsupported CPU
If you have an old PC with an incompatible CPU but has TPM 1.2, you can still install Windows 11 on unsupported hardware using the following Registry Editor hack.
- Navigate to HKEY_LOCAL_MACHINE > SYSTEM > Setup > MoSetup in Registry Editor.
- Right-click on MoSetup and choose New > DWORD (32-bit) Value.

- Rename the New Value #1 entry you just created AllowUpgradesWithUnsupportedTPMOrCPU.
- Now, double-click this file and change the Value data to 1.
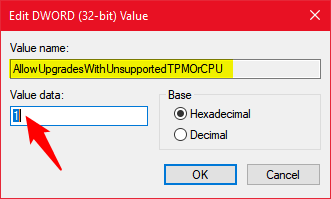
- Once you have made the change, click OK to save it.
You are all set to install Windows 11 on your old laptop or desktop with unsupported hardware. Just open the Windows 11 ISO in File Explorer, double-click the setup.exe, to launch the installer, and follow the on-screen instructions.
Method 3: Enable TPM 2.0 from UEFI to Install Windows 11
If your PC has the required CPU for Windows 11 but the TPM 2.0 is an issue, follow the tips below. In this section, we will check out the steps to enable TPM 2.0 in UEFI BIOS (PC firmware). If you purchased your Windows PC within the last 5-6 years, it’s most probable that it already has TPM 2.0 but lies disabled in the BIOS.
Therefore, even if you see the “TPM 2.0 must be supported and enabled on this PC” message while checking requirements, there’s a way to enable TPM 2.0. While the registry hack described above is enough to prevent Windows 11 Installer from checking for TPM, you should still enable it from the BIOS menu.
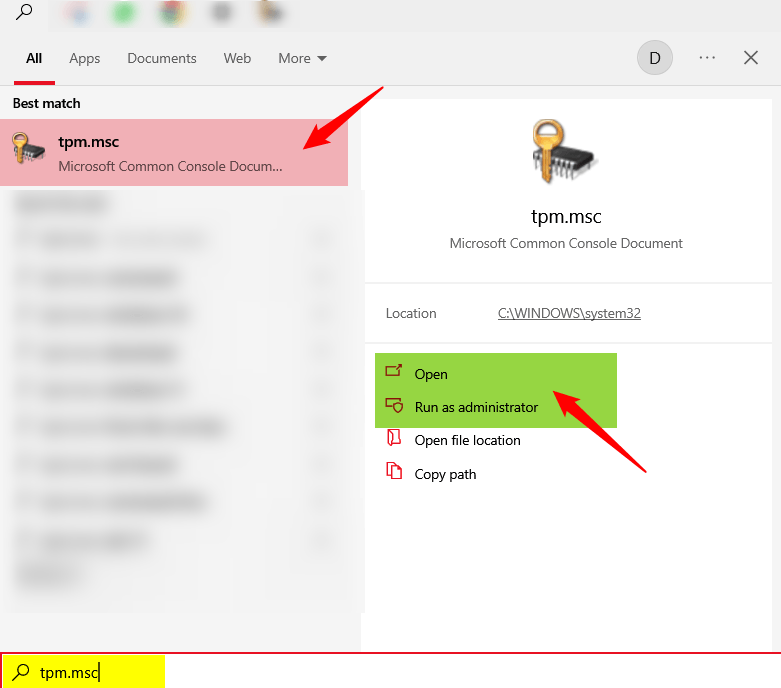
To verify if your PC has TPM support, open the Windows Search, type “tpm.msc” and click the tpm.msc or Open option from the result.
If you see “TPM is ready for use” and Specification Version 2.0 in the TPM Management on Local Computer window, it’s all good. However, if you get the “Compatible TPM cannot be found” warning, try enabling it from the BIOS security options.

- Open Windows Search, type “Recovery Options” in the search box, and select Restart. You can also navigate to Settings > Update & Security > Recovery > Restart now. Alternatively, you can directly access the BIOS settings by restarting the computer normally and pressing the F1, F2 (Dell), F10, or F12 (HP).
- When the recovery options appear on the screen, go to Troubleshoot > Advanced Options > UEFI Firmware Settings and select Restart now.
- Once you see the BIOS settings screen, look for Advanced Security or Trusted Computing. Depending on your PC manufacturer, the option to enable the TPM may be labeled as one of the following:
- Security (Dell/HP)
- Security Chip (Lenovo)
- TPM State
- Security Device Support
- AMD PSP fTPM
- Advanced\AMD fTPM (Asus)
- Advanced\PCH-FW Configuration page (Asus)
- Intel PTT
- Intel Platform Trust Technology
- Enable TPM 2.0, save the changes, and exit the Boot menu.
Now, open the Windows 11 ISO (Win11_English_x64v1.iso) in File Explorer and run the setup.exe to install Windows 11.
Method 4: Install Windows 11 Using Windows 10 Bootable USB Drive
The Regedit method is enough to help you install Windows 11 on unsupported hardware, especially with incompatible CPU and TPM. However, there is another method to trick the installer into thinking it’s installing Windows 10. You can install Windows 11 even if your PC meets the minimum requirements to install Windows 10. Needless to say, the method involves downloading the ISO files for both Windows 10 and Windows 11.
Before you proceed with this method, make sure to have the following things ready.
- Windows 11 ISO file
- A USB drive with at least 8GB of storage space
- Windows 10 Media Creation Tool
- Fast data connection
Once you have the above things ready, create a Windows 10 bootable USB drive.
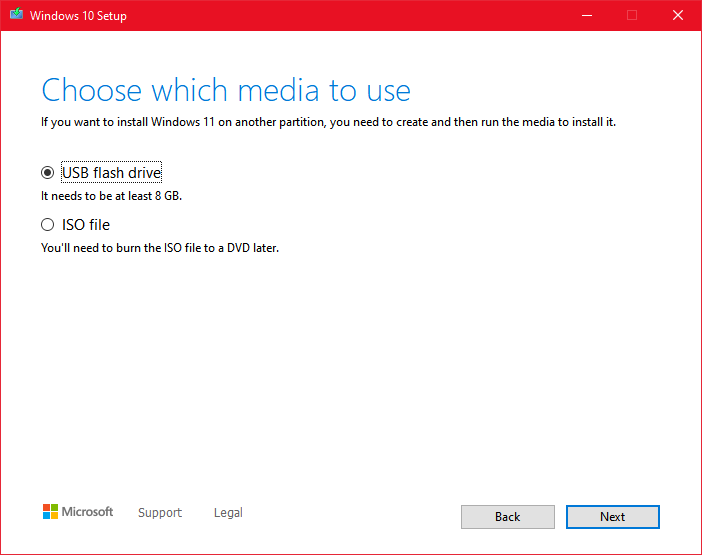
Plug the USB drive into your PC. Keep in mind that any data stored on the USB drive will be erased in the process. Double-click the MediaCreationTool21H2.exe file and select the USB flash drive.
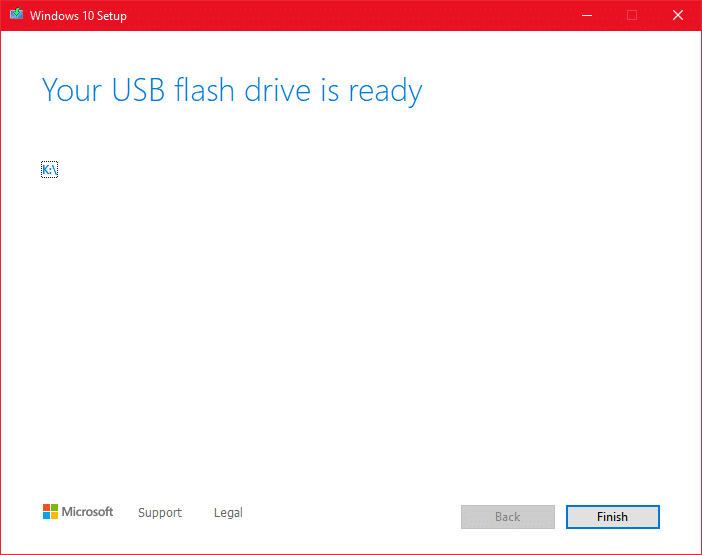
Click Next, agree to the terms and conditions when prompted, and keep clicking the Next button until you reach a point where you get to the finish line saying, “Your USB flash drive is ready“.
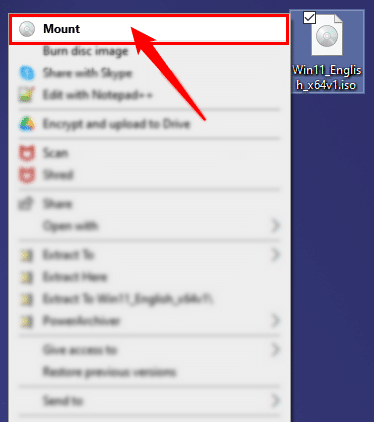
Now that you have created the bootable USB drive, right-click the Windows 11 ISO file (Win11_English_x64v1.iso), select Mount, and click the Open button.
You’ll now have all the files of the Windows 11 ISO in front of you. Open the sources folder, look for a file named ‘install.wim‘, and copy it.
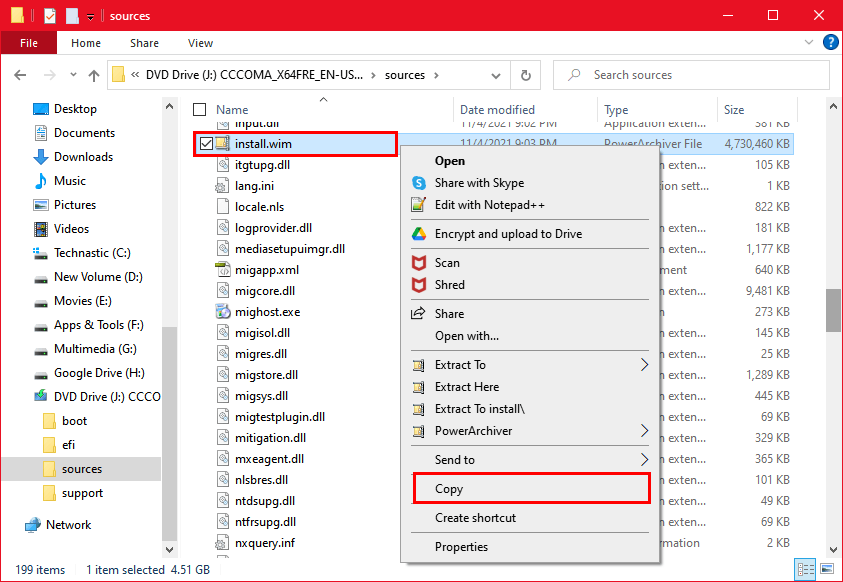
Now, open the Windows 10 USB flash drive in File Explorer and double-click the sources folder. Look for ‘install.esd‘, delete this file, and paste ‘install.wim‘ (from the Windows 11 ISO) you earlier copied into this folder.
Now, go back and right-click the setup.exe file on the bootable USB flash drive and run it as an administrator to install Windows 11 on unsupported hardware from USB.
Method 5: Install Windows 11 without TPM Using Rufus
Rufus is a bootable USB drive creation tool that can help you install Windows 11 on unsupported hardware from a USB without a TPM requirement check. In my opinion, this is the easiest method to install Windows 11 on old PCs that don’t support TPM or secure boot. To use this method, make sure to get the following things ready beforehand:
- Download Rufus
- A USB drive with a minimum 8GB storage capacity
- Windows 11 ISO file
Let’s start now!
- Plug the USB drive into your PC.
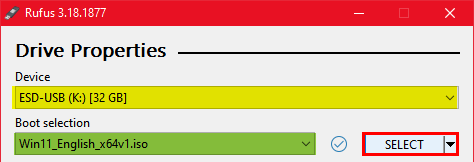
- Launch the Rufus tool as an administrator. The app will automatically detect the USB drive and show it under the Device section.
- Click the Select button, navigate to the Windows 11 ISO file, and add it to Rufus.
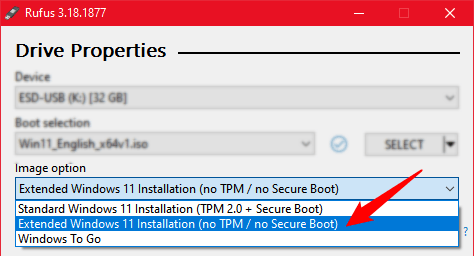
- Click the box under the Image option section and select Extended Windows 11 Installation (no TPM / no Secure Boot).
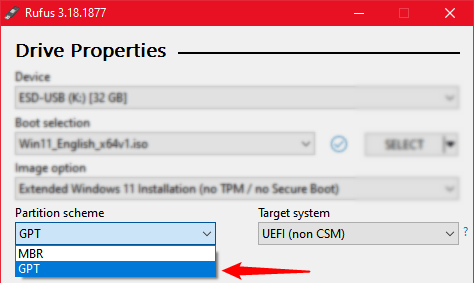
- Click the Partition scheme section and select GPT (GUID Partition Table).
- Finally, check the Rufus window to ensure you’ve configured everything properly. Now, go ahead and click the Start button.
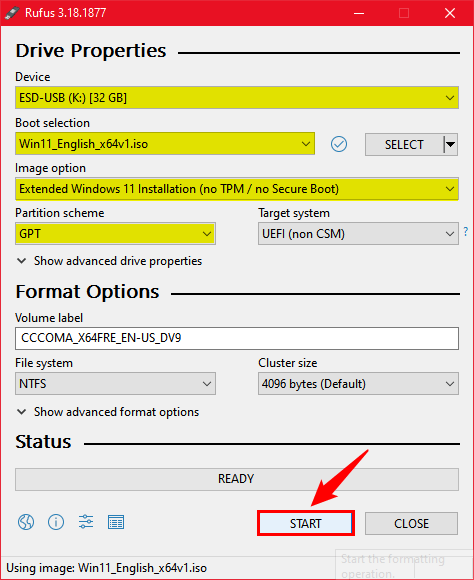
That’s it! Just wait until Rufus finishes creating a Windows 11 bootable USB drive. You can use this bootable USB to install Windows 11 on PCs with no support for TPM and Secure Boot.
When the Windows 11 installation setup launches, follow the on-screen instructions.

Go and grab a cup of coffee, as it’ll take a while for the Windows 11 installation to finish. Enjoy the new user interface and all the new features of the newly installed OS.
Finally, it’s time to wrap up this article. We just discussed 5 workarounds to install Windows 11 on unsupported hardware. You can use the Regedit hack method or create a bootable USB drive without the requirement check using Rufus to get Windows 11 on any PC. Which method did you try? Do share your thoughts with us.