Linux allows users to switch entire desktop environments if they don’t like the default. This is true for any Linux distribution including Ubuntu. For a while, Ubuntu had Unity as the default desktop and now it has switched to GNOME. Neither is very resource-friendly and takes up around 300MB or more RAM. If you have an older PC or a PC with not-so-good hardware GNOME might not be the best performer. A lightweight alternative, the XFCE desktop environment can be useful here and below we’ll see how to install it on Ubuntu.
Let’s be clear though, despite being known for its resource-heavy nature, Ubuntu with GNOME, Unity or even KDE is less demanding compared to other operating system platforms. Chances are if you’re coming from Windows or macOS, installing Ubuntu will do wonders for your aging hardware. In case the default Ubuntu with GNOME is still too much for your system, the XFCE desktop environment is a great choice.
XFCE Desktop Environment
XFCE stands for XForms Common Environment. It is the default desktop environment for Xubuntu, an official lightweight Ubuntu flavor. Xubuntu is lighter than Ubuntu, despite installing XFCE and removing GNOME. It has fewer pre-installed apps and an even lesser number of pre-installed packages.
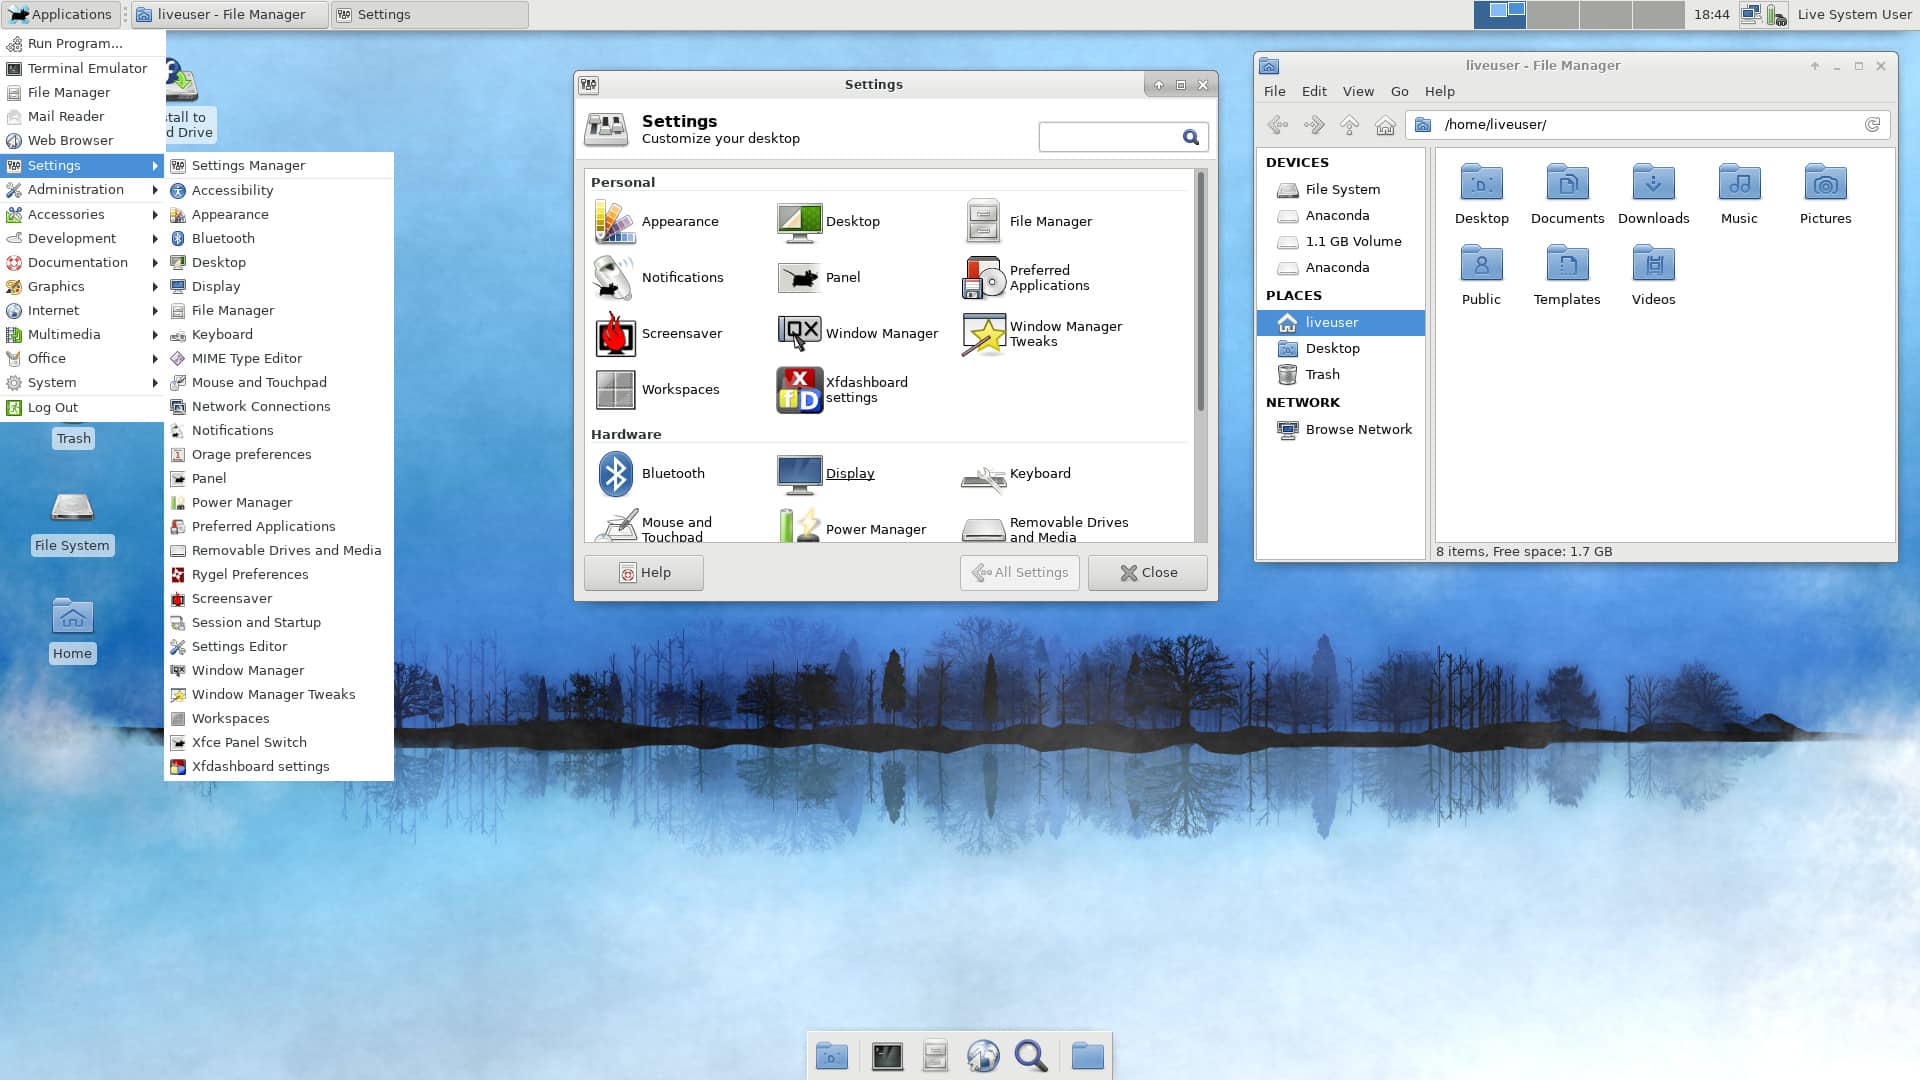
XFCE is based on the GTK toolkit but is not a GNOME fork. It uses the XFWM window manager and its configuration is entirely mouse-driven, with the configuration files hidden from the casual user. By default, XFCE does not feature any desktop animations which is expected because XFCE is lightweight by choice. Animations are one of the biggest draws on system resources.
It does support compositing though so you can always install something like Compiz. Not only can you get animations but even the fanciest of animations that’ll attract anyone’s eyeballs.
When you install XFCE on Ubuntu, you can keep your default desktop so you’re not losing out on anything in case you don’t like XFCE. You can choose which desktop environment to log into during boot. However, once you’ve used XFCE and decided you like it, you’ll probably want to uninstall the older DE (Desktop Environment) if your computer isn’t big on resources. Alternatively, you can try the Unity desktop on Ubuntu 18.04 and 19.04.
Packages installed
The latest version of XFCE is XFCE4 and installing it requires downloading and installing several packages it is dependent on. All this only amounts to about 112MB compared to more than 500MB of packages required for installing something like GNOME. Below is a full list of all the packages that will be downloaded and installed.
- desktop-base exo-utils
- greybird-gtk-theme
- gtk2-engines-xfce
- libbonobo2-0
- libbonobo2-common
- libbonoboui2-0
- libbonoboui2-common
- libexo-1-0
- libexo-2-0
- libexo-common
- libexo-helpers
- libgarcon-1-0
- libgarcon-common
- libglade2-0
- libgnome-2-0
- libgnome2-common
- libgnomecanvas2-0
- libgnomecanvas2-common
- libgnomeui-0
- libgnomeui-commo
- libgnomevfs2-0
- libgnomevfs2-common
- libjpeg-turbo-progs
- libkeybinder-3.0-0
- liborbit-2-0 libthunarx-2-0
- libtumbler-1-0
- libwnck-common
- libwnck22
- libxfce4panel-2.0-4
- libxfce4ui-1-0
- libxfce4ui-2-0
- libxfce4ui-common
- libxfce4ui-utils
- libxfce4util-bin
- libxfce4util-common
- libxfce4util7
- libxfconf-0-2
- orage pavucontrol
- tango-icon-theme
- thunar
- thunar-data
- thunar-volman
- tumbler
- tumbler-common
- xfce4
- xfce4-appfinder
- xfce4-notifyd
- xfce4-panel
- xfce4-pulseaudio-plugin
- xfce4-session
- xfce4-settings
- xfconf
- xfdesktop4
- xfdesktop4-data
- xfwm4
- xscreensaver
- xscreensaver-data
- xubuntu-icon-theme
You can boot into USB whenever you want, you should create a persistent Ubuntu USB drive.
Steps to Install XFCE Desktop on Ubuntu
Installing XFCE desktop on Ubuntu used to require installing the entire Xubuntu desktop packages which was pretty much like installing Xubuntu on top of Ubuntu. That’s not the case anymore and you can install it with a simple command. Launch Terminal and enter the following command.
sudo apt install xfce4You’ll be asked to enter your password and then you’ll need to press ‘y’ on your keyboard to confirm the installation. Once installed, log out of your current desktop session and you’ll be able to select XFCE from the login screen. The selection menu can be located differently on different login managers such as gdm3 or sddm.
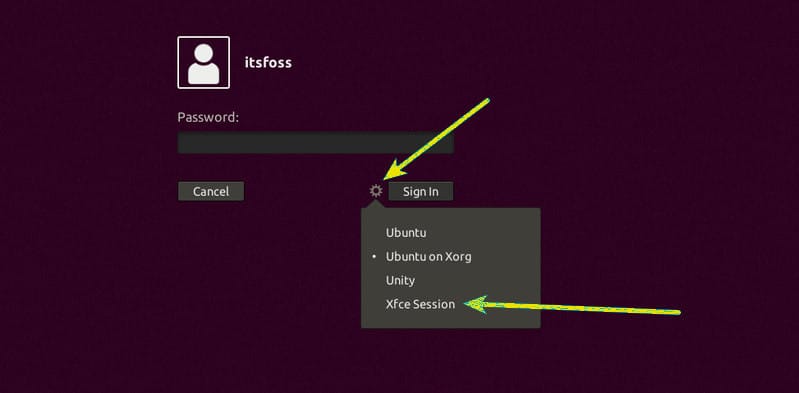
Since GNOME uses gdm3 and it is the default desktop environment on Ubuntu, we’ll assume you probably have the gdm3 login manager installed.

Click the gear icon next to the Sign-in button and select XFCE from the list. You can switch back to GNOME or any other desktop the same way. On your first login, you’ll be asked to choose a configuration. Click Use default config.
You have successfully installed the XFCE DE on your Ubuntu computer. XFCE is not the only option if you are looking for a great-looking DE. Here are 3 great desktop environments for Linux that are lightweight and fast.