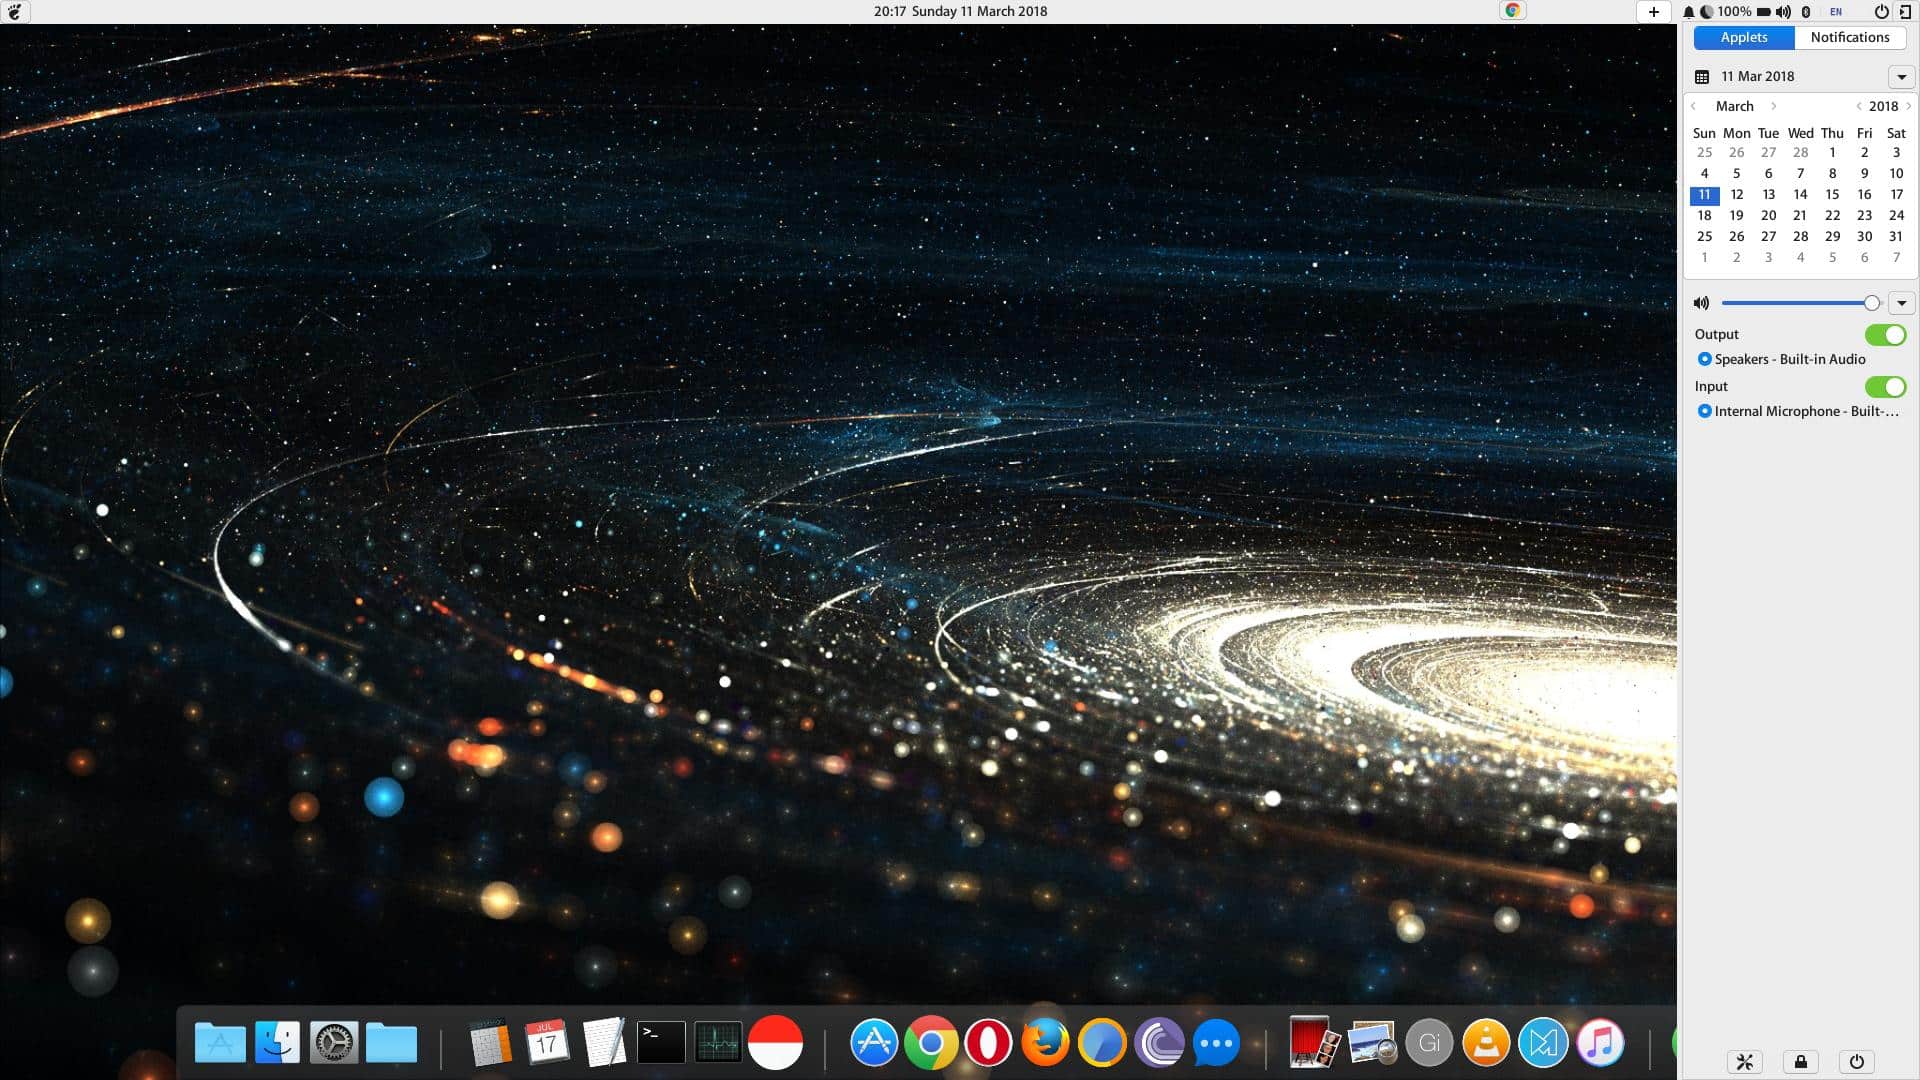
Budgie is a homegrown desktop environment of the Solus project, based on GNOME 3. Due to its growing popularity in the Linux community, it even received an official Ubuntu flavor that ships with Budgie desktop pre-installed. The developers have been working on Budgie 11. It’s a lightweight alternative to the GNOME desktop. Being lightweight, it comes with a few sacrifices. There are also some additions you probably won’t find on GNOME, at least I haven’t.
What’s new in Ubuntu Budgie desktop 10.4
- Budgie 10.4 now makes use of animations while minimizing and maximizing applications.
- Now, the alt+tab switcher prefers the theme icon instead of the X11 icon.
- To go backward in the Alt+Tab dialog, the Shift+Alt+Tab support has been added.
- Budgie 10.4 introduces the Night Light applet for reducing eye strain.
- Places Indicator and Workspace applet have seen multiple improvements. For each workspace, the windows are now represented by icons in a grid layout.
Notable Budgie features
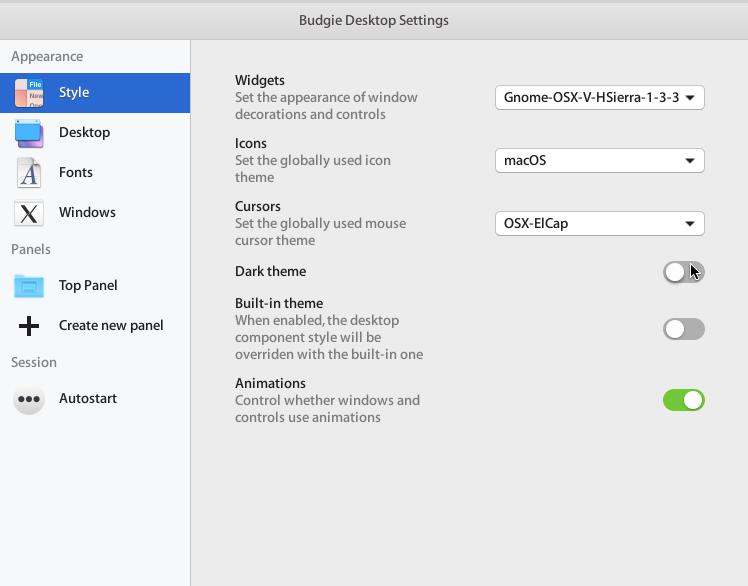
Modifying Budgie’s appearance is easier than GNOME’s. It does not need a separate Tweak tool and allows you to do a fair bit of customization. Clicking the Settings button at the bottom of the Raven Sidebar Control opens up the Settings, not the music player. Budgie has a built-in theme and a dark theme. The built-in theme prevents desktop elements like the panels from being affected by themes and keeps them dark. The themes look nice, but the look is not for everyone. If you’d like to turn these off, you can do so with simple toggles.
There are several things you can change from application themes to fonts, icons, and cursors. It also lets you customize the top panel’s size, make it transparent, add, remove, or move the applets on the top panel, etc. It is no match for the Plasma desktop’s customization, but it is still better than what GNOME or Unity offers. All in all, Budgie is a solid take on a modern Linux desktop. It looks nice even with the default settings, and it works just as well. The applets may not be as flexible as GNOME extensions or Plasma widgets, but that could change as popularity grows.
Installing Budgie Desktop 10.4
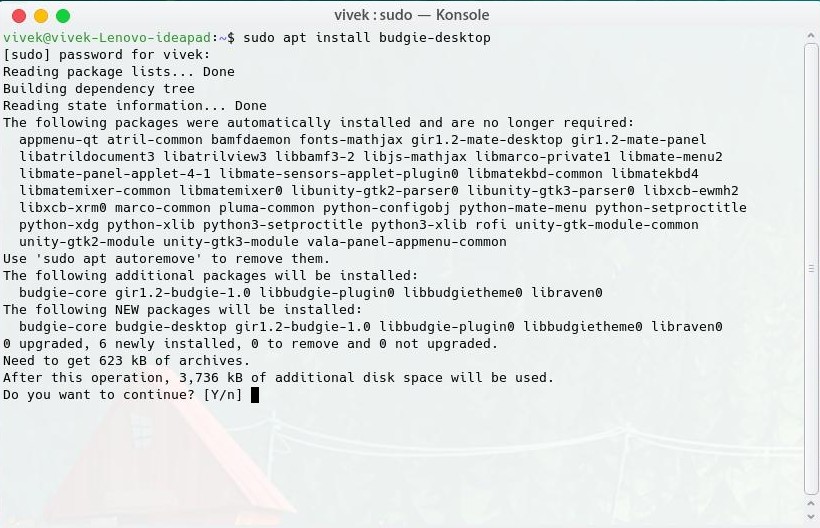
Installing the Ubuntu Budgie desktop is not a hassle if you’re used to Ubuntu by now. You may have used the Terminal plenty of times already to install and uninstall software. Budgie can be installed similarly via the Terminal. Depending on your Ubuntu version, you will need to add a PPA or not. Execute the commands given below one by one, depending on your version of Ubuntu, and follow the on-screen instructions. The first commands add the respective PPAs according to your system version. You’ll be required to enter your password.
The second commands update the list of packages available, and then the third commands install the Bungie desktop package to your system. You might be required to press Y on your keyboard to confirm the installation.
16.04 LTS
sudo add-apt-repository ppa:budgie-remix/ppa
sudo apt update
sudo apt install budgie-desktop
17.04 LTS
sudo add-apt-repository ppa:ubuntubudgie/backports
sudo apt update
sudo apt install budgie-desktop
17.10 LTS
Ubuntu 17.10 already includes Budgie in the official repositories, so you won’t need to rely on PPAs. Simply run the install command and press Y when asked.
sudo apt install budgie-desktop
How to switch to Budgie desktop
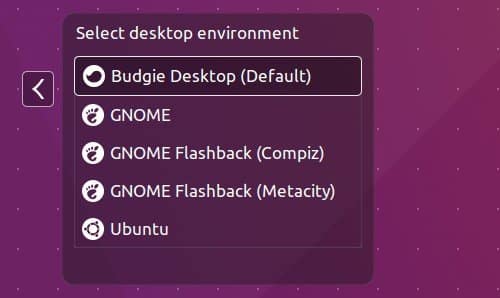
To switch to Budgie desktop, you’ll have to log out of your current desktop session. Click the Ubuntu logo icon next to your username on the login screen and select Budgie Desktop. After that, enter your username and password to log in, and you’ll be greeted with a brand-new desktop environment.
Installation Command
To uninstall Budgie, just run the following command in a Terminal.
sudo apt remove budgie-desktop-environment budgie-desktop && sudo apt autoremove
Recommended for you: How to Enable Flatpak Support in Ubuntu


