GParted is one of the most well-known GUI tools in the Linux world and the most popular partition-managing tool on Linux as well. It’s a free and open-source utility like every other widely used Linux app out there. GParted is written in C++, and being a tool with a GUI, it’s rather easy to use for anyone. The app can be installed on the most popular Linux distros, including Ubuntu, Fedora, Arch Linux, and their derivatives. It’s available to download on the distro’s software center from its official website. Like most partition managers, GParted can help you create and resize unmounted partitions only.
So if you’ve installed GParted on your Linux distro, you can’t work with the partition where your Linux system is installed. So to do that, you’ll need the Live USB version of GParted. Apart from that, the Live USB version and the installable versions are very much the same thing.
GParted basics
- Launch GParted and enter the root password (your password, in most cases) when asked. It will take a few seconds to load up all the necessary information about the mounted or unmounted disks and partitions.
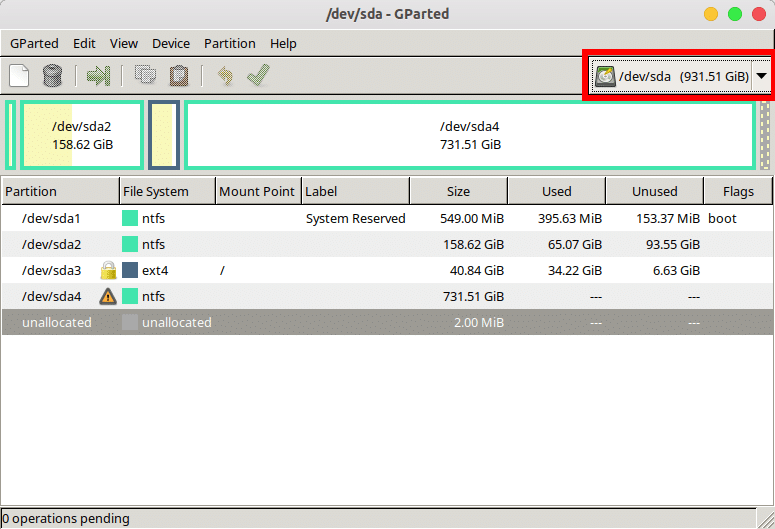
- Select the disk you want to partition from the drop-down menu in the top-right.
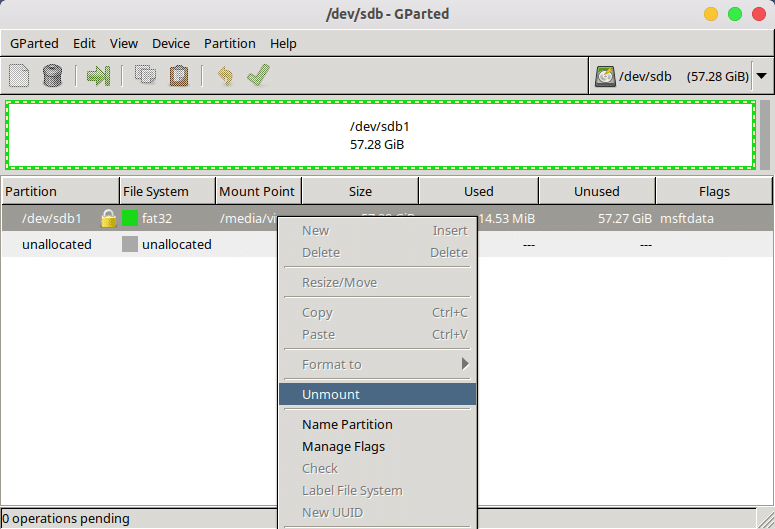
- If you see a lock icon next to a hard disk partition, it means the partition is currently mounted and cannot be resized, deleted, or anything else. To unmount it, right-click on it and select Unmount. The lock should then disappear, allowing you to modify the partition. If you see an error like “Couldn’t unmount..target is busy”, it might be because it’s a live partition that your OS is installed on. This won’t be a problem with a Live USB.
You may also like: How to Backup and Restore Linux Using Timeshift
Create and Resize Partitions with GParted
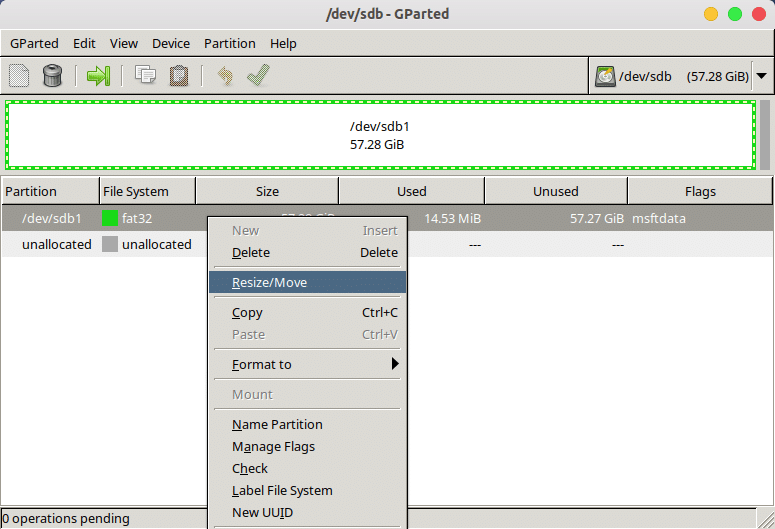
- You can now delete a partition to create a new one in another format or resize the partition. While resizing is relatively safer, you’ll have to make sure you don’t resize enough to delete the stored data. For instance, if you have 4GB of data on a partition, you should probably keep its size well over 4 GB. To resize, right-click it and select Resize/Move.
- GParted lets you drag and resize partitions and input the exact size from the keyboard.
- As you can see in the screenshot below, you can enter any values in the text fields labeled Free space preceding or Free space following. It is generally easier and safer to resize a partition from the tail end. When you’re ready, click on the Resize/Move button.

- You’ll now have an Unallocated partition. It cannot be used until you allocate a file system. This can also be done with a right-click. Select New from the context menu and then enter a size for the partition if you still want to save some space for another partition. You can leave the default size as it is if you intend to use the entire space for the partition. Select a filesystem of your choice and assign a label to it(optional). Click Add when you’re ready.

Apply changes
Everything you do in GParted is only a preview. Click the Apply button at the top to save the changes. Click Close when the changes are applied and you’re done. 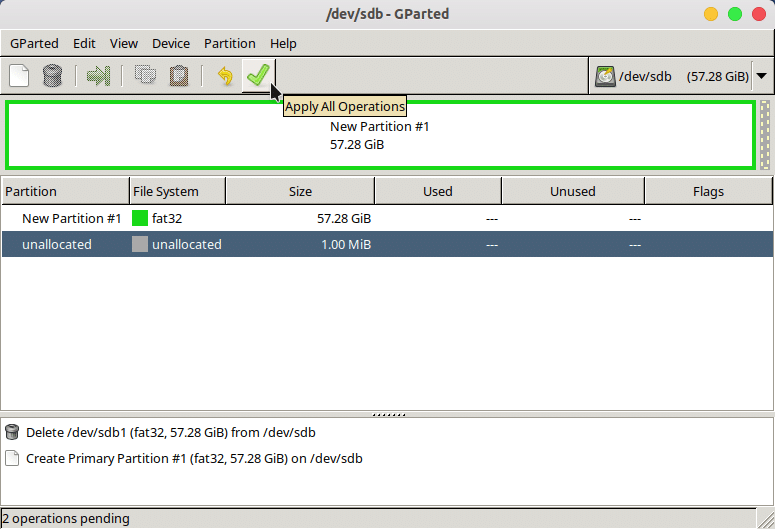
Read on: 5 Popular Mac and Windows Apps Also Available For Linux
