Windows 10 Fall Creator’s Update has been out for a while now. If you haven’t got it yet, you will soon. You can try manually installing the update via Windows 10 Update Assistant. We’ve already discussed several key features of the Fall Creator’s update, leaving out several. Windows is a popular desktop OS used by many people from different countries. Not all of them are physically identical, or capable. This is why alongside the new set of features and changes, the OS has also made improvements that make it more accessible to people with disabilities. Windows 10 Fall Creator’s Update introduces a new feature called color filter.
Color filters can help a color-blind or visually impaired person to better view the display. Users running Windows 10 v1709 or above can choose from various settings to make the screen more readable. Moreover, the color filter works at the system level which means it works for Windows elements and third-party apps. This includes both apps from the Windows store and traditional (Win32) Desktop apps. There are a few ways to apply color filters on Windows 10 and we’re listing them all below.
Use Keyboard Shortcut
Anytime while using your Windows 10 machine, press Windows + Ctrl + C and you’ll immediately notice your screen go black and white. This keyboard shortcut is one of the fastest ways to apply the Grayscale filter. The problem is, that’s the only color filter you can apply using keyboard shortcuts.
Use the Settings App
The Settings app is slowly and gradually replacing the Windows control panel. As such, it makes sense that this is where you should be able to access any of the newer features added to Windows. You can access the Settings app by pressing Windows + I on your keyboard or clicking the gear icon in the Start menu. In Settings, go to Ease of Access > Color & High Contrast. On the right, you’ll find a toggle labeled, Apply color filter. Below is a drop-down menu labeled Choose a filter with Grayscale as the default option.
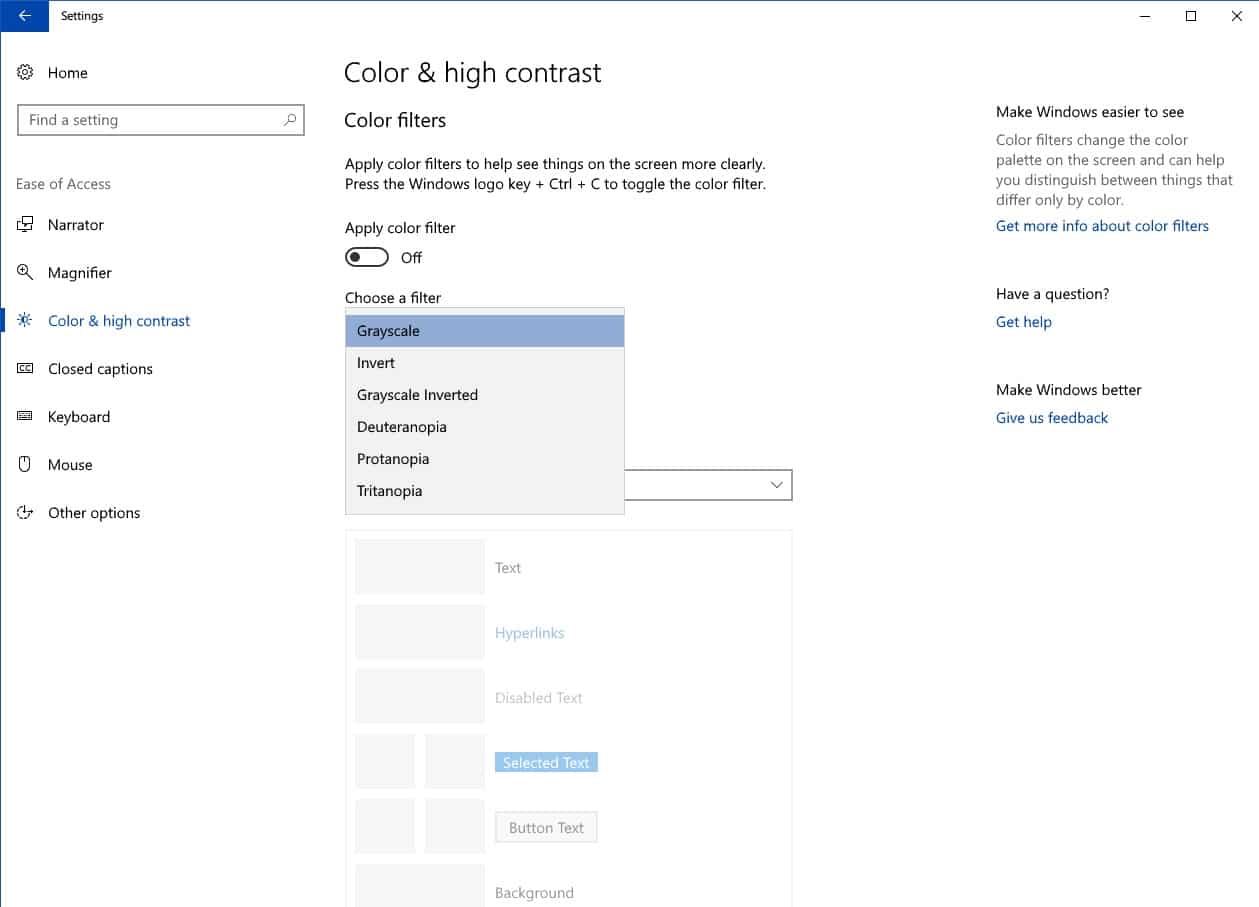
You can select these filters from the drop-down menu:
- Grayscale
- Invert
- Grayscale Inverted
- Deuteranopia
- Protanopia
- Tritanopia
Each of these is for a different set of conditions. For instance, the Deuteranopia, Protanopia, and Tritanopia filters are different types of color blindness.
Use Registry Editor
This is a Registry editor tweak to do this but we’ll leave it here anyway. To apply color filters using the registry, open Registry Editor by pressing Windows + R on your keyboard. In the Run dialog that appears, type regedit and hit Enter. In the Registry Editor, navigate to:
Computer\HKEY_CURRENT_USER\Software\Microsoft\ColorFiltering
On the right side, you will find two keys – Active and FilterType. If you’ve never applied any filter other than Grayscale before, you may not see the FilterType key.
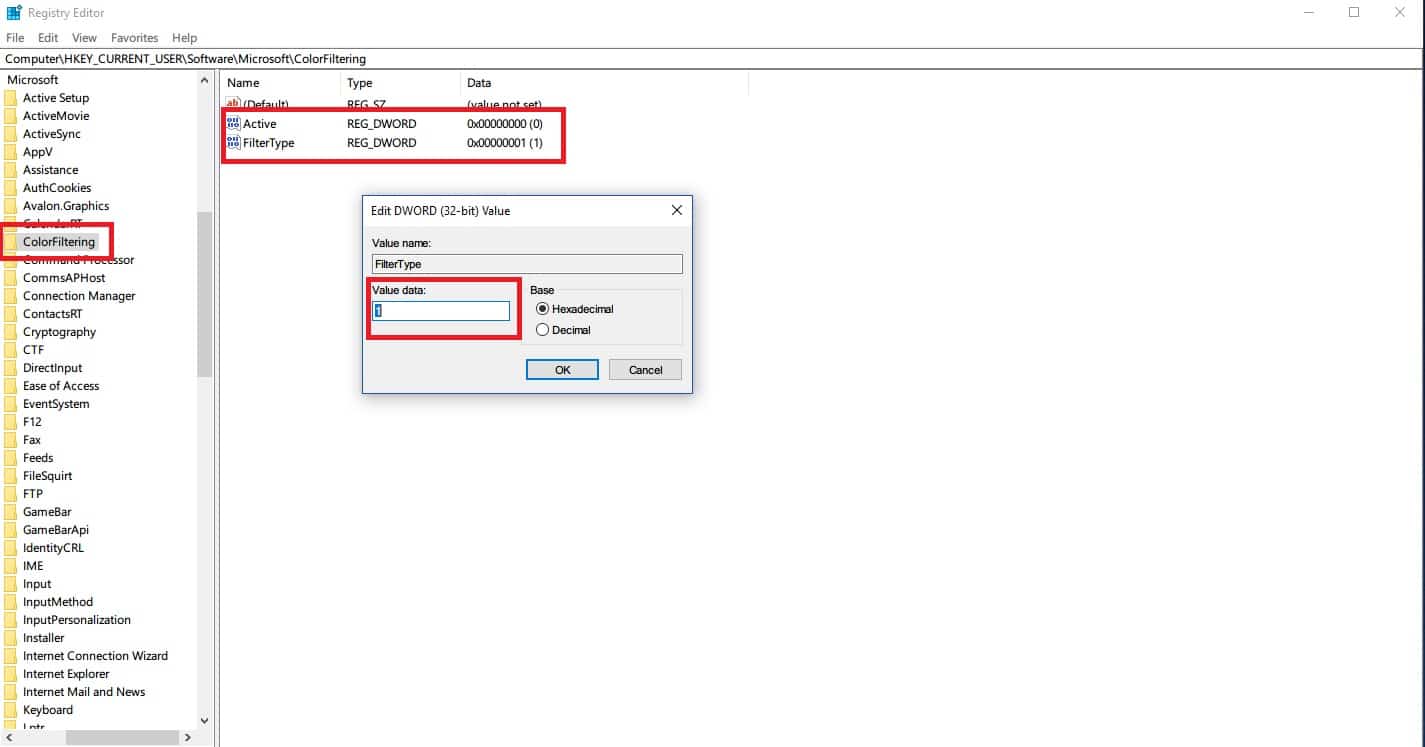
Double-click on the Active key and change the entry in the Value data field from 0 to 1. Then double-click the FilterType key, change the Value data to anything from 0 to 5, and click OK. The corresponding color filter will be activated.
- 0 = Grayscale
- 1 = Invert
- 2 = Greyscale Inverted
- 3 = Deuteranopia
- 4 = Protanopia
- 5 = Tritanopia