Windows Vista was more than just unsuccessful. This does not mean the buggy ride had no positives. Windows Vista’s aesthetics stuck around in Windows 7. Desktop Gadgets, what we’d today call widgets thanks to the popularity of Android, were also introduced with Windows Vista. Windows 7 too had a few desktop gadgets, although quite limited in number. Windows desktop gadgets did not become very popular but many people love them.
With Windows 8 and now Windows 10, Microsoft completely killed these. Luckily, Windows is quite popular and there’s no lack of third-party support. With 8GadgetPack you can relive those days while still sticking to the modern Windows 10 experience. Let’s see how we can add desktop gadgets to the Windows 10 desktop.
8GadgetPack is a freeware that adds the original Windows gadget-related files and registry settings to your Windows 10 system. It also brings around 27 popular desktop gadgets with it. Your gadgets can freely float around anywhere on the desktop. But if you’re like me you’d rather keep them organized and assign them a dedicated space, as in a sidebar. 8GadgetPack also includes that among other gadgets. 8GadgetPack was originally made for Windows 8, hence the name but it has been updated to work with Windows 10. I can run it without any hiccups on my Windows 10 v1709.
You customize your Windows desktop with Rainmeter. Here are 5 best Rainmeter skins to give your Windows 10 a modern look.
Add Sidebar & Gadgets
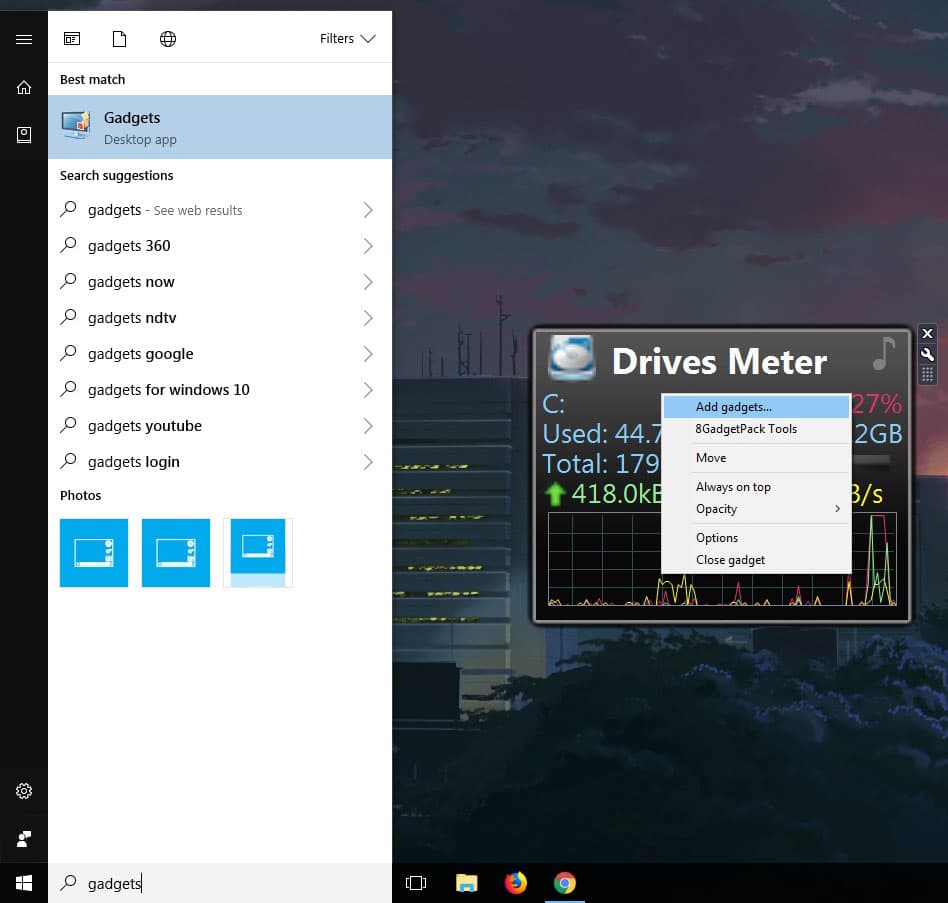
If you’ve done this on Windows Vista or Windows 7 things should be quite familiar. When you install 8GadgetPack, let it run after the setup exits. This will load up a bunch of desktop gadgets you can move around or remove. To add a gadget, right-click an existing gadget and select Add gadgets… or search for Gadgets using the Windows 10 search.
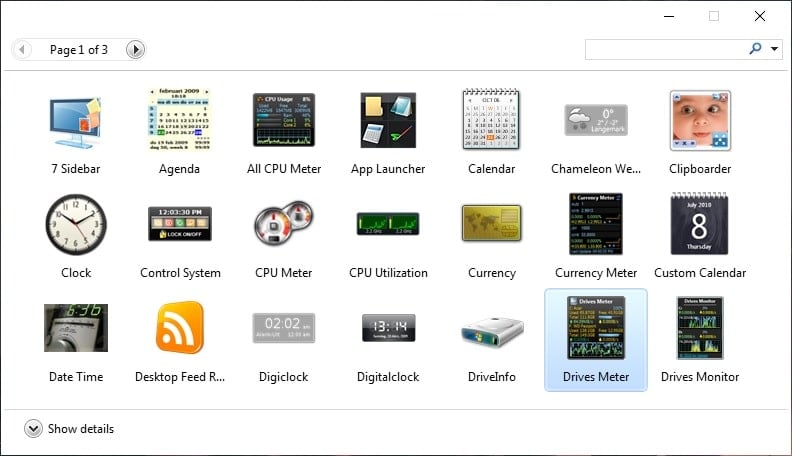
This will launch the Gadgets gallery where you can drag and drop gadgets onto your desktop. The sidebar is listed as a Gadget as the very first entry (7 Sidebar) which you can also drag and drop onto your desktop.
The sidebar is quite limited in space, vertically but it contains different pages that you can add gadgets to. To create a new page, simply keep on adding gadgets to the sidebar until the page is full. The next gadget you add will push the bottom-most one to another page.
Modify or remove Gadgets
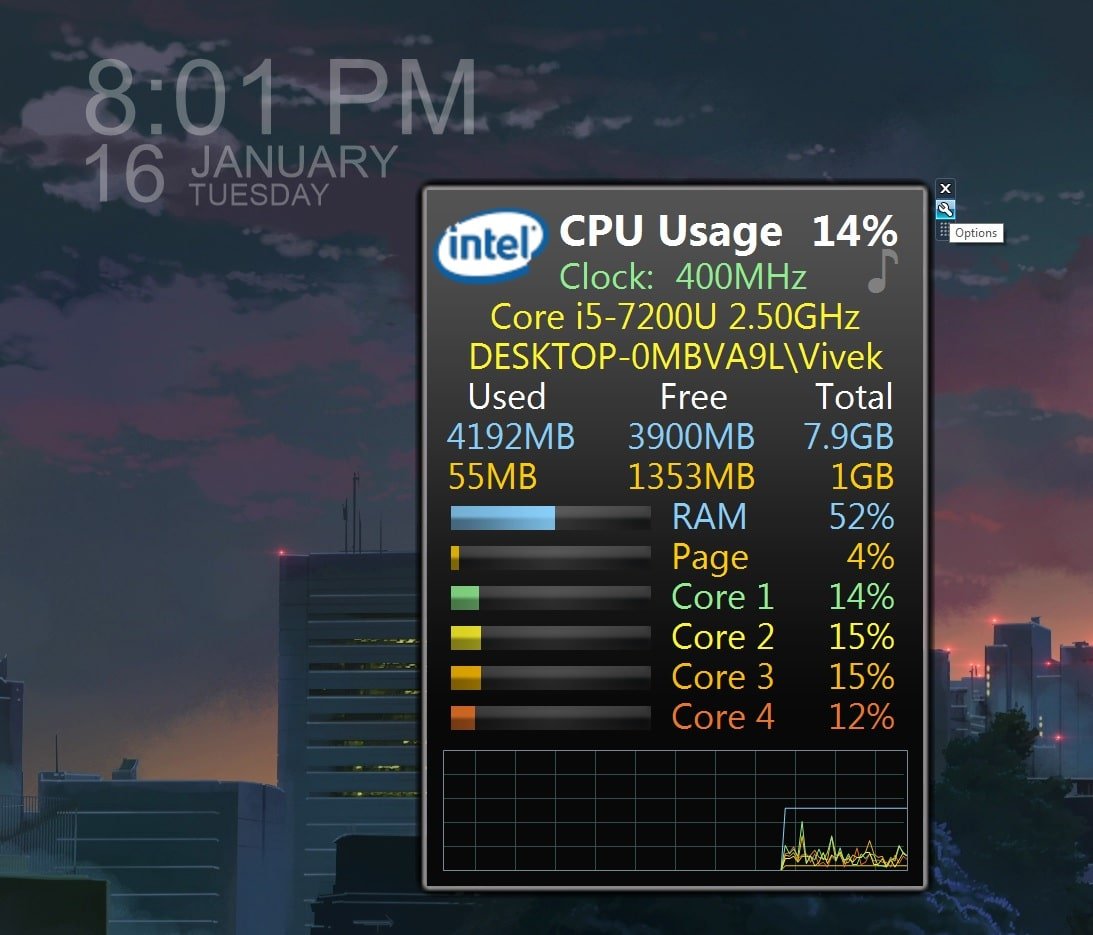
When you hover the mouse over any gadget, you’ll see three buttons appear in the top-right corner. The X will close the widget and the wrench icon lets you configure or modify the widget. There are many things you can do to a widget depending on what the widget is. Perhaps the setting you will use the most is the Size found under the Display tab. You can make a gadget up to 400% bigger in size.
Although 8GadgetPack might not be Rainmeter, there is still plenty that you can do with the available Gadgets. I’ve never been a fan of desktop gadgets mainly because of their 3D style and overall clunkiness.
Better than Rainmeter?
Let’s address the elephant in the room. Rainmeter is much more flexible but a lot less user-friendly. You know how you can let your imagination run wild with Rainmeter. With 8GadgetPack you can only do so much as add pre-built gadgets and modify them. That’s not necessarily a bad thing though. Remember, this makes 8GadgetPack much easier to use than Rainmeter.
The sidebar is dynamic which is one of my favorite things about 8GadgetPack. It is dynamic, meaning it expands automatically if you increase the size of a gadget. The clipboard widget is my favorite of the bunch.
If you’re someone who has tried Rainmeter and found it to be a little overwhelming, you should give 8GadgetPack a spin to add desktop gadgets to Windows 10.
Read Next: Enjoy macOS Cursors on your Windows 10 PC


