So you’ve got that new iPad, or maybe an old one, but you’re new to it anyway. I know I was, coming from Android and landing straight on iOS. It’s an open world vs closed walls kind of a difference. Not all is bad behind the closed walls, and there are plenty of things to keep you entertained, so you’d never wish to go out. iOS places a lot of restrictions on what you can use and how. However, there are also some pretty nifty features hidden and invisible that are useful once you learn about them. So here are 5 iPad tips and tricks to help you use your iPad like a pro.
1. Scroll to top
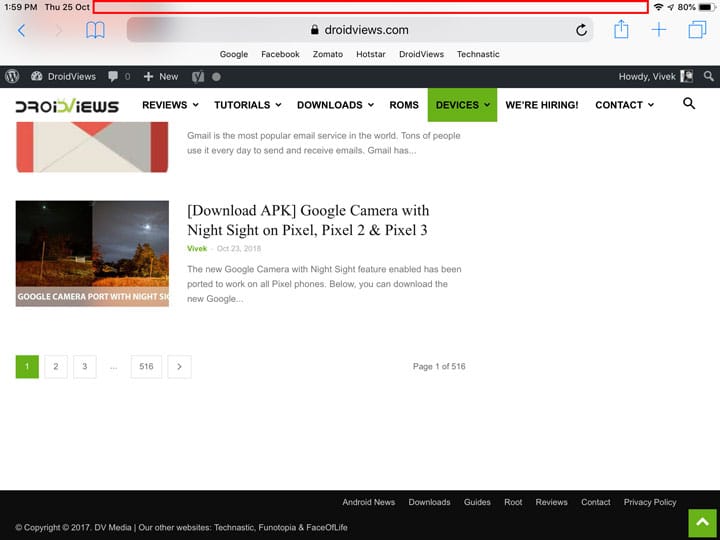
We do a lot of scrolling on our devices, sometimes a little too much. Have you ever scrolled through a long list or a long web page only to then want to go back to the top? I’m sure you have, we all have. On an iPad or any iOS device in general, all you have to do is tap at the very top of your screen. This works most of the time, regardless of which app you’re in. It works inside Safari, even Chrome, in the music player, Settings, and almost any app.
2. The virtual touchpad
While we’re on the subject of scrolling, how about scrolling through text? Touch screens and your fingers are great for general-purpose use, but when it comes to accuracy, your big, fat fingers aren’t very efficient. This is why there is no replacement for a mouse and keyboard setup in computing. The iPad does offer a pretty big screen. Apple is also trying to sell it off as a more productive tool that can compete with laptops.
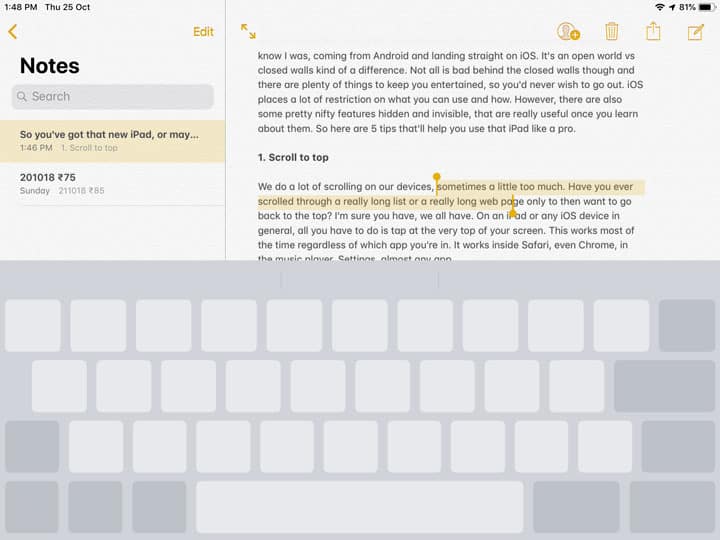
So it makes sense that you would want to be productive on the go with your iPad. If you’re someone who uses it to type emails, scripts, blogs, or anything else, you’d appreciate this little tip. If you tap the virtual keyboard with two or more fingers, it changes into a virtual touchpad. Without lifting your fingers, you can drag them left and right to move the cursor or select text.
3. Request Desktop Site on Safari
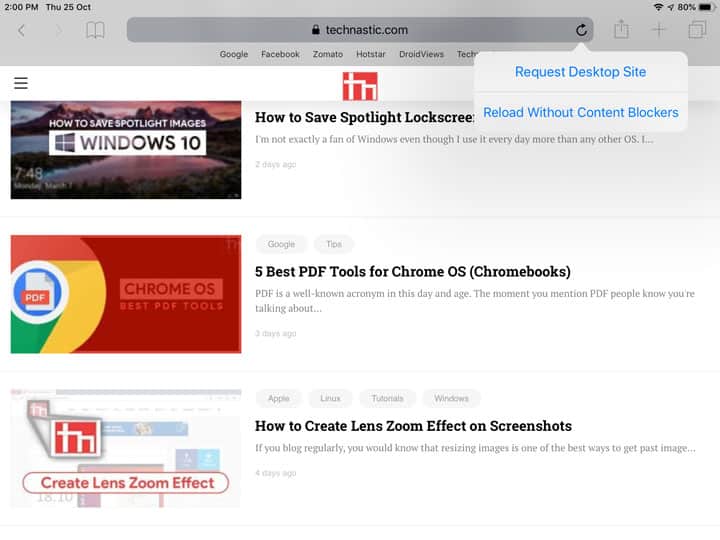
I’m a Google guy through and through. But on the iPad, Safari looks way better than Google Chrome with all its blurriness and thin icons. It even gets out of the way when you scroll by shrinking the title bar at the top. Newer versions of Chrome now do that too, but it still has nothing like that blur. However, no menu button on Safari lets you access some cool and useful browser features like Chrome. When you have that huge a screen, you don’t want to be browsing mobile websites, for example. Turns out, Safari does have the option to Request a Desktop Site, it’s just not as visible as it is on Chrome. To get to it, you have to long-press on the reload button in the title bar.
Related post: How to Enable Parental Controls on iPhone or iPod
4. Let your iPad read the text for you
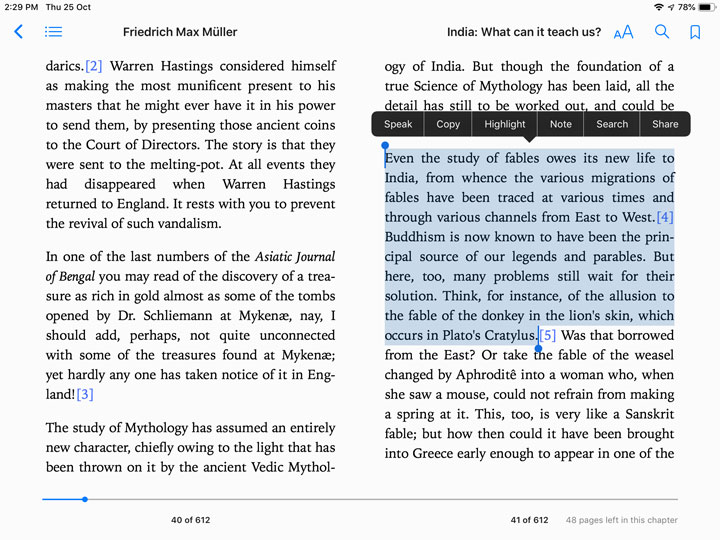
Your iPad can read the selected text for you or even everything on the entire screen. It’s useful when you have a book that’s not an audiobook, but you’d still want it read to you instead. Staring at your screen at night isn’t good for your eyes either. Before you can start using this feature, you’ll have to enable it in Settings > General > Accessibility > Speech. Here, turn on Speak Selection. If you prefer, you can also turn on the Speak Screen. The former adds an option to speak the text you’ve selected, while the latter can read your entire screen when you swipe down from the top of the screen with two fingers.
5. Multitasking Gestures
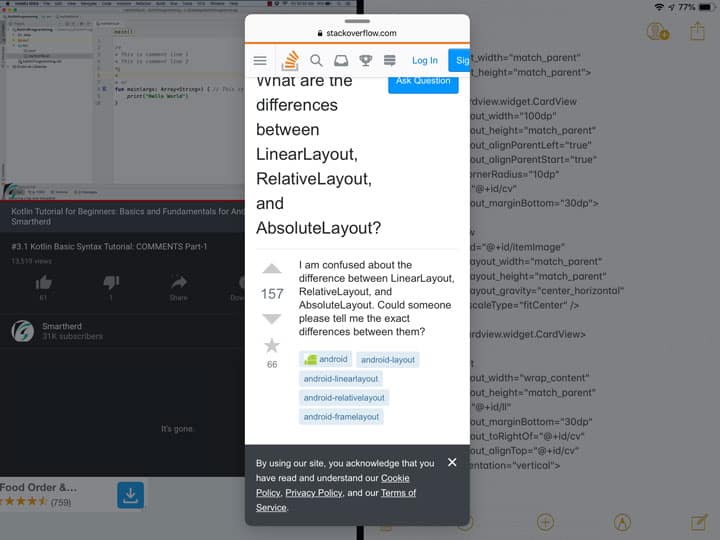
Since Apple started pitching the iPad as a Microsoft Surface competitor, Apple has released several multitasking features in subsequent iOS updates for the iPad. Right now, with iOS 12.0.1, the iPad lets you run two apps side by side and another on top of them. Two launch two apps side by side, tap and hold onto one app on your home screen, and then open another app using another finger. Then you can drag and drop the first app anywhere to the left or right to open both apps in split-view. You can also open a split view when you’re inside an app. Swipe up from the bottom slowly to bring up the dock, then drag an app icon from the dock to the left or right of the screen to open it in split view with the app already on your screen.
You can also add an app as a floating window above any app or any two apps in split view by dragging it and dropping it anywhere in the center instead of the left or right of your screen. Swipe down from the title bar of this floating app window, and it will slide back into the split view. Swipe down again, and it comes back up as a floating window.
You can find the setting to disable them in Settings > General > Multitasking Gestures. These are enabled by default.
So, here ends our small list of iPad tips and tricks. We’ll soon come up with some tips for advanced users. Stay tuned!
