Unwanted preinstalled apps have always been a matter of concern for Windows users. The way Windows handles user data and permissions makes you feel like you’re not fully in control. Scripts like Win11Debloat make it easy to remove those unwanted apps. Win11Debloat is a powerful script that removes unnecessary apps, disables annoying telemetry services, and eliminates digital cruft on Windows 11.
This guide will walk you through running Win11Debloat safely via PowerShell, selecting the right settings, and taking important precautions before making these changes. Depending of what mode you select, the debloater script will turn your bloated Windows 11 PC into a leaner and faster machine without unnecessary junk.
Win11Debloat Script
Win11Debloat is a lightweight script that works via PowerShell. It performs several heavy tasks without making any major changes to the Windows 11 system. It’s technically safer to use as compared to other bloatware removal tools for Windows. Apart from removing Windows 11 bloatware apps that hog system resources but offer minimal value in return, the script disables various unnecessary things to give you a clutter-free experience.
Win11Debloat Script offers 3 modes that let you choose how you want to tweak your computer.
- Default mode: Apply the default settings
- Custom mode: Modify the script to your needs
- App removal mode: Select & remove apps, without making other changes
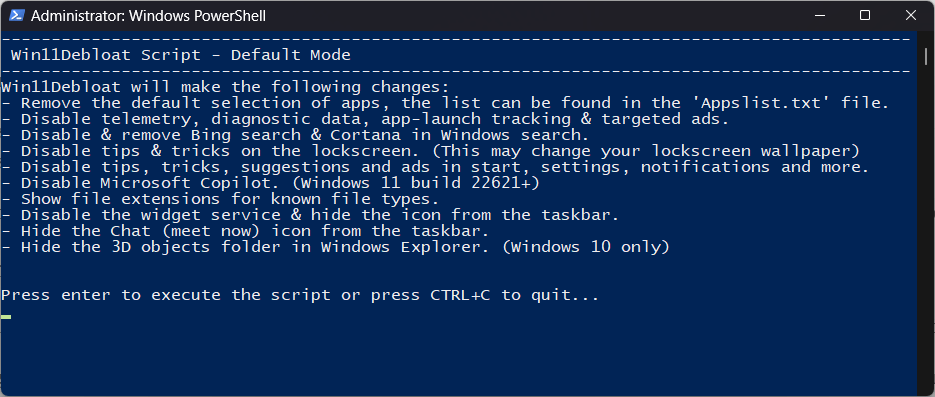
In the Default mode, Win11Debloat disables the following items.
- Telemetry, diagnostic data, and activity history.
- App-launch tracking & targeted ads.
- Tips, suggestions, and ads in Start menu, lockscreen, and notifications.
- Bing web search & Cortana from Windows search.
- Microsoft Copilot.
- Widget service.
- Chat icon from the taskbar.
The script can do more when you run the Custom Mode. Please note that Windows can restore removed apps and enable disabled features with future system updates. That’s why you might need to run the script again after every update. Cleaning the cache on Windows 11 can further make your PC snappier.
Debloating Windows 11 with Win11Debloat Script
Before you start removing bloatware from Windows 11, you need to take a few precautions. Debloating modifies system files and removes pre-installed apps, so these safety steps ensure you can recover if something goes wrong.
- Back up important files
- Create a system restore point
Now that your system is properly backed up, let’s get to the actual cleaning process. The good news is that using Win11Debloat isn’t complicated once you know what you’re doing. The entire process takes just a few minutes, and the results are worth the small effort involved.
Open PowerShell as Administrator
Win11Debloat needs administrator privileges to make changes to your system. Here’s how to launch PowerShell with the right permissions:
- Press the Win + X keyboard shortcut.
- Select Terminal (Admin) from the menu that appears.
- Click Yes when the User Account Control prompt asks if you want to allow changes.
If you can’t find Terminal in the menu, you can always search for “PowerShell” in the Start menu, right-click it, and select Run as administrator.
Run the Win11Debloat script
With PowerShell now open with administrator privileges, you need to download and run the script. Copy and paste this exact command into PowerShell:
& ([scriptblock]::Create((irm "https://debloat.raphi.re/")))
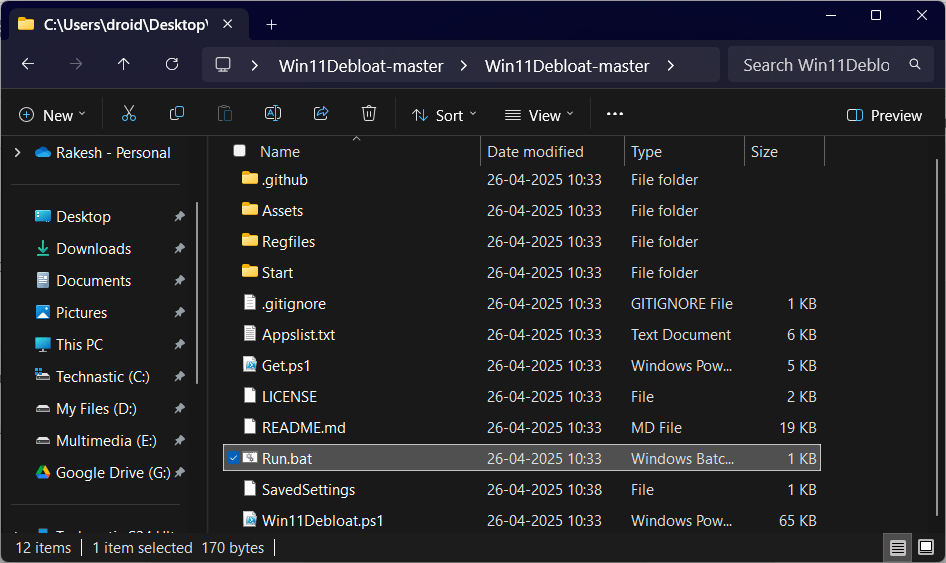
Hit Enter to download the script automatically. Once complete, a new PowerShell window will open showing the Win11Debloat menu with several options. Alternatively, you can download the Win11Debloat script manually and double-click the run.bat file to launch the debloater menu in PowerShell.
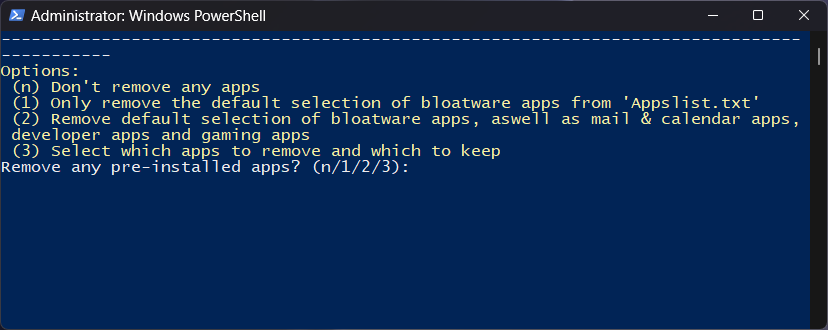
Choose the Default Mode for Safe Debloating
When Win11Debloat launches, you’ll see different operation modes. For most users, the Default mode is the safest bet.
Simply type 1 and press Enter to select Default mode. This balanced option removes common bloatware while keeping essential system functionality intact. It disables telemetry, tips, suggestions, and those annoying ads throughout Windows 11 without breaking anything important.
Take a moment to review the list of changes the script will make. If everything looks good, press Enter to confirm and start the cleaning process.
For a more extensive bloatware removal on your Windows 11 PC, you can go with the Custom mode.
Restart your PC after Completion
The debloating process typically takes less than a minute to complete, much faster than you might expect for something so effective. After that, restart your PC so all the changes can take proper effect. When your PC boots back up, you’ll immediately notice a cleaner, more responsive Windows 11 experience without all that bloatware slowing things down. The difference can be particularly dramatic on older or budget PCs with limited resources.
How to Re-enable Disabled Features
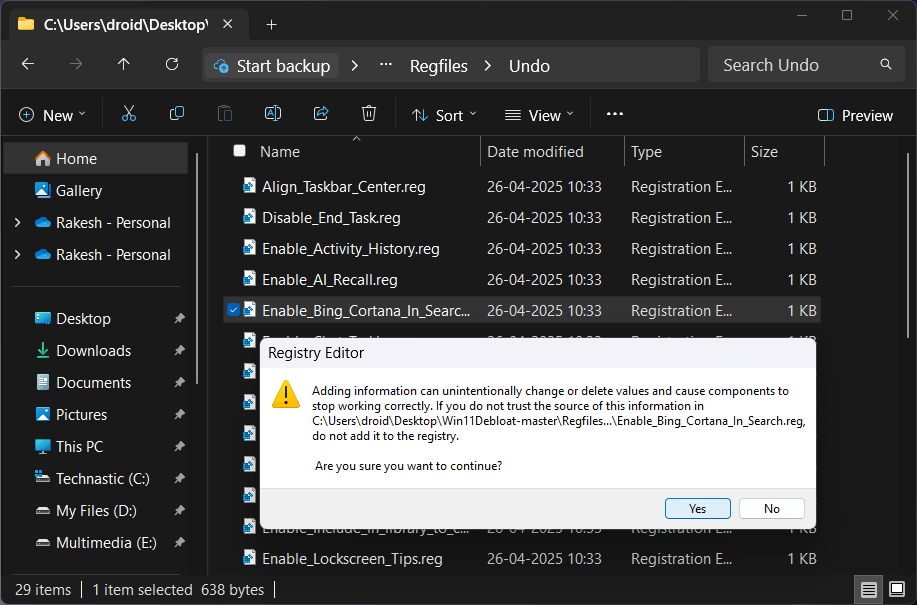
One of Win11Debloat’s better design choices is providing methods to reverse its changes if you change your mind. Also, it’s easy to revert the changes made by Win11Debloat. The script thoughtfully includes registry files that can reverse specific changes. You can find these in the Win11Debloat > Regfiles > Undo folder. Double-click a Reg file and select Yes when prompted to re-enable the feature.
Debloating Windows 11 with Win11Debloat solves a problem that Microsoft pretends doesn’t exist. Your computer should work for you, not for the companies trying to push their software onto your system. By removing this digital bloat, you’re taking back control of your PC and enjoying the performance you paid for.