Since Microsoft’s new CEO took office, the company has had a more inclusive approach toward competition. Instead of being hostile, the company is embracing rival platforms. We can see this with Microsoft developing apps for Android and iOS. Of course, the company does expect to benefit from it too. Similarly, Microsoft has recently been involved in several open-source projects on GitHub that they eventually ended up buying. They even managed to bring Ubuntu on Windows 10 with the anniversary update earlier.
Full-fledged Ubuntu on Windows?
With the Fall Creator’s update, several other Linux distros such as OpenSUSE have been added to the list. If you love Linux but miss the incredible third-party app support of Windows, this was a piece of exciting news. Before you get any ideas, you cannot run a full-fledged Linux operating system on Windows 10. That would be like committing suicide if Microsoft allowed users to do that. But what you can do is use bash or other Linux command-line shells.
To be more precise, this news has no implications for the end-users. It is huge for developers who were torn between the command line powers of Linux and the GUI app support of Windows. However, that doesn’t mean you cannot have a bit of fun using the Linux command line on Windows 10, even if you’re just an enthusiast. You can always run an Ubuntu virtual machine on Windows 10. It gives you a complete Linux desktop experience, but virtualization requires a lot of resources. It still doesn’t offer the same performance.
So instead, Windows 10 offers a full Windows Subsystem intended for Linux for running Linux software. It’s based on Microsoft’s abandoned Project Astoria work for running Android apps on Windows. This is like Wine, a program that lets you run Windows apps on Linux. Except this lets you run Linux apps on Windows, even some GUI apps if you know how.
Install the Windows Subsystem for Linux
Before you go ahead with installing any of the available Linux distros, you’ll need to enable the Windows subsystem for Linux. Enabling it is pretty easy especially if you’ve been using Linux. All it takes is a simple command through Windows Powershell. Launch Powershell as an administrator and enter this command:
Enable-WindowsOptionalFeature -Online -FeatureName Microsoft-Windows-Subsystem-Linux
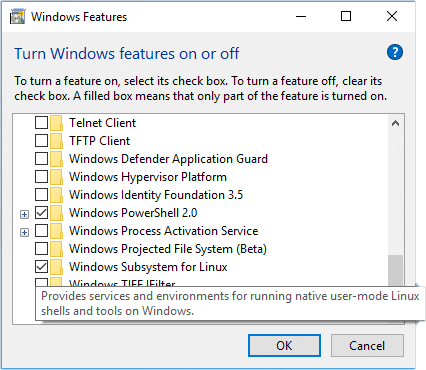
Then restart your computer when prompted. Alternatively, you can enable this via the GUI way. Search for Turn Windows features on or off in the start menu and launch it. Check the box next to Windows Subsystem for Linux and click OK. Reboot your computer and you’re good to go.
Install Ubuntu on Windows 10
Ubuntu and several other Linux distributions are available right on the Microsoft Store. This makes installation as easy as it gets. Head to any of the distros pages on the Microsoft Store and click Get. That’s all. Here are links directly to the store installers for each distribution:
Note
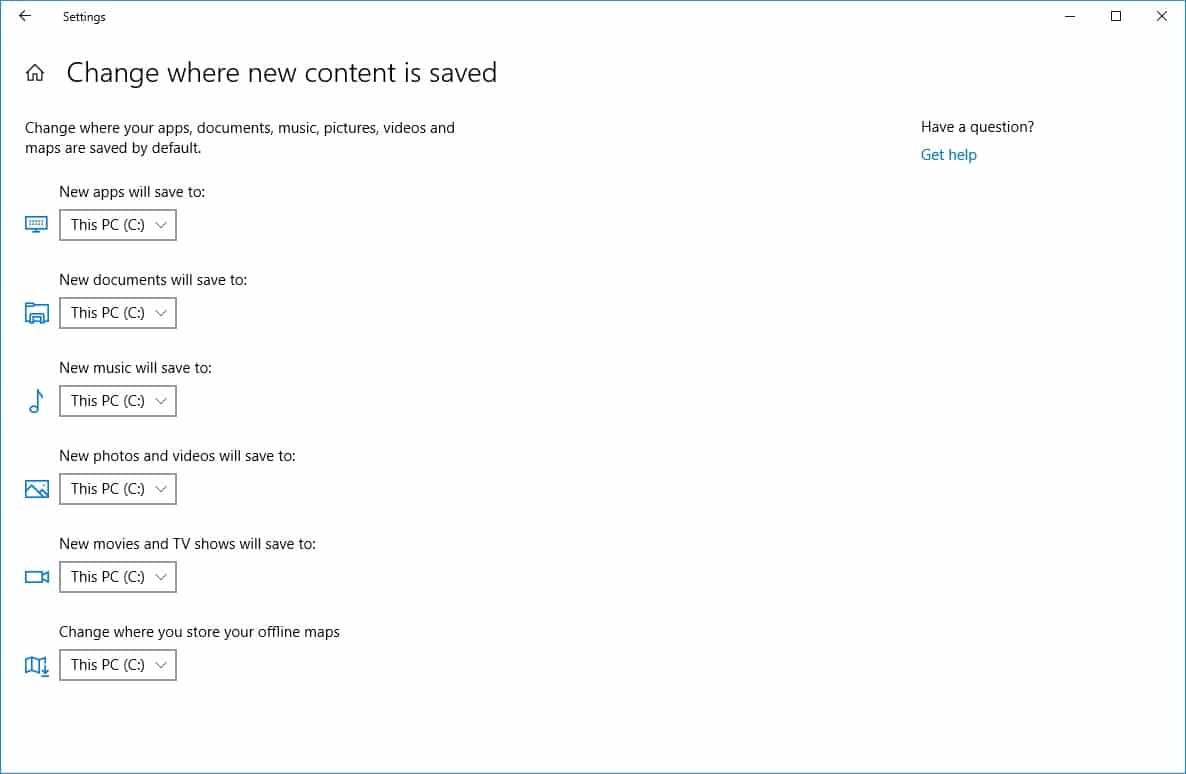
The Windows Subsystem for Linux only runs on your system drive (usually this is your C: drive). Make sure that new apps are stored on your system drive. If you get an Installation failed with error 0x80070003 message, it’s quite likely that this setting is not quite right for your PC. Open Settings > System > Storage. Scroll down and click Change where new content is saved under More Storage Settings.
Some things you can do with Ubuntu on Windows 10
Installing software with apt-get
Software distribution on Linux happens via repositories. You could consider them app stores of sorts. Most Linux distros maintain different repositories and many developers maintain their little stores called PPAs. apt-get is the command you can use to get software packages from one of these repositories on Ubuntu. apt-cache search app_name will search the repository for whatever you’re looking for. When you’ve found it, you can install it using sudo apt-get install app_name.
On newer versions of Ubuntu, simply using sudo apt install app_name will also work just fine.
Editing files in the Command Prompt
On Linux, almost everything can be done with the command line including editing files. Apps have their settings and configurations saved in simple text files, no matter how complex they are even if they have a GUI. There are no silly registries to deal with. To appreciate how cool this is, here’s an example. You can change the boot sequence from the command line, by editing a simple text file.
You will need a command-line text editor for this though and some of the best are Vi and Nano. Nano is pretty easy to use too. Just type nano filename to edit that file. Once you’re in Nano, the instructions on how to save, exit, or do other things are written right at the bottom. For instance, Ctrl+X means exit.