In this simple tutorial, we’ll show you how to type the Indian rupee symbol (₹)on Ubuntu with your keyboard. The tutorial below has been written for Ubuntu 18.04 onwards. However, it should also work for any newer or older versions of Ubuntu. This method can also be applied to other Linux distros or other operating systems. The process to get to the keyboard settings can, of course, greatly differ.
The Government of India unveiled a symbol for the Indian currency, the rupee, in 2010. The Unicode character U+20B9, ₹, is an intelligently, creatively crafted symbol for the rupee. It looks like a half R, for the rupee, but it’s also a lot more similar to the Hindi equivalent of the letter R (₹). Over the years, the ₹ sign has started appearing on several keyboards, both in India and internationally. It’s usually placed on the key 4 right along with the $ sign.
How to Type the Indian Rupee Symbol in Ubuntu
Typing the $ sign is pretty easy and can be typed just like any other symbol above the number keys. Press and hold the Shift key and press 4. But how do you type that third ₹ symbol on the key 4? Generally, to type the third symbol on any key, like the € on key 5, you have to press and hold AltGr (the right Alt key) while pressing the button. So to type the ₹ symbol, press and hold AltGr and press the key 4.
Many will find this does nothing on their Ubuntu machines. In that case, you need to change a few things first.
Add Input Source
To be able to type the ₹ symbol on any OS or Linux distro, you need to be using the English India keyboard with the ₹ symbol. Don’t worry, you won’t need to buy a new keyboard. You don’t even need to have the ₹ symbol printed on the number 4 key of your keyboard. Neither do you need a keyboard manufactured after 2010. All you need to do is change the keyboard layout of the operating system.
In Ubuntu GNOME, hit the Windows key or get to the Activities overview screen and type Settings, then launch the Settings app.
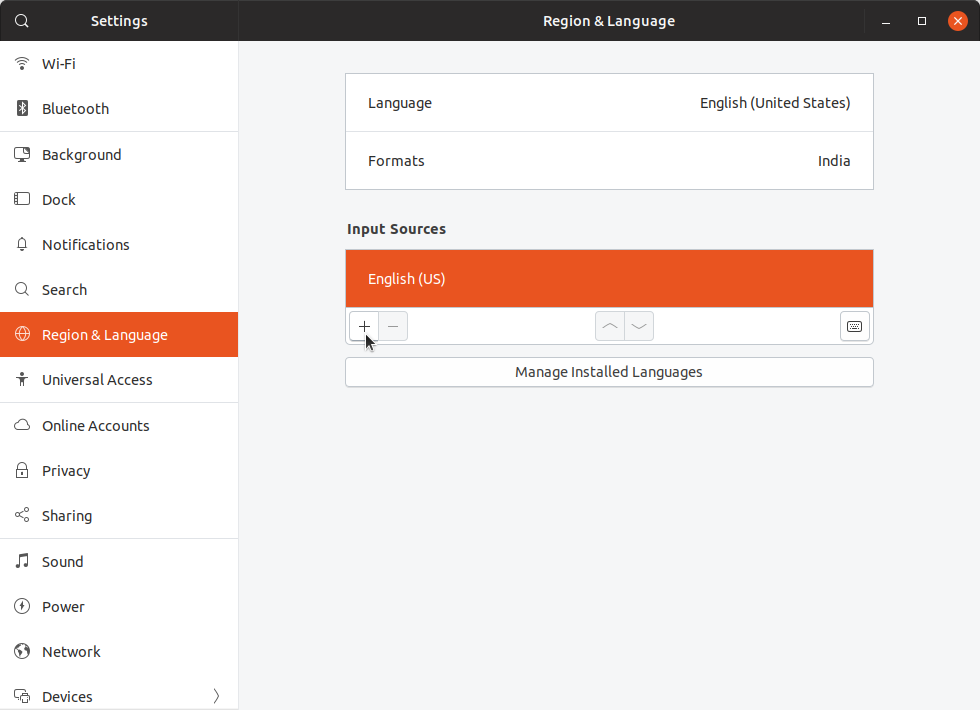
On the left column, click the entry that says Region & Language. On the right side, you will see all the active keyboard layouts under Input Sources.
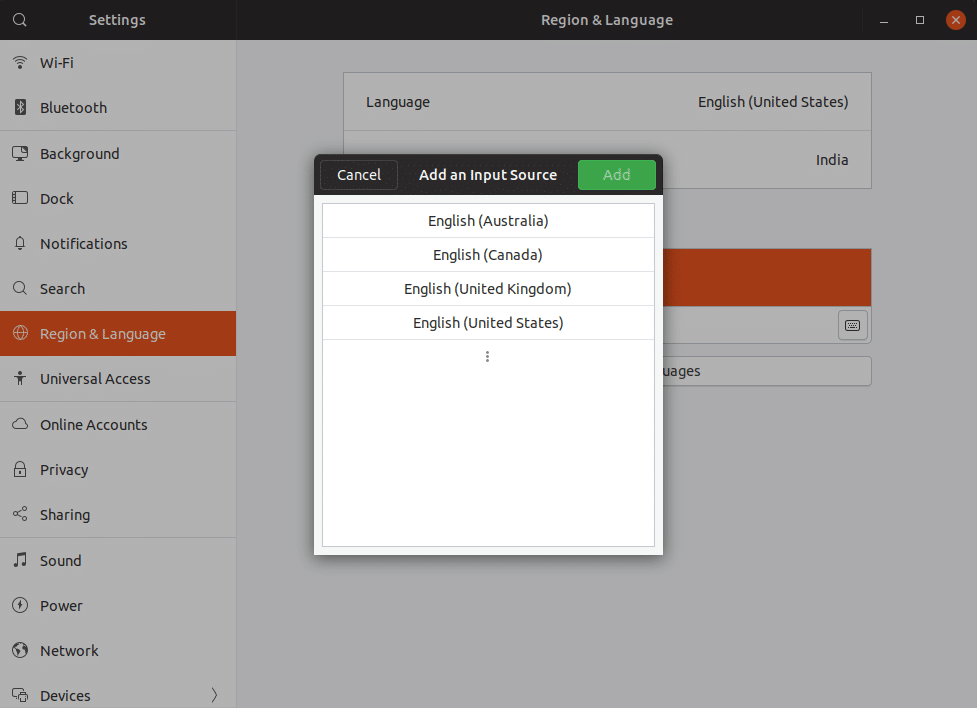
Under that, click the + button, then the vertical three-dot button at the bottom of the pop-up window that appears.
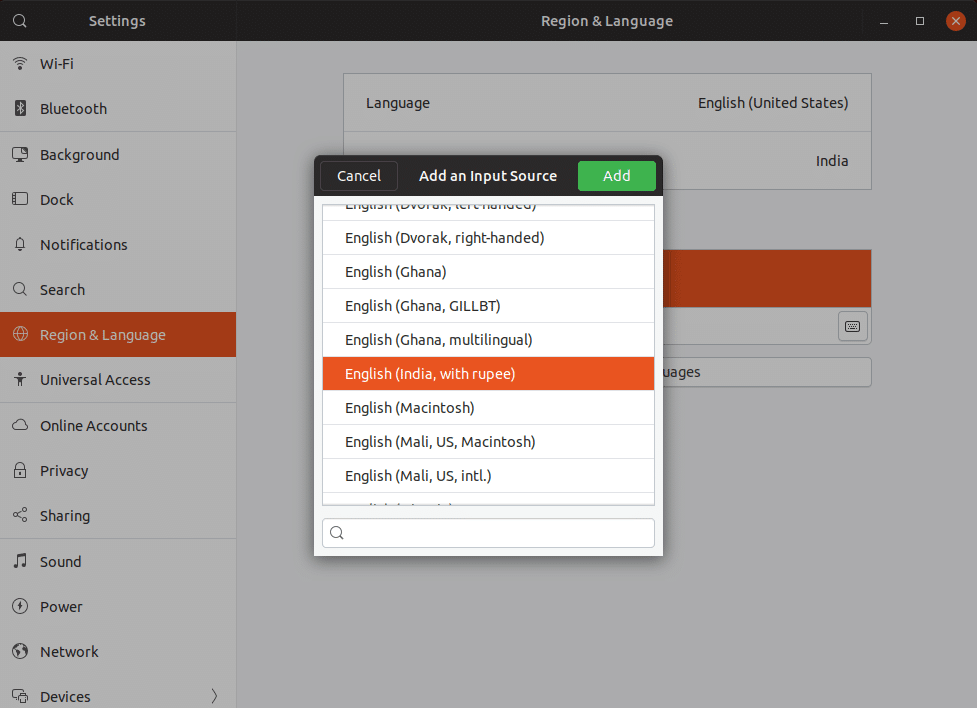
Scroll down and look for English (India), click on it, and then select English (India, with rupee) among the numerous options. You may find the English (India, with rupee) option even under English (US) or some other English versions. Click the Add button when you’ve selected English (India, with rupee).
Must read: 10 Google Chrome Keyboard Shortcuts Every User Should Know
Change Keyboard Layout
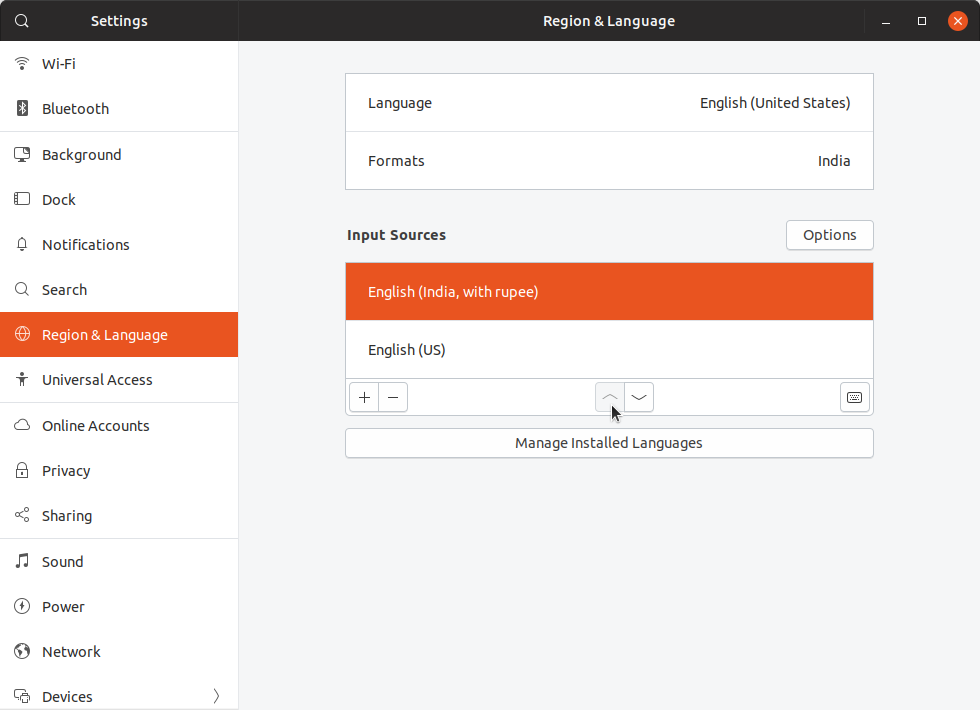
When you’ve added another input source, you can quickly switch between all the active input methods by pressing Windows + Space on the keyboard. If you want, you can also make English (India, with rupee) your default keyboard layout. In the Region & Language settings, select the English (India, with rupee) keyboard under Input Sources and click the up arrow button at the bottom so the selected keyboard is at the top. You can even select the other keyboards and click the – button to remove them, leaving only the English (India, with rupee) keyboard as the only input source.
The changes are applied immediately, but sometimes you may have to log out or even reboot for the changes to take effect. Please note that typing the ₹ symbol does not require anything special from your physical keyboard. All it needs from your physical keyboard is the number 4 key, and the AltGr keys are working. This will work even if your keyboard does not physically show the ₹ symbol on the key or shows it on the wrong key for some reason.
Read next: How to Record Screen as GIF in Ubuntu