The latest OS from Microsoft holds tons of goodies within itself. Not only does it manage to score on the UI/UX and performance front, but it also has a pretty decent record when it comes to providing useful functionalities. One of them is the Slide to Shutdown feature. Unknown to many, this cool trick allows you to shut down your PC just by performing a downward swipe on your desktop. This Slide to Shutdown feature exists in the %windir%\System32 directory of your Windows operating system.
All you have to do is execute that said feature. And there are four different ways of doing so. Let’s have a look at all of these methods to enable the said feature. You save all your work and make sure the tabs in browsers like Chrome don’t have any important open tabs. Executing the steps below to enable the Slide to Shutdown feature will completely shut down the PC, and you might lose any unfinished work.
Enable Slide to Shutdown from the Start Menu

- Click on the Windows icon to go to the Start Menu.
- Search for the SlideToShutDown program.
- Finally hit Enter. This will bring the Slide to Shutdown feature. Drag down that menu to shut down your PC.
Also, here are the steps to backup & restore the Windows 10 Start Menu layout. Do check it out as well.
From the Run Dialog Box
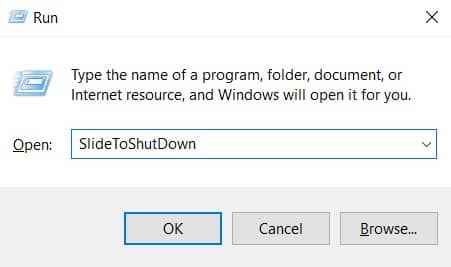
- Click the Windows icon and search for the Run program.
- You could also access it via the Windows+R shortcut key combination.
- Type in SlideToShutDown and hit Enter.
- This will bring in the Slide to Shutdown feature. All you have to do is perform a downward swipe to turn off your PC.
Don’t Miss: 10 Useful Windows Command Prompt Tricks
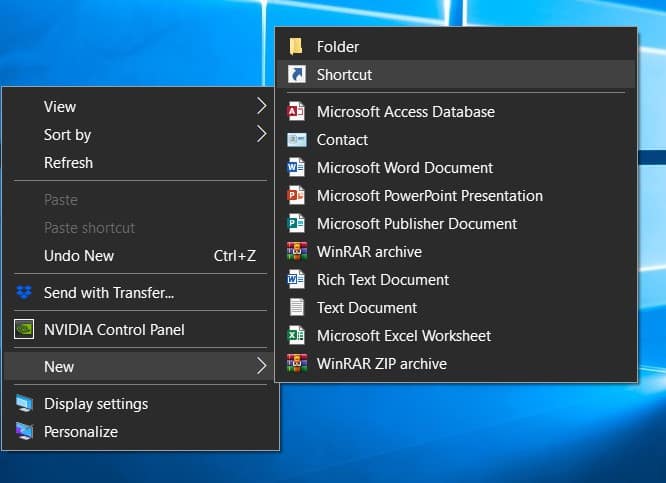
Create a Slide to Shutdown Shortcut
This method directly creates a Desktop shortcut. You no longer have to type in and search for the Slide to Shutdown feature whenever you wish to use this feature. Although the steps are a bit complicated, it’s only a one-time effort. With that said, here are the steps to do so.
- Right-click on Desktop and click on New.
- In the subsequent menu, click Shortcut.
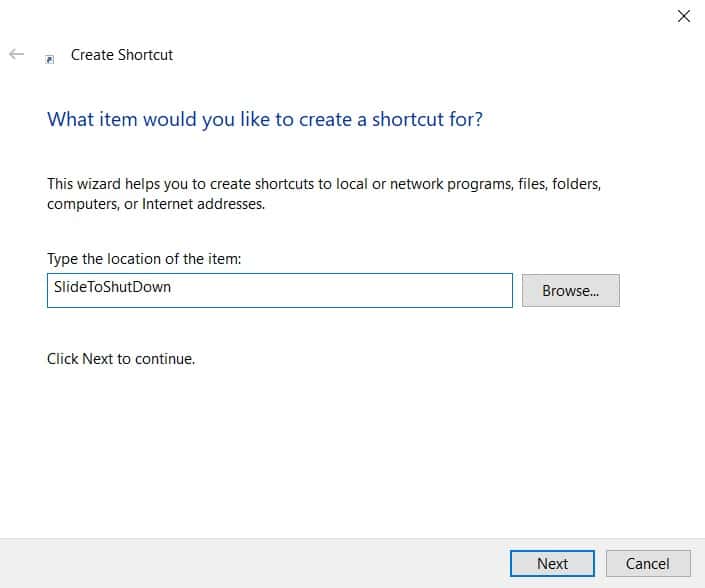
- Now, enter the function’s name for which this shortcut needs to be created. Enter SlideToShutDown and click Next.
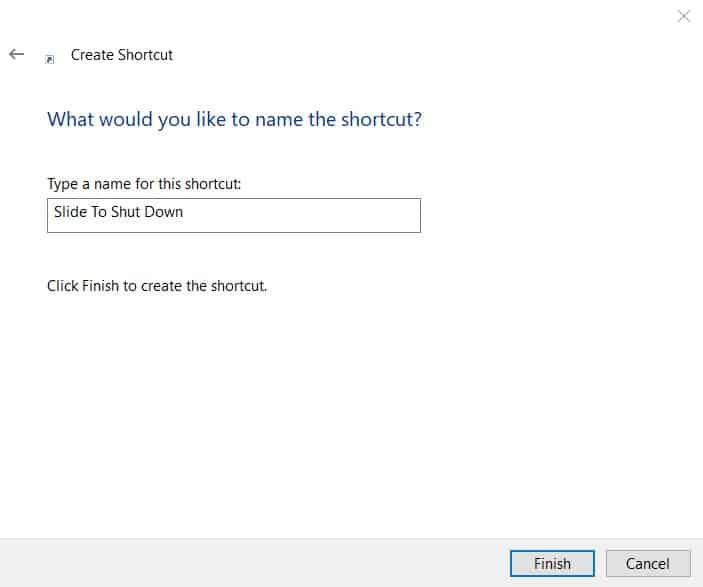
- Finally, give this shortcut a name. Please stick to the function’s name. In this guide, we have named it Slide to Shutdown.
- That’s it. Now, double-click on the newly created shortcut to launch the said feature.
With that, we conclude this guide on how to enable the Slide to Shutdown feature using different methods. Will you be using this functionality from now on, or will the usual method of shutting down your PC from the Start Menu still stand as your favorite?
Read next: How to Disable Auto Update Feature in Windows 10 Store Apps