We’ve all seen desktops cluttered with icons. I usually never keep a single icon on my desktop. Once you decide to let a few icons live on your desktop, the icon list grows like fungus. Desktop icons allow you to access your most-used files and apps easily. Sometimes, when you’re a professional, avoiding desktop icons is not a choice. This is where Stardock’s Fences can come in handy, as it lets you organize Windows 10 desktop icons for a cleaner desktop experience. Alternatively, you can organize your desktop icons view to list and details view as well.
Fences are basically like a folder group we’re now familiar with on our smartphones. It’s a bunch of icons grouped to occupy less space. You can place your icons, shortcuts, files, and folders all inside Fences on your desktop. This results in a more organized Windows desktop, which looks natural. It’s like an integral part of Windows, especially Windows 10. Surprisingly, Microsoft hasn’t learned something yet, considering the app has been around for about half a decade.
Organize Windows 10 Desktop Icons
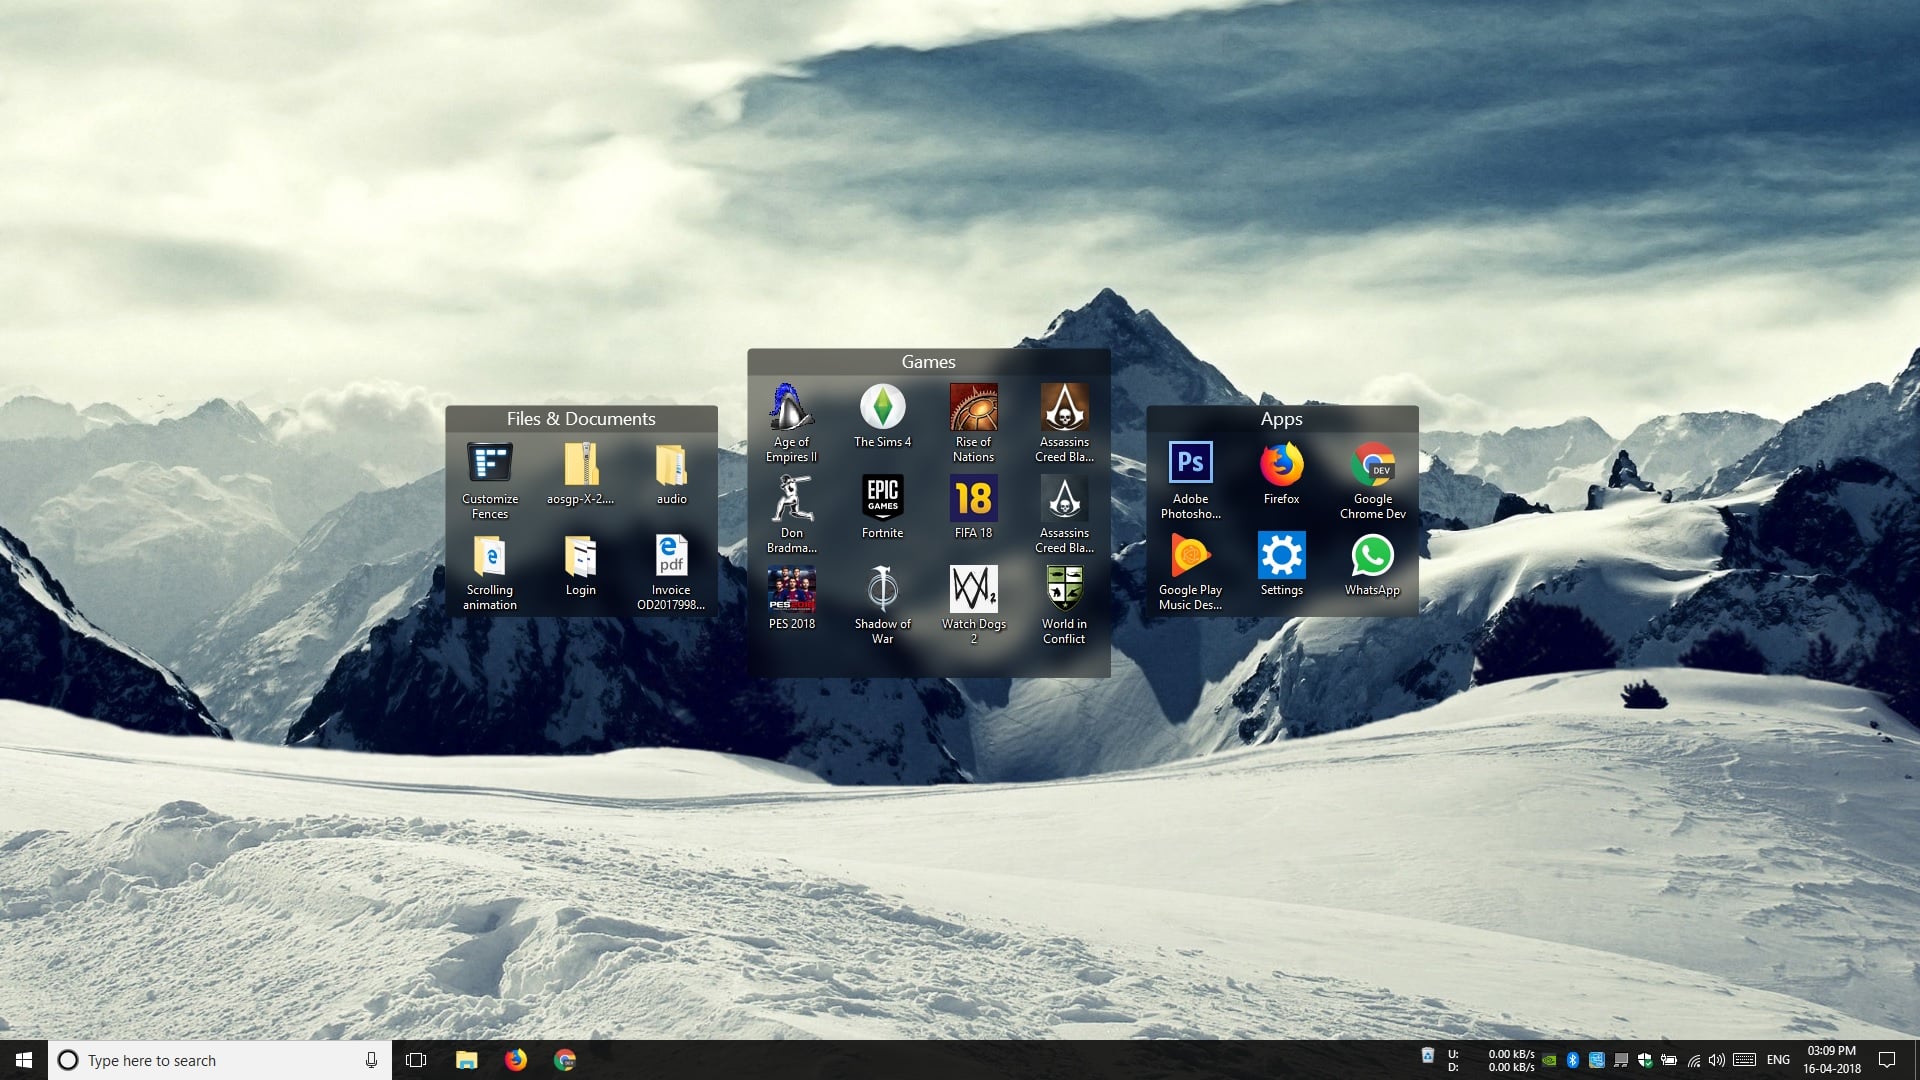
When installed, Fences automatically sorts out all of your icons into a separate Fence, except the Recycle Bin icon. All the icons work and behave exactly as before, double-click to open, right-click for options. To add a new icon to a Fence, you have to drag and drop it like you would on your smartphone. Similarly, you can move icons out of a fence. You can resize or move the Fences around like you would resize or move a Window.
You can fit as many icons as you want without worrying about the size. Any icons that don’t fit the allotted space will be pushed below, and you can scroll down on the fence to see them. It takes care of screen resolution changes by preserving the desktop layout automatically. It also moves all fences to any new primary monitor that you connect to the computer. If you double-click on the desktop, Fences can even hide all your Fences and desktop icons. This is convenient for people like me or those who like some privacy. When you want the icons, they’re simply a double-click away. This is also true for any icons on your desktop, inside or outside fences.
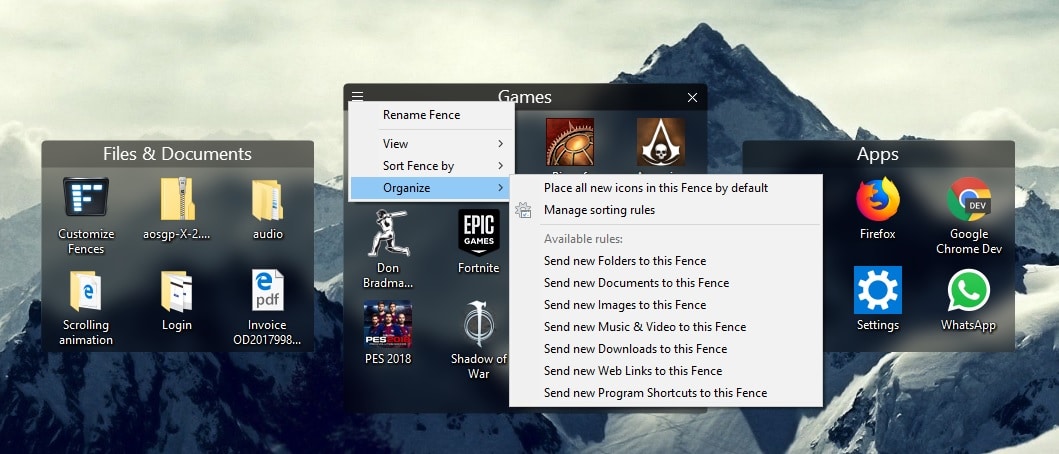
Each Fence has a hamburger menu icon that you can click to access the menu. Here, you can select to rename a Fence, select your sort preference, or Organize. Under Organize, you can select various rules that define how new files, folders, or shortcuts that land on the desktop are handled. You can make a fence the default fence for all new icons on the desktop. Alternatively, you can make it the default for only new folders, only new documents, only images, only music & video, Downloads, etc. If you take advantage of these rules, you never have to manually sort out your desktop icons.
Configure Fences
This is all just scratching the surface. The program has more features once you’re in the Configuration window. To access this, you can click on the Customize Fences icon that is automatically placed on your desktop. Alternatively, you can right-click anywhere on the desktop and select Configure Fences. Once you have configured it, you can organize your Windows 10 desktop.
Under Color & appearance, you can change both the color of the fences as well as the opacity. If you’re using Windows 10, you can also enable the background blur. It allows you to change these settings for all the Fences at once or change individual settings for each fence separately. This can lead to quite a colorful desktop.
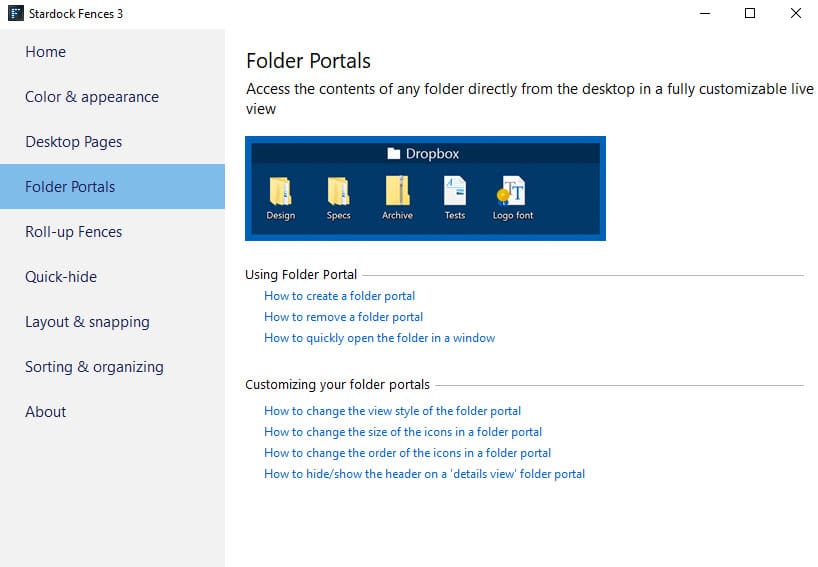
 Folder portals let you display the contents of a folder and interact with it live on your desktop. It’s like having a folder open on your desktop at all times. To do this, press and hold the Alt key while you drag and drop a folder on the desktop. Right-clicking a Fence’s title bar and going to View lets you select an option called Rollup Fences. A rolled-up fence only displays the Fence title bar, thus helping save even more space. To view its contents and interact with them, you have to mouse over the fence.
Desktop Pages let you create different pages on your desktop with different Fences. This can be useful if you carry your laptop to work and use different sets of files and apps at work and another set at home. To create or navigate between Desktop pages, you have to grab and pull the edge of the screen from the left or right. The configuration Window has a quick guide to almost every query you may have. Make sure to check those out. Not only that, you can also organize the taskbar icons by moving them to the center.
Download Fences
Fences is available as a free trial for 30 days on Stardock’s website. This is enough time to make up your mind about it, after which it will cost you $9.99.
Once you have a clean desktop, you can make it look geekier by adding desktop gadgets to your Windows 10 desktop.