Windows 10 operating system comes with many numbers of preloaded apps from Microsoft. Some might be useful and some may not be. If you are quite obsessed with these apps, you might have thought of removing or disabling these apps. But in some cases, you can’t just remove or disable them directly. All you need is to follow a specific process to disable or remove these apps.
OneDrive being one of the apps that comes preloaded with Windows 10 is useless to some users. Few may use it to store their data, this could be one of the reasons behind the addition of OneDrive in Windows 10. If you want to disable or remove OneDrive from File Explorer on Windows 10, you are in the right place. Let us assist you in this process.
Remove OneDrive from File Explorer on Windows 10
Microsoft provides a group policy setting that can be used to disable the OneDrive from File Explorer. However, this group policy setting works only on Windows 10 Professional, Enterprise, and Education editions. Windows 10 Home edition users don’t worry, you can too disable OneDrive by using a registry hack. Let’s deal one by one.
For Windows 10 Professional, Enterprise, and Education edition users
Group policy settings can be accessed only on Windows 10 Professional, Enterprise, and Education editions. This utility provides access to disable OneDrive and remove it from File Explorer on Windows 10.
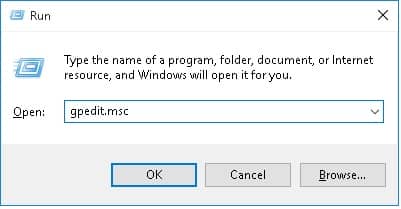
- Click the Start menu and type Run in the search box. You can also press the Windows +R keyboard shortcut key to launch the Run windows.
- Once the Run window opens, type gpedit.msc in the textbox and hit the enter key to open the Group Policy Editor window.

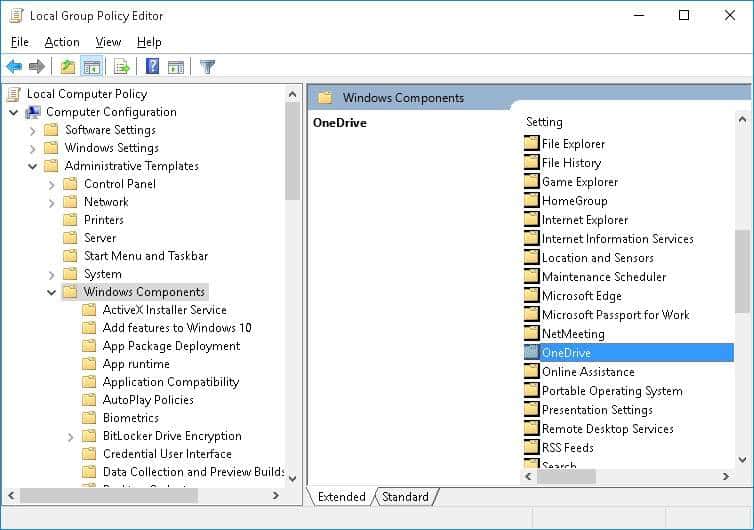
- Navigate to Local Computer Policy › Computer Configuration › Administrative Templates › Windows Components › OneDrive.

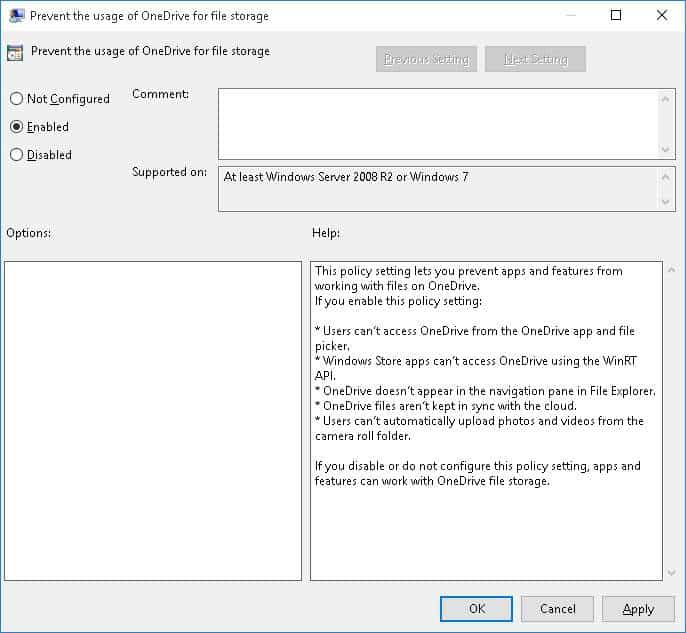
- Then double-click “Prevent the usage of OneDrive for file storage” option in the right pane of the window.
- Prevent the usage of OneDrive for file storage window will open on the desktop. Then select the Enable option and click the OK button to disable OneDrive on Windows 10.

That’s it. Now, you can’t launch and access OneDrive from the file explorer or the Windows Store app. If you want to access OneDrive, go back to the same location in Group Policy Editor change the option to Not Configured option, and click the OK button.
For Windows 10 Home edition users
If you are a Windows 10 Home Edition user, follow this method to disable the OneDrive app on your Windows 10 PC.
- Right-click on the OneDrive icon in the notification area. If are unable to figure it out, click the Up arrow icon in the bottom right of the desktop screen. Then right-click on the cloud-shaped OneDrive icon.
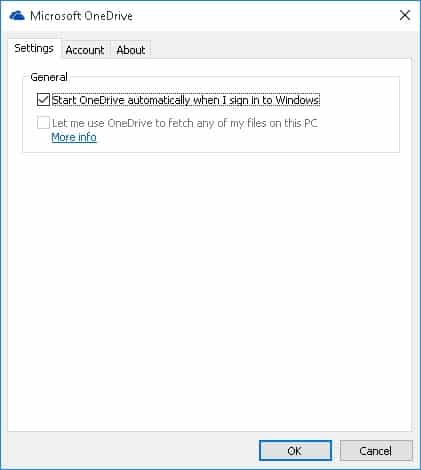
- Select Settings from the options. Microsoft OneDrive window will open right away on the screen.
- Click the settings tabs and uncheck “Start OneDrive automatically when I sign in to Windows” option under the General section.

- Now click the OK button. That’s it. Now OneDrive will not start automatically after PC startup.
If you want to use OneDrive, you need to click or tap the “Unlink OneDrive” button under in Account tab. This will stop OneDrive from syncing files until you set it up again. It’ll be in gray color if you haven’t set up OneDrive.
To remove OneDrive from appearing in File Explorer, download the zip file containing a registry hack file from the download section. Open the .zip file and double-click on the appropriate .reg file based on your Windows 10 32 or 64-bit version. You can also restore OneDrive by using the restore .reg file attached in the zip file. OneDrive will disappear instantly in file explorer. If it appears even after performing the above process, reboot your PC.
Downloads
That’s it. Do let us know your valuable suggestions and comments in the below comments section.