Until Windows XP, the auto-arrange or auto-refresh feature wasn’t there in Windows Explorer but was introduced in Windows Vista which isn’t surprising. Windows Vista annoyed a lot of people and it paid the price. Unfortunately, the auto-arrange feature stayed when Windows 7 came along and is present in Windows 10. Many users have been looking for a way to disable auto arrange in Windows 10 Explorer. Below, I have mentioned 3 ways to turn off the auto arrange of files and folders in Windows.
What it essentially does is rearrange the files and folders in the Explorer windows as soon as a change is made. Say, the sort method is set to sort by name and you rename a file xyz.txt to abc.html. Windows Explorer automatically moves the file from the bottom to the top. This is a nice feature but the way it’s implemented, it happens as soon as you hit Enter which is a jarring experience. It seems after all these years Microsoft is yet to notice this problem let alone address it. This is why there isn’t a way to turn off auto-arrange in Windows Explorer but you can easily hide files and folders on your PC.
Change the sort method in Windows Explorer
There are certain workarounds to turn off or disable auto arrange in Windows 10 File Explorer. If you are fine switching the default sorting method to sort by date then you have an easy workaround. Right-click an empty area in the Explorer window and select Sort by > date. When files are sorted by date, any changes you make usually stick to the bottom. This may still not work sometimes but it does most of the time.

Registry edit
There are lots of Registry Editor tweaks you can use to customize your Windows 10 experience.
- Open Registry Editor. In Windows 10, you can hit the Windows key, type regedit, and hit Enter. On the previous Windows version, you may have to open the Run dialog first. You can do this by pressing Windows + R on the keyboard. Type regedit and hit Enter. Navigate to the following registry key using the side navigation menu or copy and paste it into the address bar at the top.
Computer\HKEY_CURRENT_USER\Software\Classes\Local Settings\Software\Microsoft\Windows\Shell\Bags\AllFolders\Shell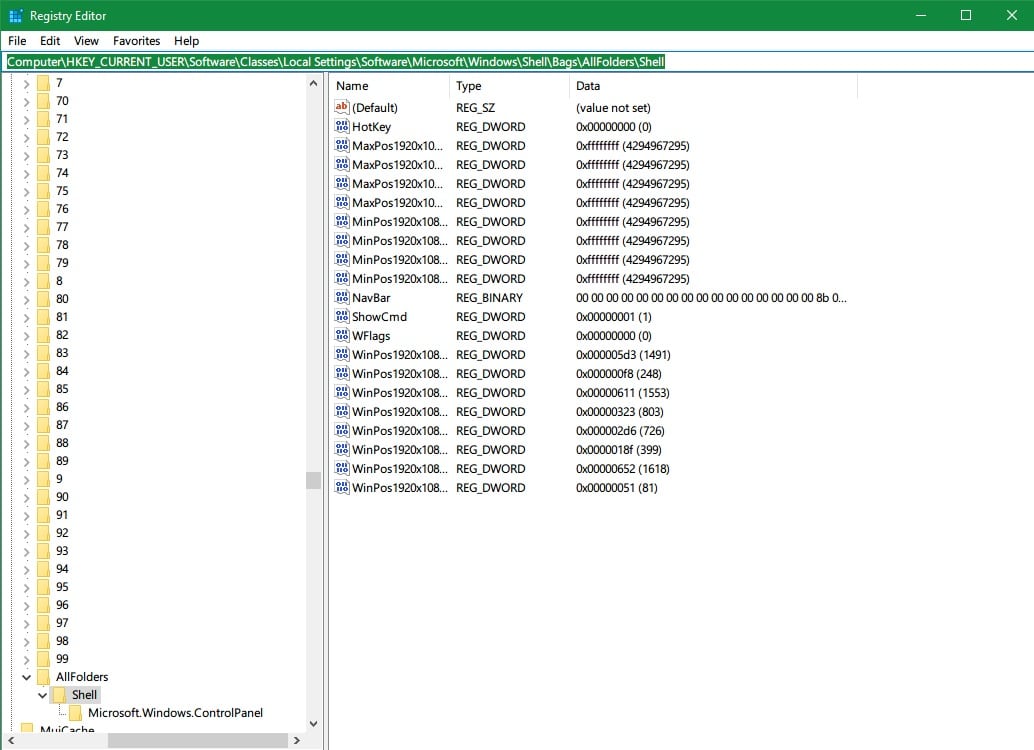
- Right-click the Shell key, select New > Key, and name it {5C4F28B5-F869-4E84-8E60-F11DB97C5CC7}.
- On the right side, right-click the empty area and select New > DWORD (32-bit) Value. Name it FFLAGS.
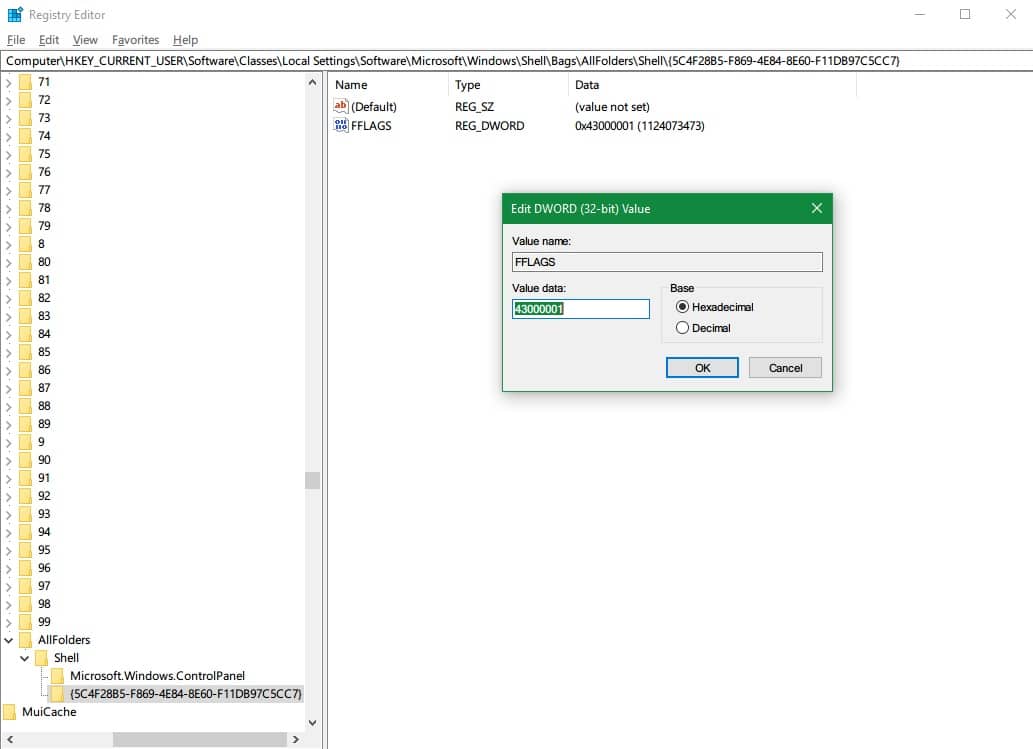
- Right-click on the newly created FFLAGS Value and select Modify…
- The default value is 0, change it to 43000001 with a Hexadecimal base and click OK.
- Similarly, create another Value named Mode with a value of 00000004 and a Hexadecimal base.
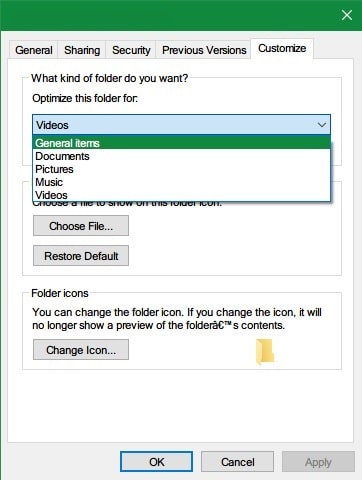
- This creates a template for folders of type General items. If you remember there are four other folder types. Documents, Music, Pictures, and Videos.
- You’ll have to create a template for each of these folder types just as before, with the same two values FFLAGS and Mode. The key values for each of them are given below.
- Documents: {7D49D726-3C21-4F05-99AA-FDC2C9474656}
- Music: {94D6DDCC-4A68-4175-A374-BD584A510B78}
- Pictures: {B3690E58-E961-423B-B687-386EBFD83239}
- Videos: {5FA96407-7E77-483C-AC93-691D05850DE8}
Delete AllFolders on Windows 10
- Once you’re done with that, navigate to the following registry branch.
HKEY_CURRENT_USER\Software\Classes\Local Settings\Software\Microsoft\Windows\Shell\Bags\
- Scroll down the side view through the numbered entries until you find AllFolders. Right-click it and select Export. Give it a name and hit Enter to Save the registry into a file you can later restore from.

- Now right-click AllFolders and Delete it. Double-click on the .reg file you exported AllFolders to earlier. This will restore the menu branch AllFolders.
Your work is mostly done. It’s a lot to do but currently, this is the only way to stop Windows Explorer from automatically re-arranging items. Note that this registry hack only works for View > Tiles, Details, Small Icons, Medium Icons, Large Icons, and Extra Large Icons – not in the view Content and List.
You can find more details about the hack from the source link below. We have also picked a few Windows File Explorer alternatives you should consider trying.