Slow Internet is the worst nightmare for anyone in this digital age. It would really piss me off when a web page takes a long time to load and I know it’s the same for most of you. However, there are always simple hacks to make your lives better and we have a simple trick to solve your Internet problems. So, before we proceed with the trick, you should know that the web page loading time depends on the various components present in the web page. Images are one of the most data consuming components in a web page.
While you’re browsing for some text or article, you might not always need images to load in the web page. So, if you’re OK with disabling auto-loading of images in the web page, you can save your bandwidth and pages load faster as well. So, today we will see how to disable auto-loading of images in Chrome and Firefox which are the most popular web browsers used by millions of people. It’s pretty simple to perform this hack, so let’s see how it’s done.
Disable Auto Loading of Images in Web Pages
We will show you how to disable auto-loading of images in Chrome and Firefox separately. Follow the method based on the browser you’re using on your PC.
Disable Auto Loading of Images in Chrome
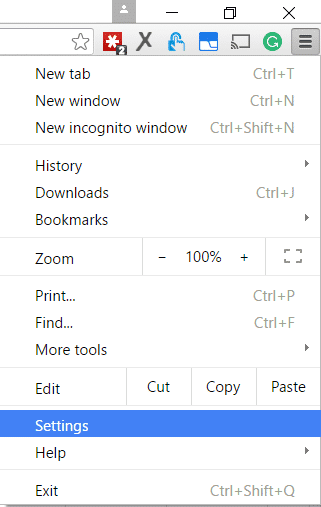
- Launch Chrome and click on three horizontal lines in the top-right corner. Select “Settings” from the drop-down menu to open the Chrome Settings.
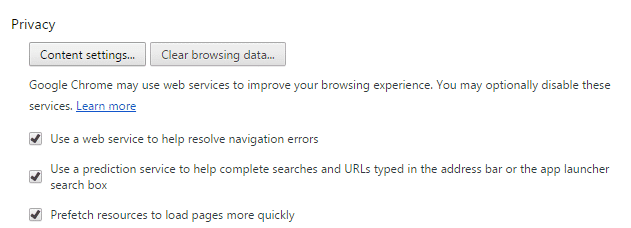
- Once the Settings page appears, scroll to the bottom and click on “Show advanced settings…” link.
- The advanced settings will unveil the “Content settings…” located under the “Privacy” options. Now, click on it.
- In the content settings menu, choose the “Do not show any images” option located in the “Images” section.

- Click on Done and this should disable auto-loading of images in your Chrome browser.
Disable Auto Loading of Images in Firefox
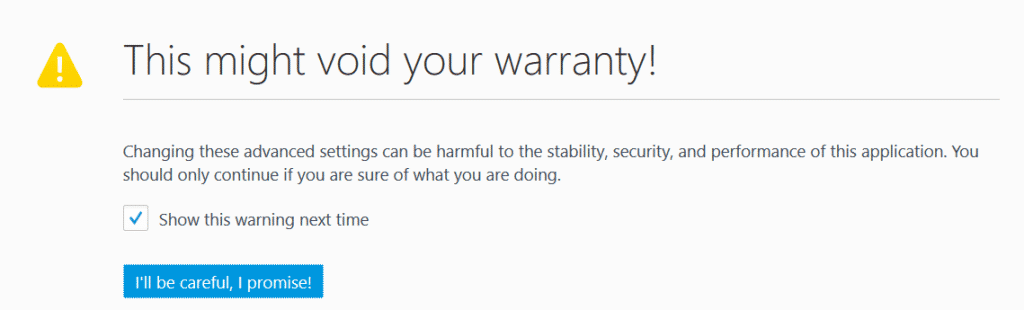
- Launch Firefox and type in about:config in the address bar, and hit Enter.

- Now you will see a scary warning message on the screen with the usual violation warning. Just click on “I’ll be careful, I promise!” to move forward.
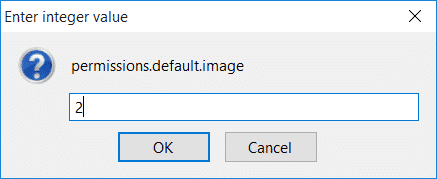
- In the next screen, use the search box to find the permissions.default.image option. Double-click on it and change the “Value” field to 2 and click OK.
- Close the settings panel and open any website. Now you will see that the images won’t load.

If you want to revert back, just follow the same procedure and undo the changes you’ve made. So, isn’t the page loading speed improved?