Unlike Windows, Linux distributions such as Ubuntu don’t ship on CDs or DVDs. They’re all available for free on the Internet to anyone who wants to download them. Thus creating a bootable USB drive is the best way to install Ubuntu or any other Linux distribution on your machine. These distributions are available for download as an ISO disc image through their websites. You can easily unpack the contents of the ISO image file onto a bootable USB stick to install Ubuntu. But what if you don’t have a bootable USB stick? You can create your own Ubuntu bootable USB drive on Windows 10.
In case you want to backup and restore the drivers on Windows 10, you should follow the steps described in our tutorial.
Download Ubuntu ISO
First, you need an ISO file though and since Ubuntu seems to be the most popular Linux distribution, it’s a good place to start. Therefore, we’ll use the Ubuntu disk image as an example but the process is very much the same for any other Linux distribution. You can find an Ubuntu disk image on Ubuntu’s download page. We’ll be using Ubuntu 17.10 which is currently the latest version. You’ll find the latest version, which is Ubuntu 17.10, and an LTS (Long Term Support) version on the page. If you’re looking for the latest and greatest, get the latest and greatest. If you prefer stability and don’t like major changes in the system, install the LTS version. It will still receive security updates, of course. If you want, you can also download the Windows 10 ISO file without a product key.
Steps to Create Ubuntu Bootable USB on Windows 10
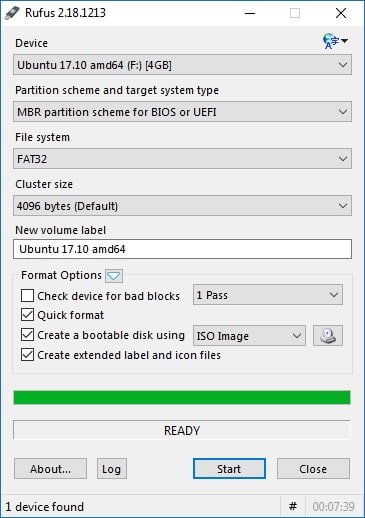
Now that you have an ISO, you will need a third-party software called Rufus. I’ve been using Rufus for years and it works consistently across any OS images I’ve used. It is also faster which is never a bad thing. It does not need any installation either. Download the .exe file and double-click on it to run it. You can download Rufus from the link below.
Now connect a USB drive to your PC with at least 2GB of space. Anything on this USB Drive will be deleted since the drive will be formatted, so back up any important files.
- Launch Rufus and there’s a good chance your USB Drive will already be pre-selected.
- If not, you can use the first drop-down menu to select your USB Drive.
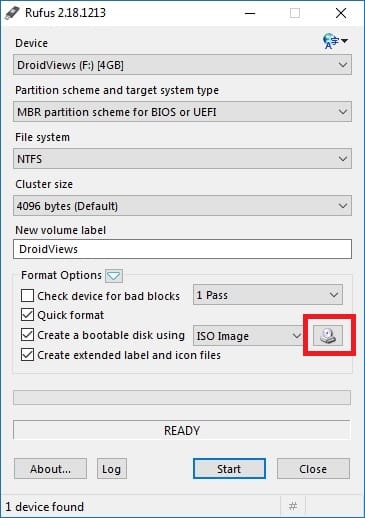
- On the drop-down menu under File system, select FAT32 if not already selected.
- Now check the box next to Create a bootable disk using and select ISO image from the drop-down menu to its right.
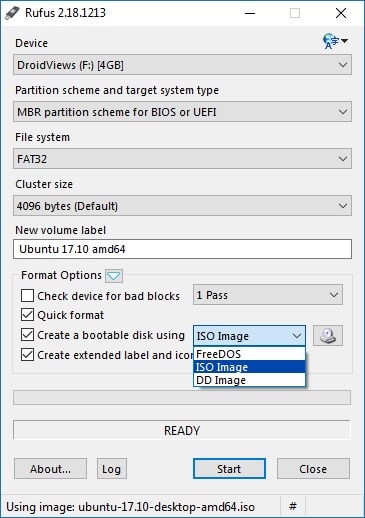
- Click the button right next to it with a disk icon and select your downloaded ISO file then click the Start button at the bottom.
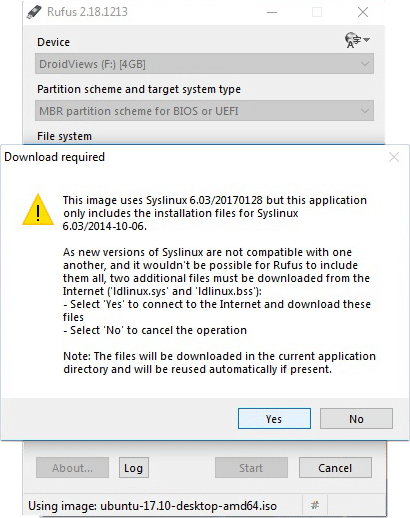
- You may see a pop-up window asking you to download new SysLinux files. Just click Yes.

- Next, you will be asked how to write the image. By default, Write in ISO Image Mode (Recommended) is selected so click OK.
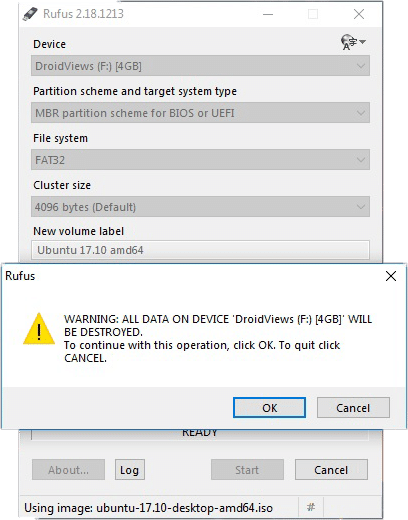
- You’ll now be warned that the data on your USB drive will be erased, click OK and the process will start.
- Wait a few minutes for the process to complete and then click Close.
Although you can use Ubuntu from a USB drive before even installing it, none of the changes you make will be saved. This means you cannot use this USB Drive as your portable computer, but you can boot up an Ubuntu session on any PC.
Read Next: How to Change Drive Letter in Windows 10