If you have recently downloaded and installed Linux Mint, we have a list of things you should do after installing it. Linux Mint is probably the best Linux distribution you can choose if you’re a newcomer. Linux Mint is there with Ubuntu as one of the most user-friendly Linux distros. Mint takes this a step further, especially for Windows users because it feels more familiar than Ubuntu. That’s thanks in large part to the default Cinnamon desktop environment too. Yet, there are a few things that you should do right away after installing Linux Mint 19.
Named “Tara”, Linux Mint 19 comes in a few official flavors including a MATE version and an Xfce version. Since Cinnamon is the original Linux Mint desktop, we’ll mostly focus on that.
1. Update the system
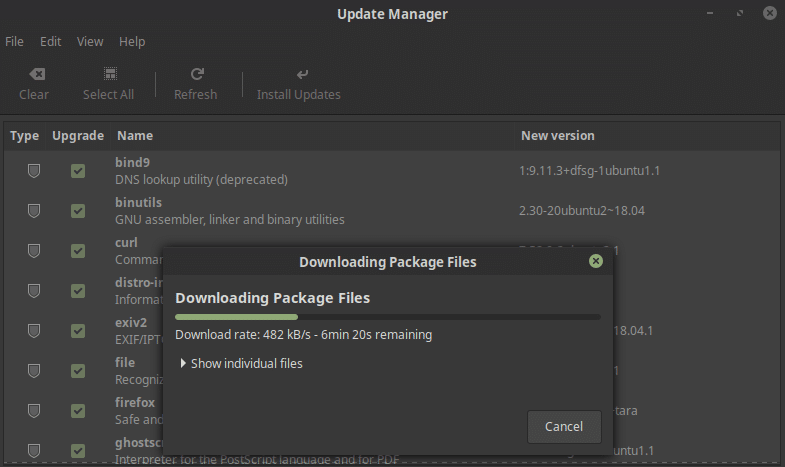
This is the first thing you should do after installing any operating system, and that’s true here as well. This is not a necessary step requiring immediate attention but it is highly recommended. Linux Mint uses the same installer as Ubuntu because it gives you the option to download and install the updates during installation. It makes the installation time quite long though and it is understandable if you decide to skip it. Now that you are booted into Linux Mint 19, you can manually update it by launching the Upgrade Manager. If there are updates to install it will show you and all you have to do is click on Install updates.
Read also: 3 Lightweight Desktop Environments for Linux
Alternatively, launch a terminal window and enter this command to update your system.
sudo apt update && sudo apt upgrade -y2. Install codecs
While other operating systems ship with codecs for popular media files such as mp3 and mp4 preinstalled, most Linux distros don’t. Once again, this is something you were given the option to install during the OS installation. However, it is easy to miss especially if you decided not to connect to a WiFi network during installation. When you log into Linux Mint 19 you’re given the choice. But you can also easily install them manually via this simple command.
sudo apt install mint-meta-codecs3. Create system snapshots
Mint 18.3 introduced a new tool called Timeshift. It is, more or less like the System Restore feature on Windows machines. You create a snapshot instead of a restore point using Timeshift. If your system ever falls into trouble you can quickly revert to a previous snapshot. It’s like shifting time backward and your system works as if the problem never existed. Timeshift is pretty easy to use and there is no command-line hassle here.
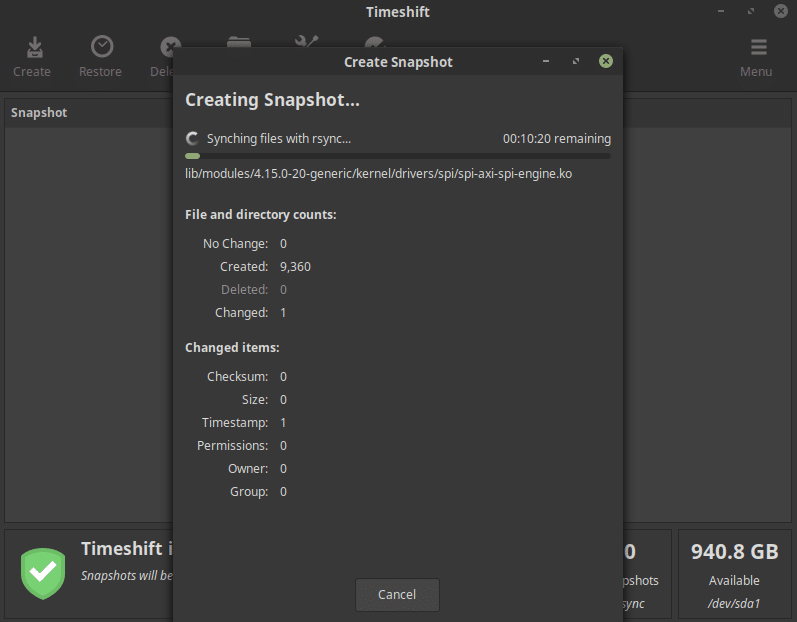
Upon launch, you will be asked to select the Snapshot type. Assuming you’re clueless about what these are, select RSYNC and click Next. Then select a drive on which you would like the Snapshot to be stored. An external drive is recommended but you can also store the snapshot on your internal hard drive. When you’re ready, click Finish and you’re ready to create Snapshots. Simply, click the Create button and the process will begin.
4. Install Chrome and other useful software
Installing Google Chrome is one of the first things many users do whenever they boot up a fresh OS install. If you’re happy with Firefox (and I don’t see why not considering how great Firefox Quantum is) you might want to skip installing Chrome. If not, you can install Chrome on your Linux machine. Head to the Google Chrome download page and download a .deb package for your Ubuntu-based and thus Debian-based system.
Double-clicking a Debian package on Linux Mint will launch the Gdebi package installer. Click Install here and Chrome will get installed as easily as it does on any other OS.
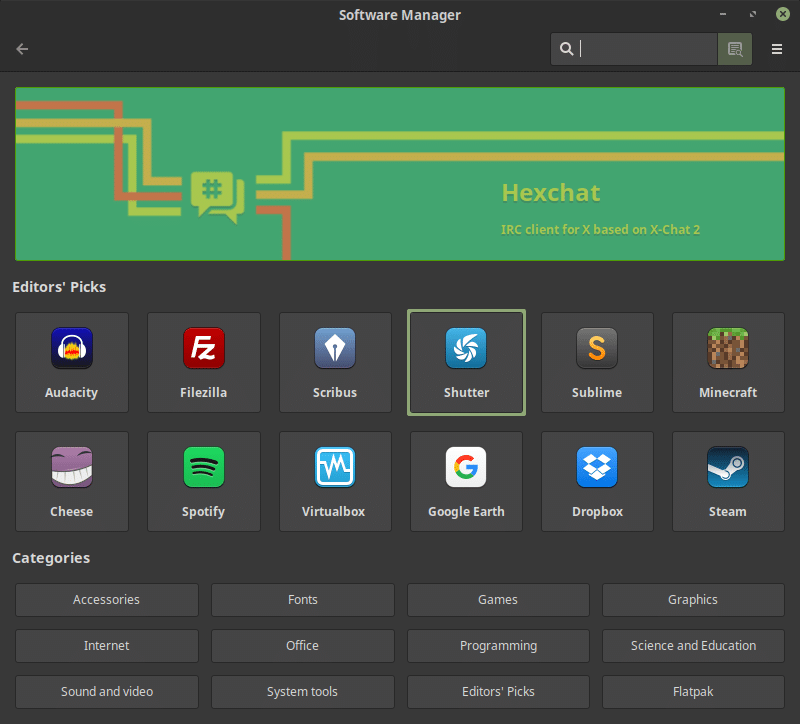
Chrome is not the only essential piece of software you’ll need. VLC Media Player is another similar program that people likely install right away. If you’re into photo editing, GIMP is also an essential program you’ll need. Both of these are pre-installed on Linux Mint. If you need anything else, you can most probably find it in the Software Manager. Some of the popular software available here are:
- Spotify for streaming music
- Atom for code editing
- Kdenlive for video editing on Linux
- LibreOffice, a Microsoft Office alternative
- KeePassXC for managing your passwords
- Skype for video communication
- Gparted for managing system partitions
- LibreOffice Draw for PDF files
- Dropbox for cloud storage
5. Learn your way around
Cinnamon might be familiar if you’re an ex-Windows user but it has so much more to offer in comparison. Things are bound to get drastically different the deeper you dive into Linux Mint. Like many other Desktop environments on Linux, Cinnamon follows a panel plus applet style philosophy. Everything you see on the bottom panel is in an applet. You can add and remove many more and even download more in System Settings > Applets.
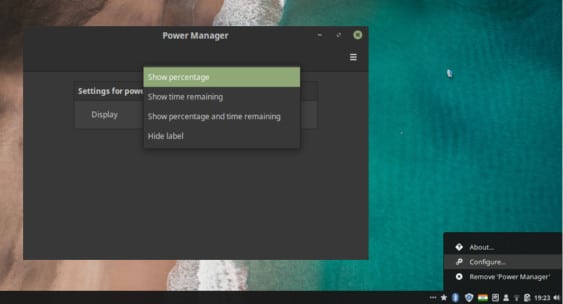
Most applets can be configured to an extent by right-clicking on them and selecting Configure. For instance, you don’t see the battery percentage by default ‘0’ on the desktop. To change that, right-click on the battery applet and select Configure. Select Show battery percentage and time remaining or Show battery percentage from the drop-down menu. It’s as easy as that. Similarly, Cinnamon also supports desktop widgets called Desklets. You can get these in System Settings > Desklets.
Cinnamon also supports themes natively, and you can fiddle with the look and feel of your desktop in System Settings > Themes. Take your time with the System Settings because there’s a whole lot that you can customize and themes are a mere small part of it.
So, these were some of the basic things users are supposed to do after installing Linux Mint 19.