Internet has changed our lives drastically. These days we access internet in our PCs, mobiles, tablets and other devices. We connect to internet through wired and wireless connections. Internet can be shared to handy devices through Wi-Fi hotspots. Routers can be used to create Wi-Fi hotspots. With the advent of Android, mobile devices can now be used as Wi-Fi hotspots to share your mobile internet.Any device which supports Wi-Fi can connect to Wi-Fi hotspots and access the wireless internet.
Do you know that you can use your Windows PC as a WiFi hotspot? The answer will be absolutely yes. All you need is laptop which supports WiFi or a PC with a Wi-Fi dongle connection. Even the PCs running on Windows XP supports creation of Wi-Fi hotspots provided the WiFi hardware must be installed. Also even these features are hidden in Windows 10, but you can always find them out with the command prompt. So lets start our tutorial on how to turn your Windows 10 PC into a Wi-Fi hotspot and help you in sharing your PC internet with other devices.
Turn your Windows 10 PC into a WiFi Hotspot
You don’t need to be an expert in Windows commands to accomplish this task. Just follow the simple steps below :
- Press
 +X shortcut key and click on the Command Prompt (Admin) option from the Windows Quick access menu to launch the command prompt with admin access.
- A notification will appear on the screen to grant admin access. Click on the Yes button to grant admin access.
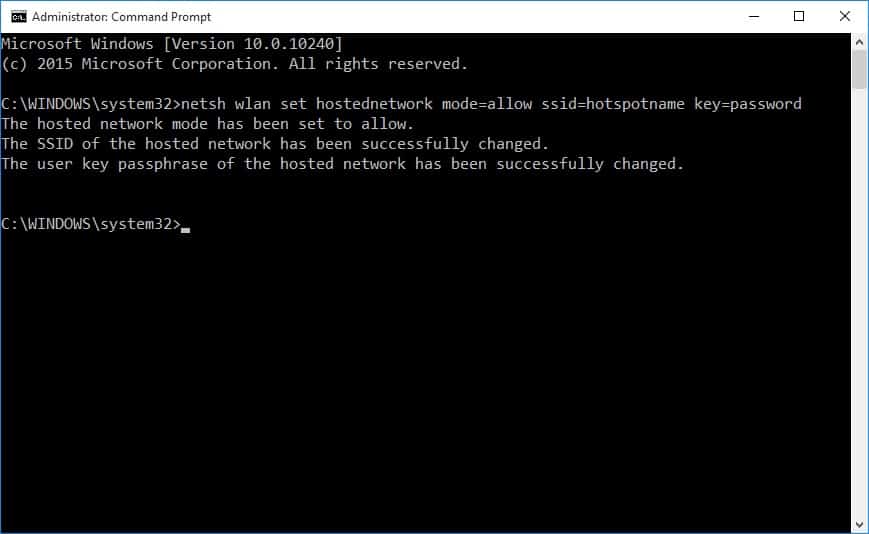
- Type the below code in the command prompt and hit enter key.
netsh wlan set hostednetwork mode=allow ssid=hotspotname key=password
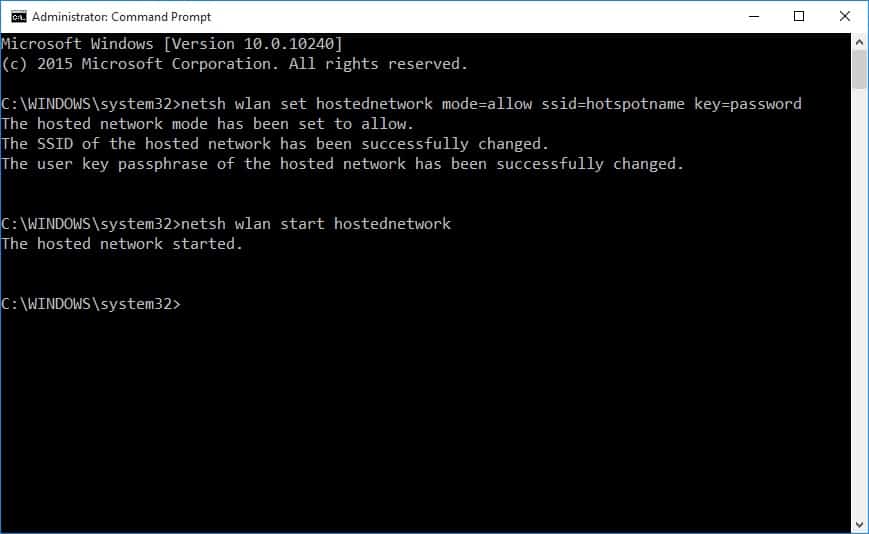
- Now type the below command and hit enter key.
netsh wlan start hostednetwork
- Open the Control panel, click on Network and Internet › Network and Sharing Center › Change adapter settings. Network connections window will appear with the list of network connections.
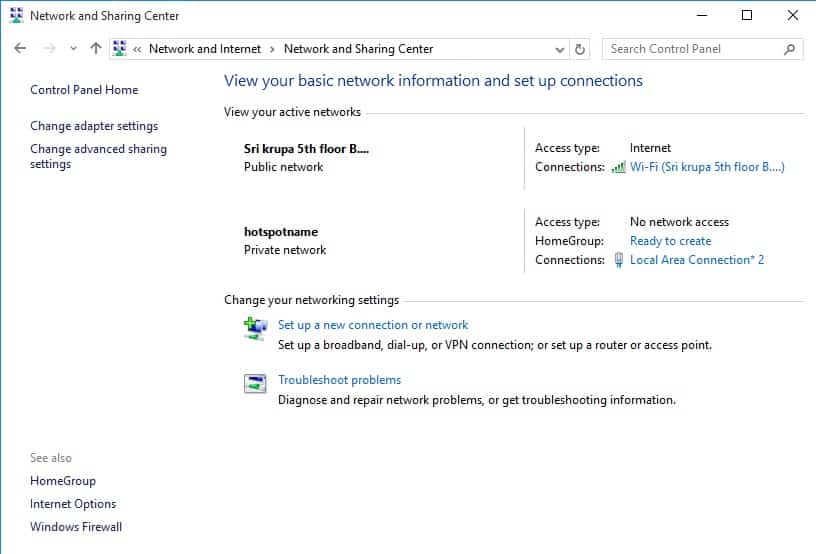
- You can find the newly created connection among them. Right click on that connection and select Properties.
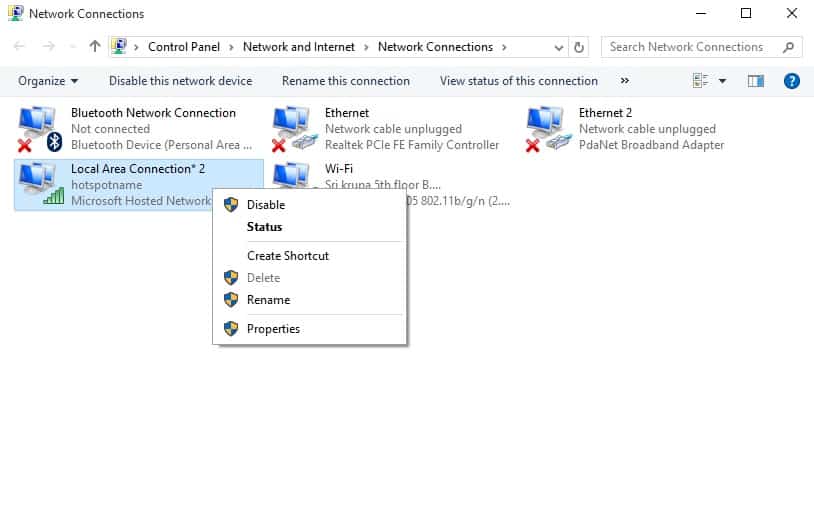
- Click on the Sharing tab and check Allow other network users to connect through the computer’s internet connection check box.

- Click on the OK button to save the settings. You can now scan your Wi-Fi enabled devices and connect to this hotspot connection to access internet shared your Windows 10 PC.
- If you want to stop the Wi-Fi hotspot, type the below command in the command prompt and hit enter key.
netsh wlan stop hostednetwork
That’s it. So what are you waiting for ? Start working out on this hidden feature on your PC.
Do let us know your doubts and suggestions through your comments in the below comments section.