Google Drive came into existence in 2012 when services like Dropbox were already gaining popularity. Back then, Google promised that support for Linux would be “coming soon.” Perhaps they’ve already forgotten given that Google Drive is a success. In the absence of official support, developers have come up with their solutions. Most of these third-party sync clients aren’t exactly free so unless accessing your Google Drive files offline is a priority, there are alternatives. For example, google-drive-ocamlfuse lets you mount Google Drive on Ubuntu.
For many of us, accessing the Google Drive files offline isn’t as important as just being able to access them from the convenience of the file explorer. This has obvious advantages over accessing the files in a browser. For one, you can drag and drop files to copy them from your Google Drive to your storage. Similarly, you can copy or move multiple images or documents to your local storage without downloading them as a zip first. If you’ve ever tried downloading multiple files from Google Drive before you know what I’m talking about. To manage other files, you can also install the Dolphin File Manager on Ubuntu and use it.
Google Drive Features
All that is possible and convenient when you mount Google Drive on Ubuntu. Google-drive-ocamlfuse is a FUSE-based file system powered by Google Drive. It allows you to access Google Drive from your favorite file explorer and the command line. You can interact with the files normally in your browser and perform actions such as opening, copying, editing, deleting, etc. If you have videos on your Google Drive you can stream them directly as long as you have a stable and speedy internet connection. Here are all the features:
- Full read/write access to ordinary files and folders
- Read-only access to Google Docs, Sheets, and Slides
- Multiple account support
- Duplicate file handling
- Access to trash (.Trash directory)
- Unix permissions and ownership
- Symbolic links
- Read-ahead buffers when streaming
Install Google Drive Ocamlfuse
Google Drive Ocamlfuse can be installed on Ubuntu 16.04 and later via its dedicated PPA.
- To add the PPA to your Ubuntu system, launch a Terminal and enter the command given below.
sudo add-apt-repository ppa:alessandro-strada/ppa
- Once the PPA is added, update the system with this command:
sudo apt update
Note: Ubuntu 18.04 users can skip this step.
- Now install Google Drive Ocamlfuse by entering this command.
sudo apt install google-drive-ocamlfuse
Mount Google Drive on Ubuntu
Once it is installed, you can go ahead and set up your Google Drive account and have it ready for mounting. Start the app from the command line by pushing the following command through the Terminal.
google-drive-ocamlfuse
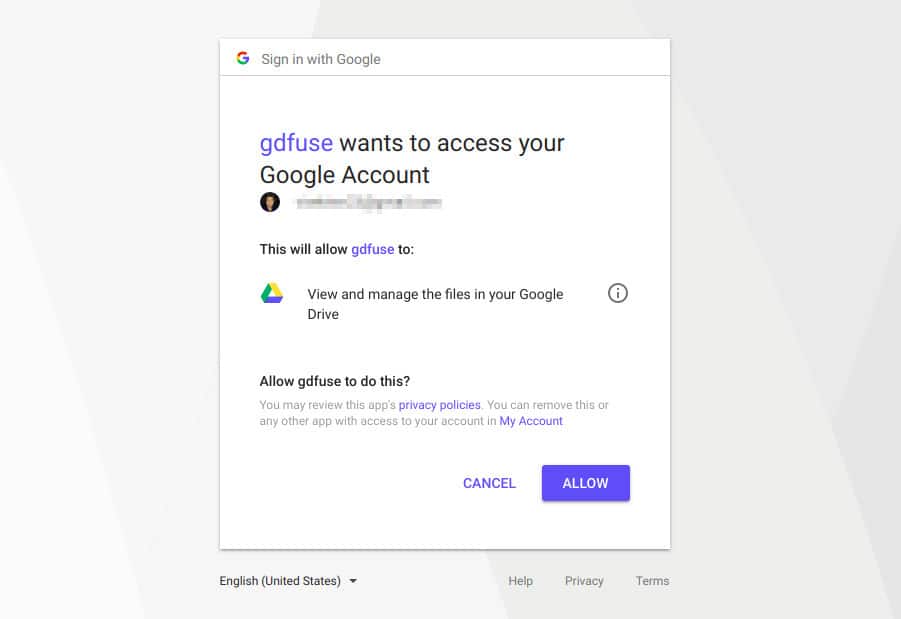
You may have to wait a few seconds after this while the utility creates the necessary files and folders. Once it does, a new tab will open in your default browser where you’ll be required to authorize access to your Google Drive account. Sign in with your Google username and password and click Allow to grant the app access to manage your files.
Now that it can access your Google Drive files, you’re ready to mount Google Drive on Ubuntu. There’s just one more tiny bit that you’ll have to do and that is to create a folder where you’ll mount Google Drive. You can do this via the Terminal as well using this command:
mkdir ~/googledrive
This will create a folder named googledrive in your Home folder. You can also do this manually, however, mounting will still need to be done via the command line. To mount your Google Drive to the newly created googledrive folder, use this command:
google-drive-ocamlfuse ~/googledrive
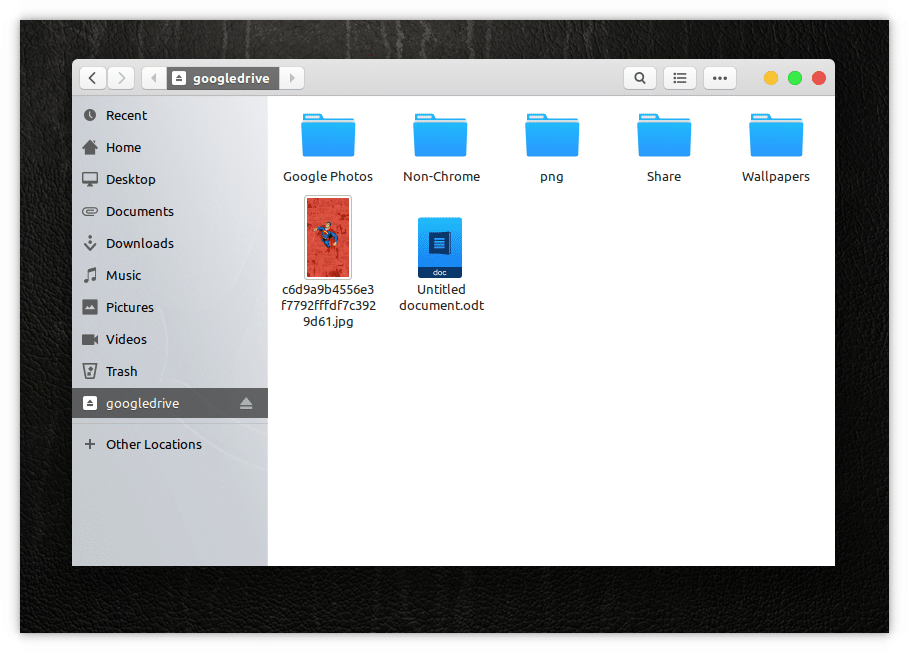
Now when you open your file explorer you’ll notice googledrive on the left column like you would a physical drive attached to your computer. When you’re done with it, and if you want to, you can unmount it using the command given below.
fusermount -u ~/google-drive
Note
As mentioned, this will not make your Google Drive files available offline. You can access your Google Drive and interact with files only as long as you’re online. If you’re looking to sync files offline automatically you’ll need to try Insync or OverGrive.
If you want to do more and make your Ubuntu experience still better, here are 20 cool Ubuntu commands you should try.


