Most of us have friends who often confront many issues with their PC and ask us for help. Visiting them or asking them to bring their laptop to your place might be quite difficult sometimes. Moreover, it’s not feasible to move the standard PCs from one place to another. In such cases, remote assistance is a good practice to solve most of the issues. Using remote assistance software, you can control a PC from another PC or even a smartphone.
TeamViewer is one of the most used remote assistance software which allows you to control other PCs from your PC itself. It features many useful functions like file transfer, capturing a screenshot, instant messaging, and many more. The idea of remote controlling the PC has been quite useful and has received much applauds from the Internet community. So, let’s see how to control your PC using TeamViewer through this simple tutorial.
Features
- Remote PC screen scaling and resolution
- Conference call
- Chat & Video
- Remote printing
- Screen recording
- File transfer
Downloads
TeamViewer Installation
Please be patient while installing this TeamViewer software, as you need to install it on both the PC that you want to control and from which you are controlling. Just follow the below steps to install this software successfully on your PC.
- Download TeamViewer software from the above download section. Once it is downloaded, double-click on the downloaded .exe file. A pop-up window will appear on the screen, click the Run button to start the installation.
- If you are using TeamViewer for personal use, select Personal/Non-commercial use under How do you want to use TeamViewer and click on the Accept – finish button.

- Please take some rest till the installation is done. Once the installation is finished, the TeamViewer application will appear automatically on the screen.
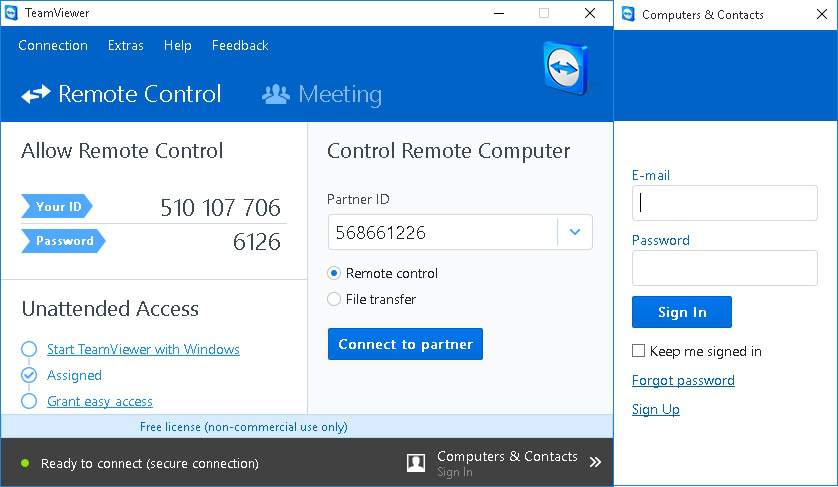
- If you wish to use TeamViewer without signing in then skip steps 4, 5. If you want to maintain a list of computers that you have connected, see the online status of contacts or exchange instant messages, then click on the Computers & Contacts option in the bottom right side of the application window. A side window will open, click on the Sign-Up button.
- Select Create a free TeamViewer account and enter your name, E-mail, and password, confirm the password, and then click the Next button.
Follow the same process as above in the other PC from where you want to control.
Control other PC using TeamViewer
I hope you have installed TeamViewer on both PCs. Now let’s see how to control other PCs using TeamViewer. Using TeamViewer is as easy as it looks.
- Launch the TeamViewer software on both PCs.
- If you wish to save the PCs that you have connected, then sign in with your Email ID and password under Computers & Contacts in TeamViewer.
- You can also connect directly without signing in by entering the ID and password of the other computer. You can find the ID and password on the left side of the TeamViewer application. The computer from which you want to control is the guest and the computer which you want to control is termed as host.
- Enter the host ID in the partner ID box on the right side of the guest PC. If you want to remote control the host PC, select Remote control, or if you wish to do file transfer, select File transfer. Now click the Connect to Partner button.

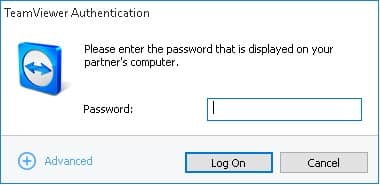
- A pop-up window will appear on the screen, then enter the password which appears on the host PC. Click on Log On button.

- The host computer display will start appearing on your desktop screen. You can use your mouse or touchpad to control the host PC. Once you are done with your session, close the window to end the session on the remote desktop.
That’s it. So what are you waiting for? Go and start using the TeamViewer to remote control the host PC.
Let us know your doubts or suggestions through your valuable comments in the below comments section.
Read Next: How to Use Google Chrome Password Manager

