Whether you need to rename a single file or an entire batch, PowerShell makes the task easier. Using variables in your PowerShell script, you can rename single or multiple files sequentially, replace spaces with underscores, and change file extensions. In this tutorial, we’ll check out a bunch of file-renaming tricks using PowerShell scripts on Windows 10 and 11.
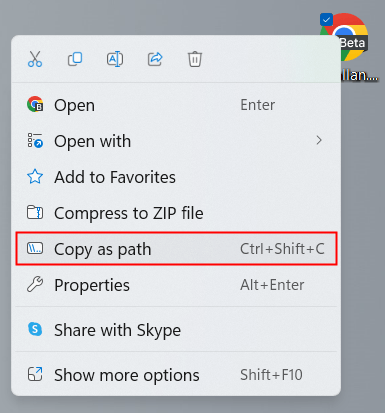
To copy, move, rename, or delete files and folders with PowerShell on Windows, you’ll need the path of the target file and folder. Right-click a file or folder and select Copy as path from the Windows context menu.
Here is a glossary of the PowerShell cmdlets, parameters, operators, and wildcards used in this PowerShell tutorial.
- Get-ChildItem: Retrieves a list of all the items (files and folders) within the specified location.
- “C:\Technastic”: An example path where our files are located. You will need to replace it with your desired path.
- | (pipe symbol): This symbol is used to pass on the output from one cmdlet to another.
- ForEach-Object: This cmdlet acts on each element in a collection.
- Rename-Item: PowerShell cmdlet to rename files.
- $_: A placeholder for the current item being processed.
- -NewName: This parameter specifies the new name we want to assign to your files.
- “NewFileName”: This is an example of the new file name we want to use. You can replace it with your desired file name.
- *.docx: This is an example of a wildcard used to filter all files in a directory with the ‘.docx’ extension.
- TimeStamp: Get the timestamp of files.
This tutorial uses variables and string manipulation to rename files. With some practice, you’ll learn to organize and manage files.
1. Renaming a Single File
PowerShell allows you to rename individual files quickly and efficiently. You can use the Rename-Item cmdlet followed by the current name and the new name of the file.
Rename-Item "OldFileName.ext" -NewName "NewFileName.ext"
For example, if you have a file named “ADB Commands” located in a folder named “Technastic” on your desktop, open the folder, open a PowerShell window with the folder path, and execute the following command:
To rename the same file from your desktop, and not from the folder where the file is located, you’ll need to mention the file path in your command.
Rename-Item -Path "Path-of-the-file" -NewName "NewFileName.ext"
Navigate to the target file, right-click on it, and select Copy as path. Launch PowerShell on your desktop and execute the following command:
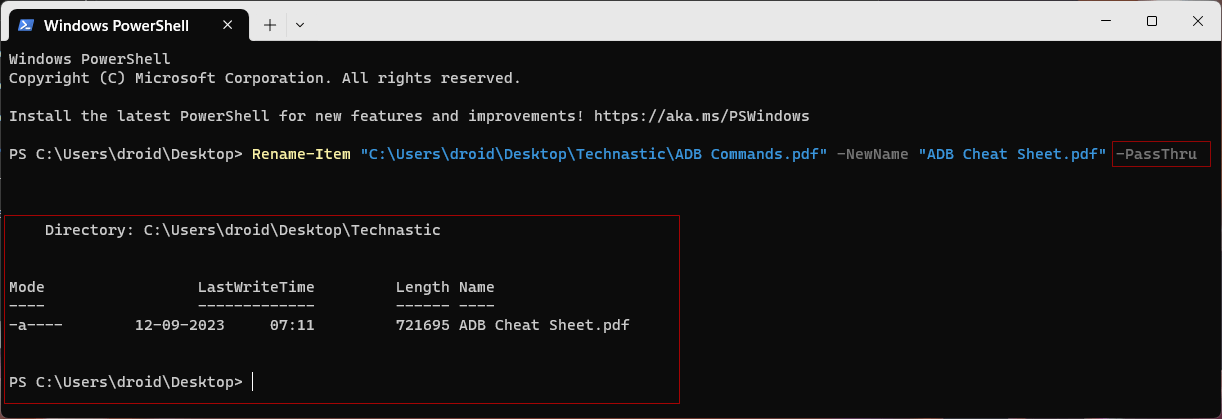
You can use the Rename-Item cmdlet with parameters like -PassThru, -WhatIf, and -Force. For example, the following command will give you the output in the command window.
Rename-Item "Path-of-the-file" -NewName "NewFileName.ext" -PassThru
You can rename even a registry key using the Rename-Item cmdlet.
Rename-Item -Path "HKLM:\Software\AngryBirds\Policies\Advertising" -NewName "Advertisement"
By using the Move-Item cmdlet, you can rename a file and move it to a defined location simultaneously.
Move-Item -Path "Document _1.docx" -Destination "D:\New folder\My Document _1.docx" -Force
2. Renaming All Files in a Folder
While Rename-Item is capable of renaming single files alone; it needs the assistance of the Get-ChildItem cmdlet to get the list of files to be renamed. Moreover, we also have to add the -Recurse, -Include, and -NewName parameters to your PowerShell command to rename multiple files.
Get-ChildItem -Path "Path-to-Folder" -Recurse -Include "*file-extension" | Rename-Item -NewName { $_.Name -replace "OldName","NewName" }
For example, to rename all files with the ‘.docx’ extension in the folder named ‘Technastic’ located in the C Drive, you have to use the above command as shown below:
In case you launch PowerShell with the path to the folder where the target files are located, you can remove -Path from the above command.
Get-ChildItem -Recurse -Include "*file-extension" | Rename-Item -NewName { $_.Name -replace "OldName","NewName" }
3. Renaming Sequentially in Increasing Order
PowerShell can also help you rename files with the same extension in increasing numbers or sequentially. Using commands, you can add a number counter before or after the file name while renaming them.
Adding an Increasing Number to the Beginning
To add increasing numbers while renaming files sequentially using PowerShell, use this command.
Get-ChildItem "Folder-Path" -Recurse -Include "*.extension" | ForEach-Object -Begin { $Counter = 1 } -Process { Rename-Item $_.FullName -NewName ("{0}_{1}" -f $Counter, $_.Name) ; $Counter++ }
For example, if you want to rename all files sequentially with the ‘.docx’ extension in a specific folder, add the folder path and file extension in the above command.
Adding Increasing Numbers at the End
Similarly, you can add numbering at the end of the file names while renaming them.
Get-ChildItem -Path "Folder-Path" -Recurse -Include "*.extension" | ForEach-Object -Begin { $Counter = 1 } -Process { Rename-Item $_ -NewName "NewFileName_$Counter.docx" ; $Counter++ }
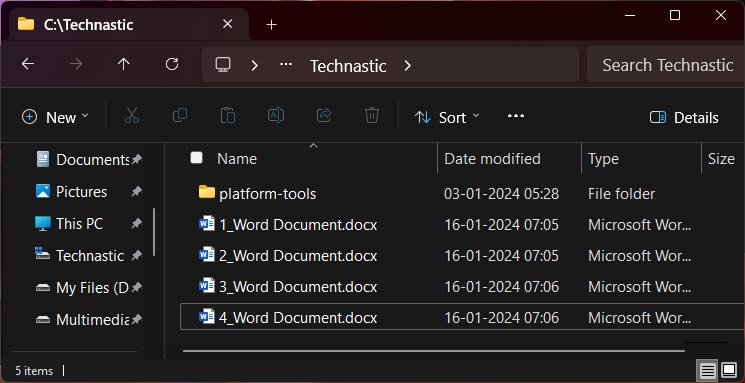
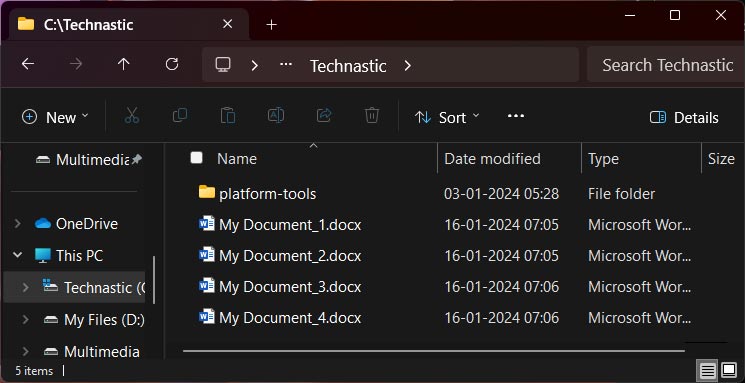
The files will be renamed as shown in the screenshot.
4. Adding Extensions and Cases
Retain the File Name but Change Its Extension
To keep the file names intact but rename only the file extension, execute the following command.
Get-ChildItem *.current-extension | Rename-Item -NewName { $_.Name -replace '.current-extension','.new-extension' }
The following command with the folder path will work anywhere.
Get-ChildItem -Path "C:\Technastic" -Recurse -Include *.docx | Rename-Item -NewName { $_.Name -replace '.docx','.txt' }
If you want to list all files with a specific extension, use the Get-Children cmdlet first. You can then use the above command to rename the current extension to the desired one. Finally, you can check the changed extension using the Get-Children cmdlet again.
Renaming Files and Extension Both
A PowerShell script can make the task of batch renaming much easier. You can use the following script to batch rename multiple files in Windows using PowerShell. It not only lets you filter all files with a specific extension and change their name and extension.
Thus, if you want to re-rename all files with ‘.docx’ extension to ‘File.txt’, try the following script.
Get-ChildItem -Path C:\Technastic\*.docx | ForEach-Object { Rename-Item $_ -NewName "File$i.txt" $i++ }
Changing All Files in a Folder to Lowercase
To rename all files in a folder with a certain extension to lowercase, use the following script.
Get-ChildItem *.jpeg | Rename-Item -NewName { $_.Name.ToLower() }
Replacing Spaces with Underscores
If your files have a space in their names (My Word Document), you can replace the spaces with underscores (My_Word_Document) or hyphens (My-Word-Document). The script will work on all files in the target folder, regardless of their extensions.
Get-ChildItem -Recurse -Force -Filter "* *" | Rename-Item -NewName { $_.Name -replace " ","_" }
To learn more about the powerful capabilities of PowerShell, you can refer to Microsoft’s official website.


