AutoPlay deals with which program is preferred for different formats of digital media. It lets you chose certain action to be acted on all kinds of digital media, like DVDs, CDs and pictures movie drives. Whenever you insert a media drive, you will get a popup for selecting the further action. In this tutorial we will guide you to enable or disable AutoPlay in Windows 10.
AutoPlay actions can be modified in two ways either by using Settings in Windows 10 or using Control Panel.
Enable or Disable AutoPlay in Control Panel
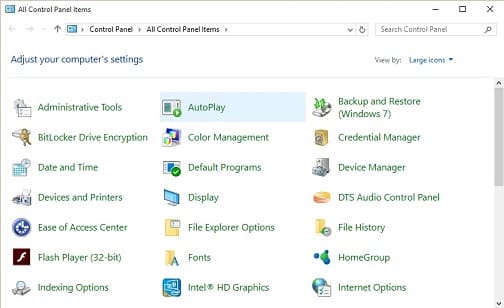
- Click on Windows icon and open Control Panel.
- Switch your Control Panel view mode to Icon mode by selecting view by options.
- Now find and Click on AutoPlay icon.

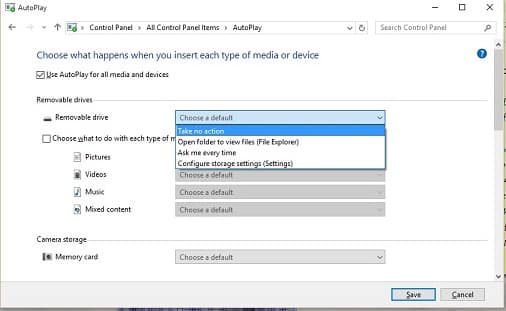
- Here you can enable or disable by checking or unchecking the check box.
- Here you can customize the action for all the media and devices by selecting the dropdown items.

- After selecting the action click on Save. It will save your action settings.
Enable or Disable AutoPlay in Settings
- Windows will provide another alternative approach to modify AutoPlay settings is using Settings.
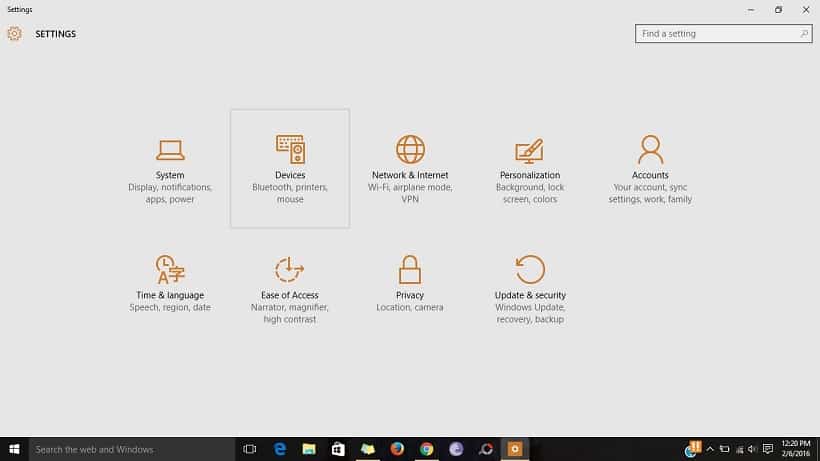
- Click on Windows icon and select Settings icon.
- Now select Devices in Settings window.

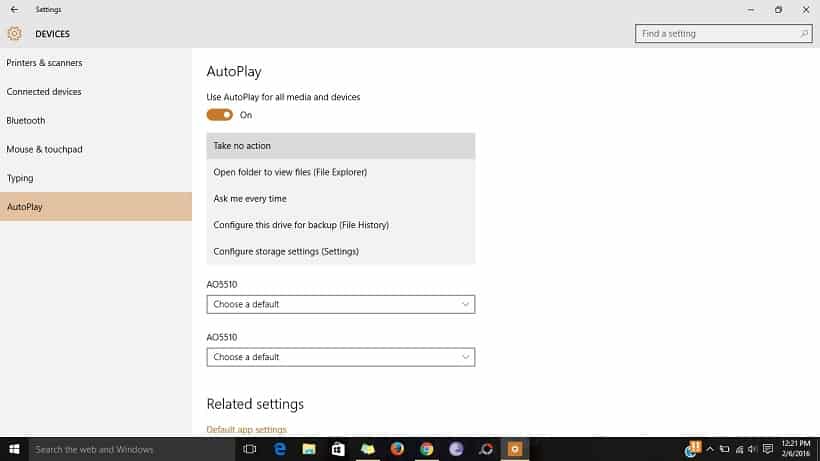
- Now go to AutoPlay menu and click on it.
- Here you can enable or disable by clicking on On of Off option.

- Here you can customize the action for all the media and devices by selecting the dropdown items.
- After selecting required action just close the Settings. Your modifications will be saved automatically.
That’s it. We hope this article will help you to to enable or disable AutoPlay options in Windows 10. The AutoPlay functionality looks same in Windows 7, Windows 8.x and Windows 10. Earlier version of Windows user can also follow this guide for customizing settings.
Do share your comments in the comments section if you have any.
