Microsoft Office is one of the most commonly used application in most of the Windows PCs. Thanks to Microsoft for making our work much easier with their suite of applications. Many applications have evolved one after the other and have revolutionized the world within no time. We can find it everywhere all over the world in all most all the offices, schools etc making the tasks much easier.
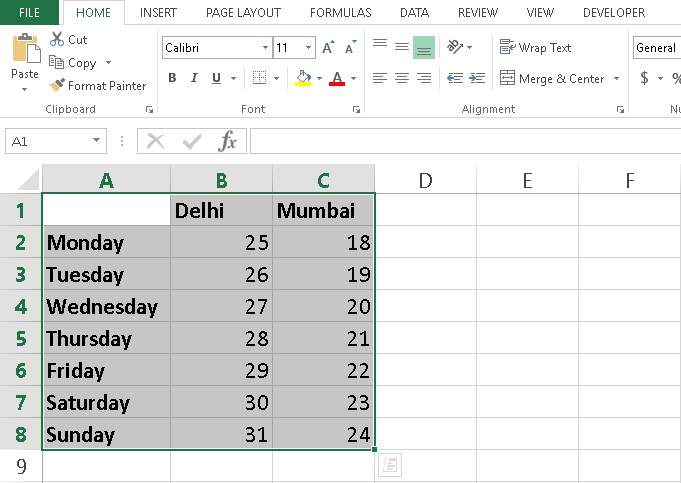
Microsoft Excel is one of the most important and popular applications which has gained much popularity than any other application. Either it may be office data or your sales data, whatever you name you can just compute them with a single click. Tables are one of the most commonly used features in Microsoft Excel application.
Most of the time we create the table, enter the data in the rows and columns and later realize that we may need to transpose them to get better analysis charts or diagrams or something else. Well, this becomes even more difficult to rotate tables and columns when there are complex tables. This is one of the common situations which most of the users confront. Let’s see how we can convert the rows into columns and vice versa in Microsoft Excel.
Convert Rows into Columns in Microsoft Excel
Well, it’s quite easy than it looks. So just follow the below simple steps to convert the rows into columns in Microsoft Excel.
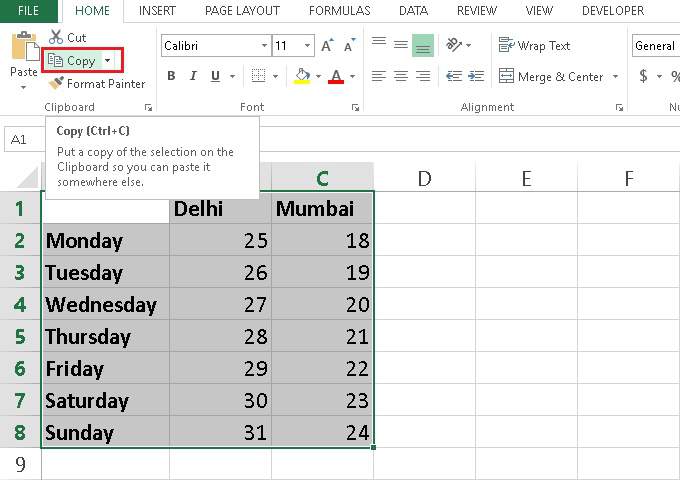
- Copy all the cells in the entire table in your Microsoft Excel sheet by selecting all the cells using your mouse.
- Press Ctrl + C shortcuts keys on your keyboard or click on the Copy button on the top left of the Window.
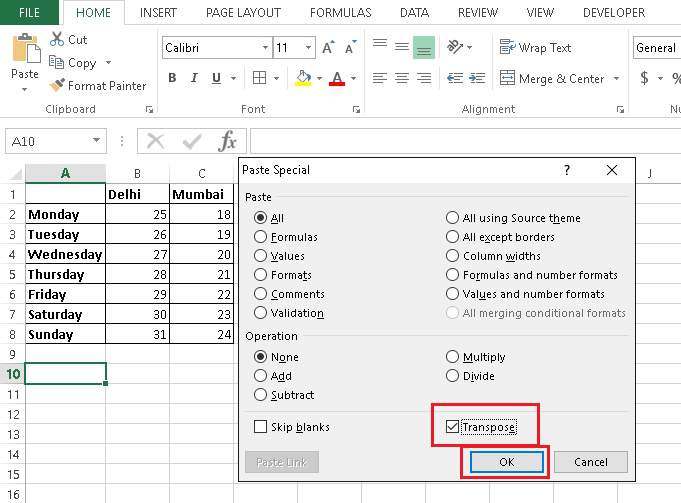
- Select an empty cell where you want the transposed table to appear.
- Then, right-click and select the Paste Special option from the list.

- A pop-up window will appear on the screen. Click on the Transpose radio button to select it and click on the ok button.
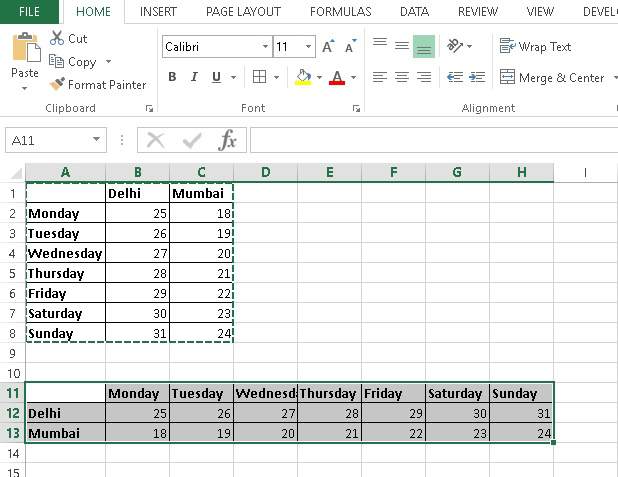
That’s it you can now see the transposed table with rows as columns and columns as rows. Here is an another tip for you. In case, if you want to do the same in Microsoft word, just copy the table from Word document and paste it in the Excel sheet. Perform the above steps and copy paste the transposed table again in the Word document.
Simple, isn’t it?
If you find this tutorial useful, do share it with your friends. Let us know your suggestions in the below comments section.