Over the years, the Internet has changed a lot, and so have web browsers. Some may argue that it is the web browsers that define what the Internet looks like today. For instance, if it weren’t for the web browsers, websites would not be able to provide you with live notifications right at your desktop. Luckily, as these browsers give websites more power, they also ensure that the control is always in the hands of the users.
This is why they let you manage what a particular website can do via Permissions and Cookies. Cookies are small packets of information that websites store on your PC. These can be aggravating, compromising your privacy, and filling up your storage. Optimizing your browser’s settings is a critical step in using the Internet securely and privately. So here’s how you can check permissions and cookies stored by websites on web browsers like Chrome and Firefox.
Google Chrome
Things couldn’t get any simpler on Chrome when checking a website’s permissions and the cookies it uses. Whenever you have a website open in Chrome, you will notice a small ![]() icon on the very left of the address bar. Click on it, and a list of all the permissions is displayed along with information about which are being used and which are not. There is also information about the number of cookies used by the website. Chrome uses the default global settings unless you choose special settings for individual websites.
icon on the very left of the address bar. Click on it, and a list of all the permissions is displayed along with information about which are being used and which are not. There is also information about the number of cookies used by the website. Chrome uses the default global settings unless you choose special settings for individual websites.
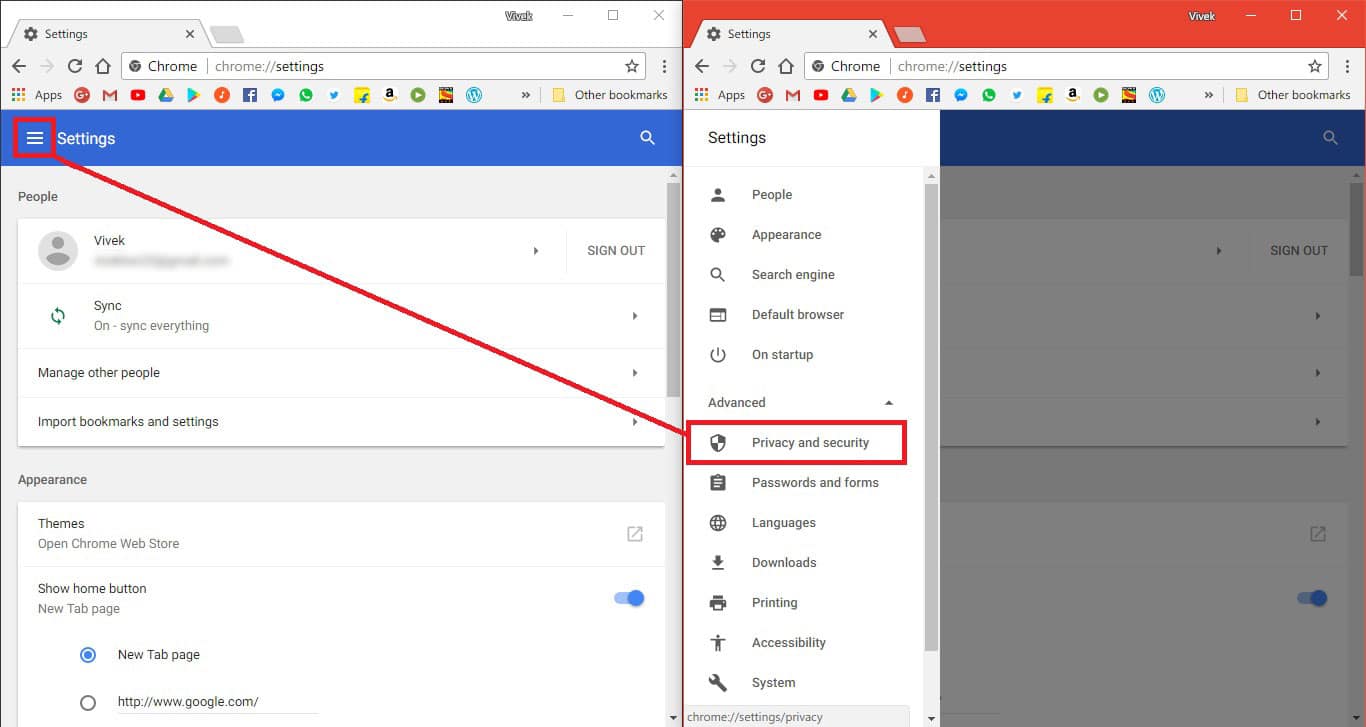
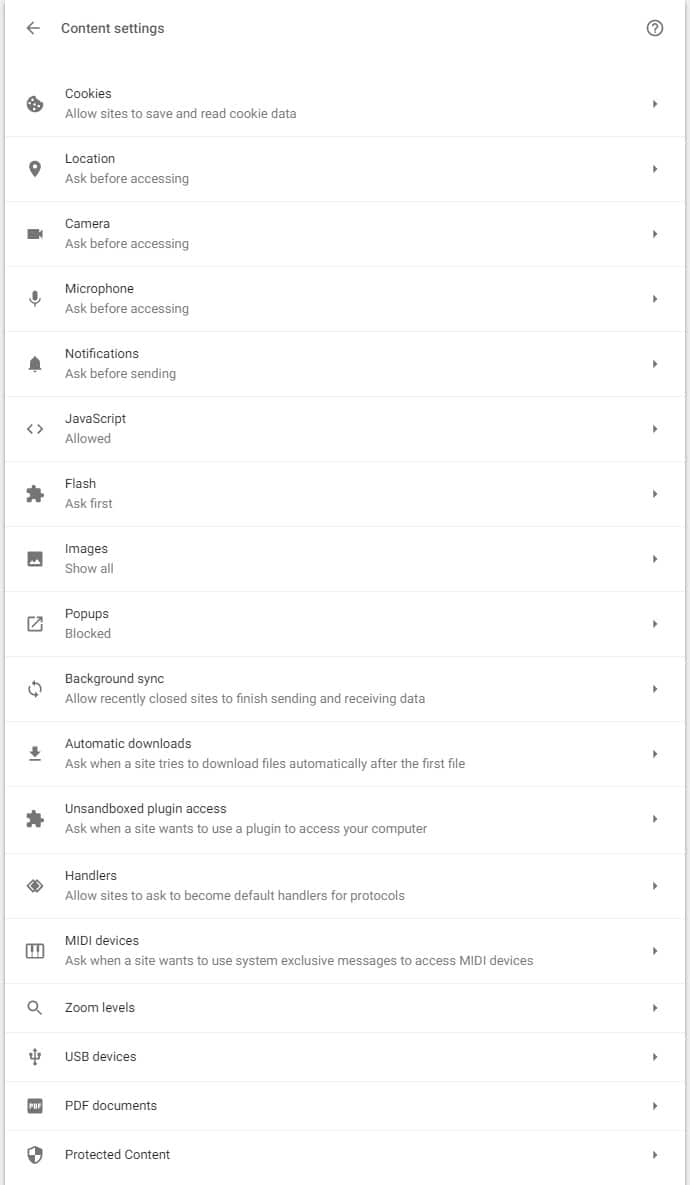
To change the global settings, click the three-dot menu button in Chrome and select Settings. Click the hamburger menu icon in the top left and click Advanced settings to expand it. Here, select Privacy and security. Or you can scroll down to the bottom and click Advanced. Under the Privacy and security settings, click on Content settings.
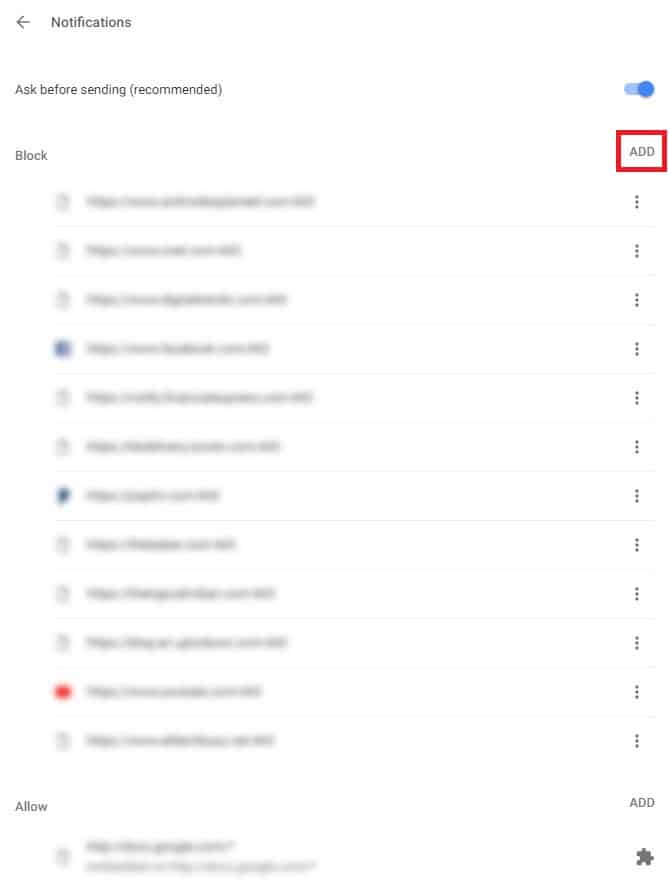
Here you can set the global settings for every permission and for cookies, and view individual websites that have been allowed or disallowed the said permission. You can also add or remove websites from the Blocked or Allowed lists.
Firefox
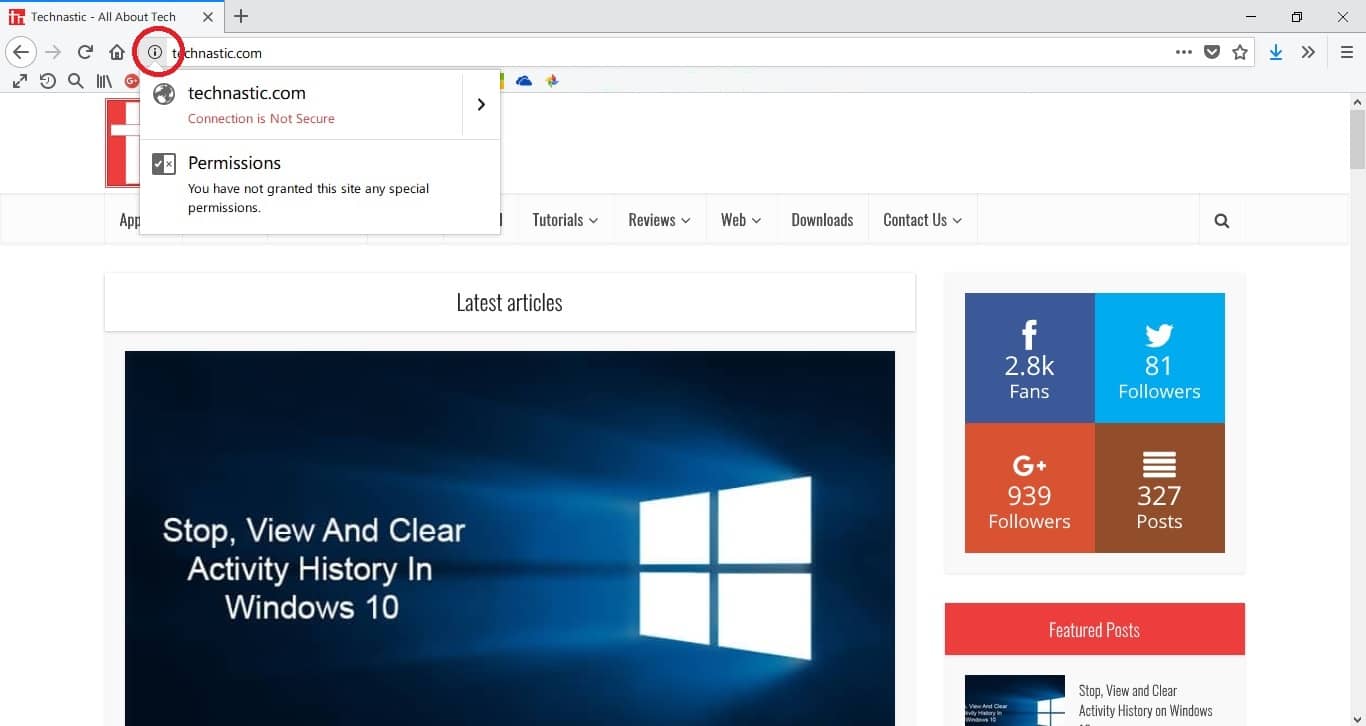
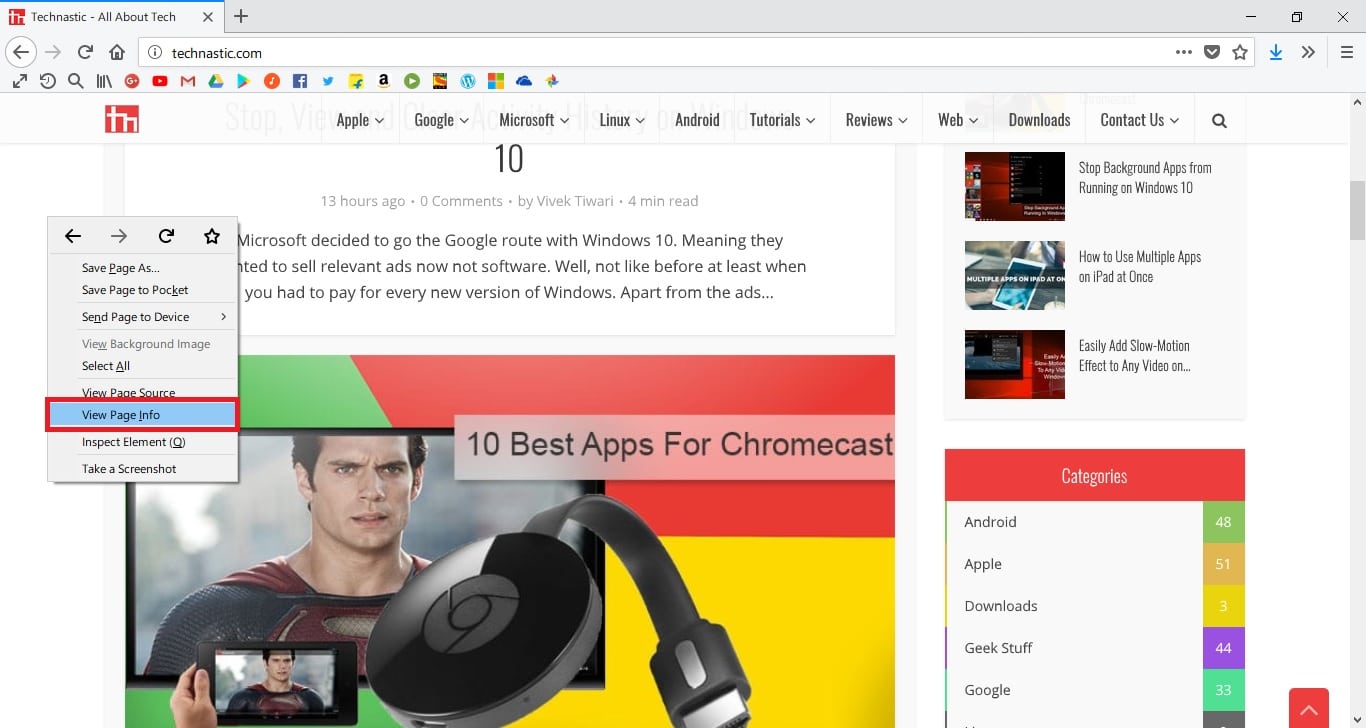
Firefox has the same icon on the left of its address bar as Chrome. Although when you click it, you can only see the permissions you have granted to the currently opened website. You can click the small arrow next to the website’s name and click More information. Alternatively, you can right-click a website, anywhere that does not include a hyperlink, and click View page info.
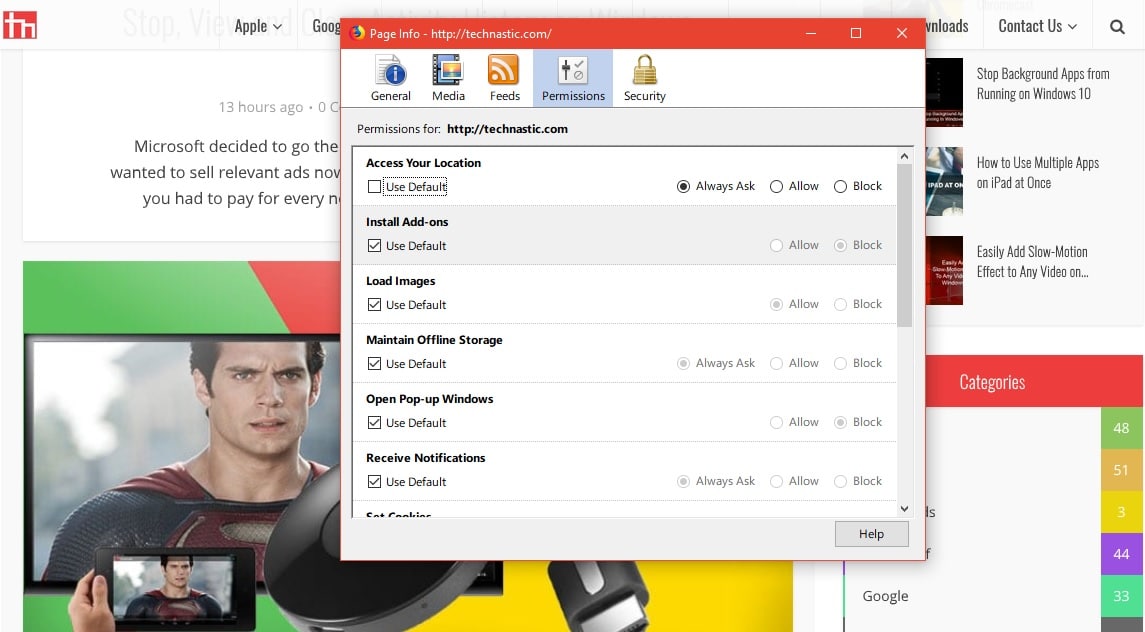
In the new window that opens up, select the Permissions tab if it is not already selected. Here, you can see and manage the permissions for the said website. By default, Firefox uses the global settings unless you change them for an individual website. You’ll have to uncheck the Use default option to be able to change permissions.
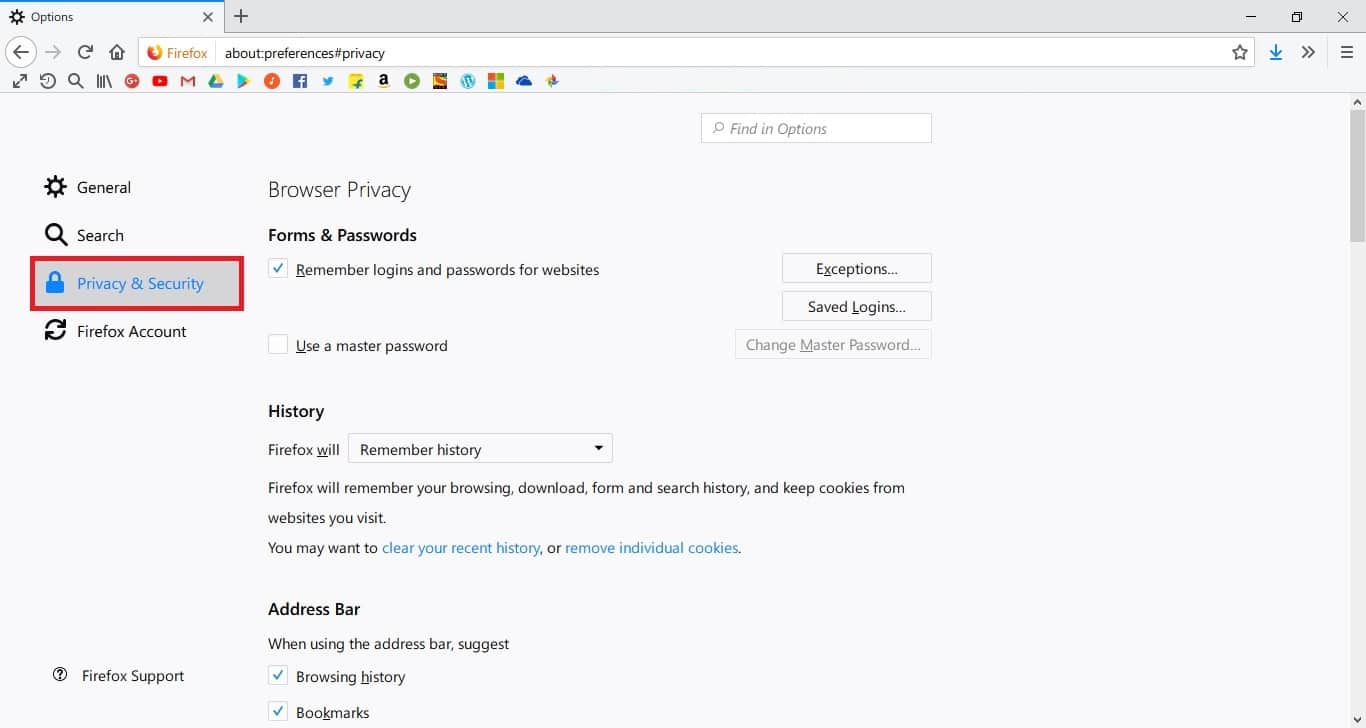
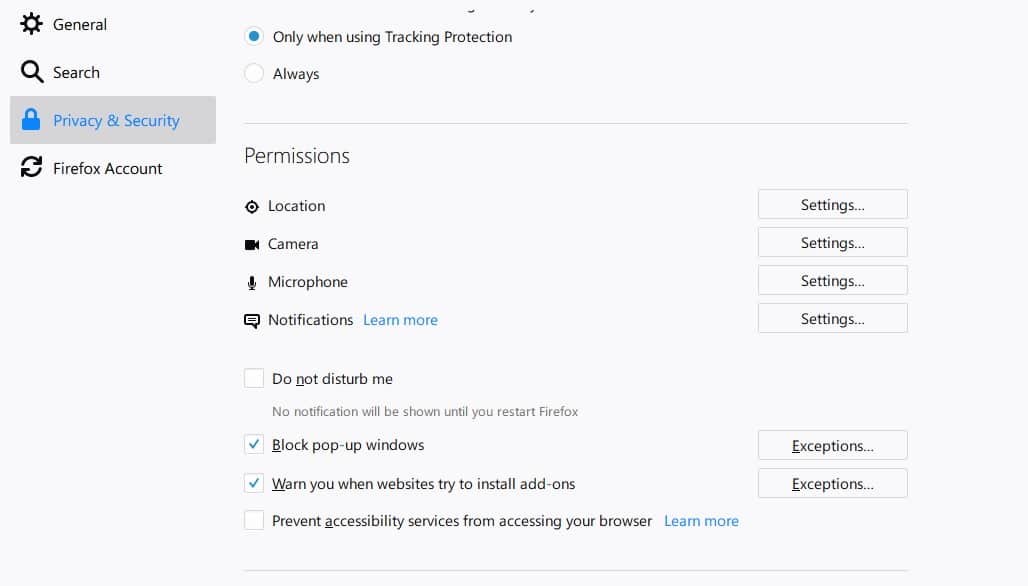
Firefox lets you see which permissions you’ve configured for different websites and change them all in one place. Firefox’s settings for Cookies and permissions are separate but can be found in the same section. To manage cookies and permissions, you’ll need to click on the Firefox menu icon ![]() and select Options. On the left, you’ll find a section named Privacy and security. Click on it.
and select Options. On the left, you’ll find a section named Privacy and security. Click on it.
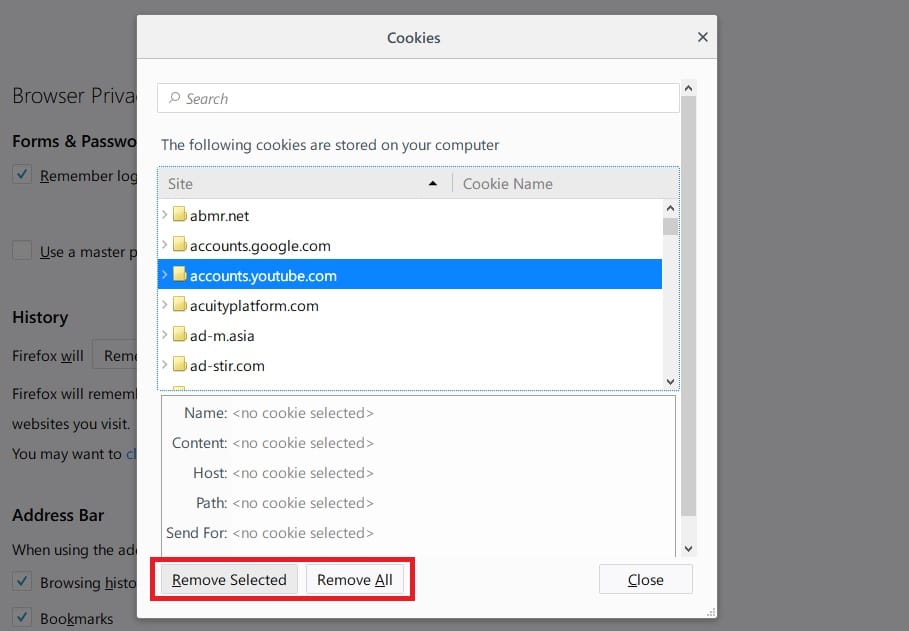
Under History, at the bottom of the subsection, you will find links to Clear your recent history or Remove individual cookies. Click Remove individual cookies. A pop-up window will appear listing all the stored cookies from different websites. You can select and remove them individually or remove them all at once.
Permission settings are placed a bit lower on the very same page. Scroll down until you find the Permissions subsection. You’ll find a Settings button next to each permission.
Clicking it will let you add or remove websites from memory. A drop-down menu next to each website lets you Allow or Block the said permission for the website.

