The latest operating system, Windows 10 has brought a great change in the world of touch. It has modified versions of the Windows 8 OS, which was the first touch support operating system. One of the most important features of any operating system is the display language. Most of the operating systems come with English as the default display language. Imagine some of the users might not know English, they may prefer to use their PC in their own language. In such cases changing the default language proves to be helpful.
Windows 10 OS supports changing the default display language. You can change it to your preferred language without much effort. You can also download and install your preferred languages for Windows 10 to use your PC in your preferred language. Let’s how to change the display language in Windows 10.
Change the Display Language in Windows 10
Installing Display Language in Windows 10
To install the preferred display language, just follow the below steps.
- Turn on your Windows 10 PC or desktop and sign in using an administrator account.
- Go to Start Menu › Settings › Time & Language.

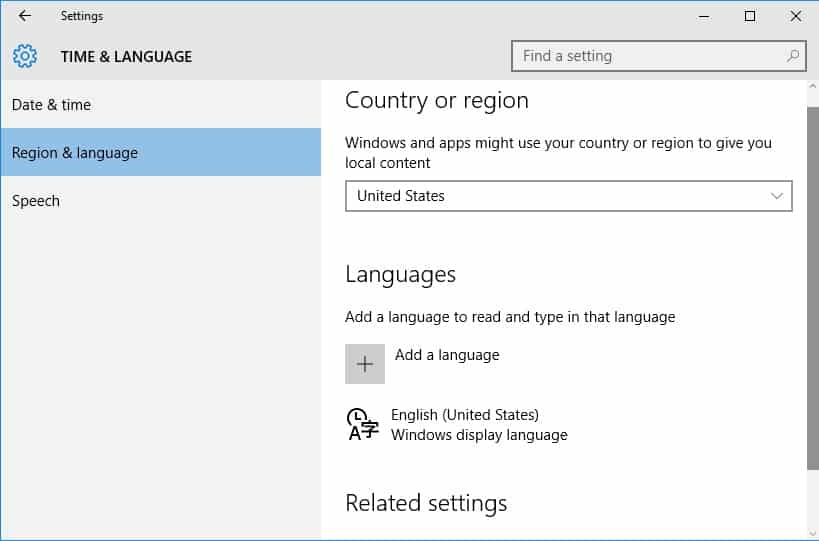
- Time & Language settings window will appear on the screen. Select “Region & language” on the left pane of the settings windows and click “Add a language” button on the right pane of the windows.
- A new window will appear on the display the list of languages in an alphabetical order. Select your preferred language by clicking on it. Once you select the language it will start downloading.

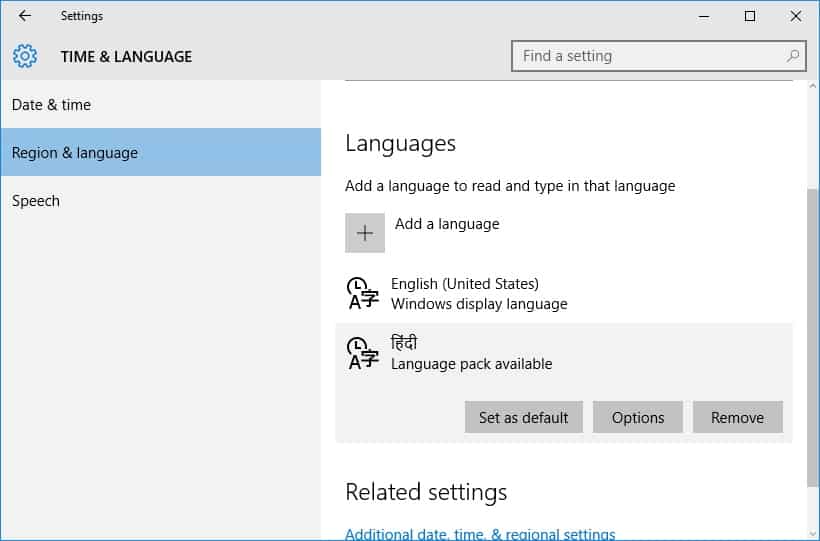
- Now go back to the “Time & Language” window screen and click on the language you just installed. You can see three options: “Set as default”, “Options”, “Remove”. Select Options and click on “Download” to download the language pack and keyboard for that language.

If you open Control Panel › Languages, you can see the display language settings along with languages which you have installed.
Changing the Display Language in Windows 10
To change the display language of the user account you are currently using, just follow the below steps.
- Go to Start Menu › Settings › Time & Language.
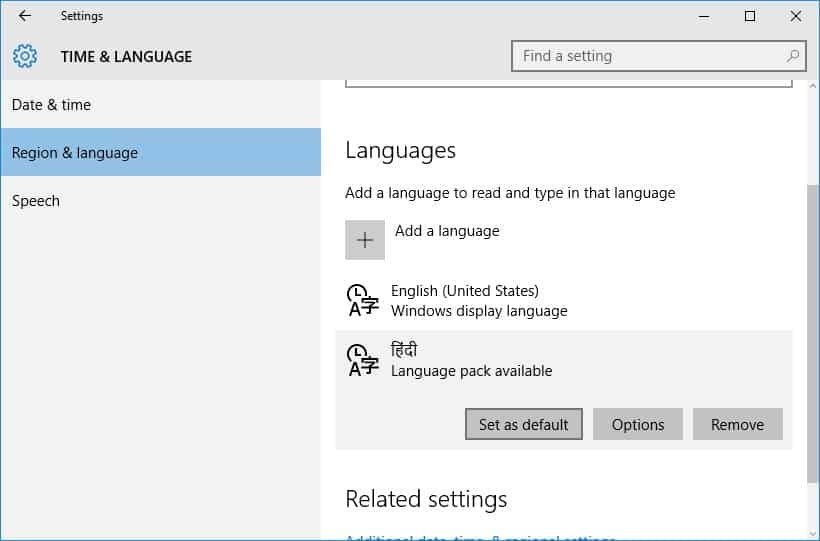
- Time & Language settings window will appear on the screen. Select “Region & language” on the left pane of the settings windows and select a language on the right pane of the windows.

- Then click on “Set as default” option. You will see a notification appearing under the language button displaying a message “Will be display language after next sign-in.”
- Now sign out of Windows account and sign in back to the same account.
That’s it. Your new preferred language will appear on the screen.
Do let us know your valuable suggestions in the below comments section.
