Windows did jump into the screenshot game quite early even before your smartphones were around. Screenshots were not a particularly popular feature back then but they are now. The old print-screen-with-PrtSc-and-then-paste-in-MS-Paint-just-to-get-a-screenshot-process is a bit too old. There are devices out there that can take and save a screenshot with the press of a button, and some even allow editing, to an extent. Microsoft has updated its Screen Sketch tool, introduced first with the original Windows 10. The company now also gives users the option to launch screen sketches with the PrtSc key on Windows 10.
If you thought I was conveniently ignoring the presence of a snipping tool that has been around since Windows 7, it’s because I was. Even Redmond is looking forward to conveniently ignoring it in future Windows 10 builds as they work to make Screen Sketch better. I’ve previously written in detail about the different ways to take a screenshot on Window. Microsoft is looking to retire the old Snipping tool in favor of Screen Sketch. Although, currently there are two ways to launch Screen Sketch.
Screen Sketch

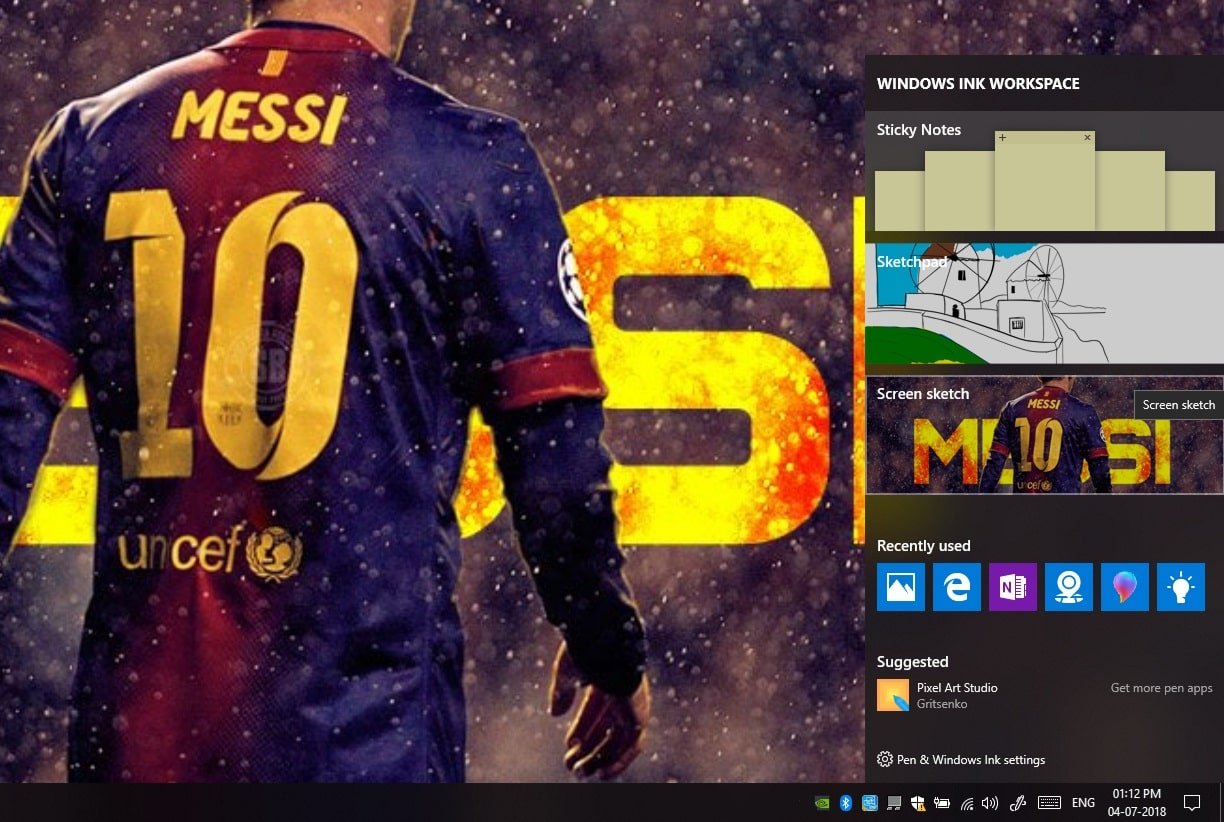
You can make use of the Screen Sketch tile in Windows Ink Workspace. This has to be enabled by right-clicking on the taskbar and selecting Show Windows Ink Workspace button if it’s not already enabled. Another way to launch Screen Sketch is by pressing Window + Shift + S keys together on the keyboard. Neither of these is quite as convenient as one would like though. Windows already has a key dedicated to taking screenshots though, which still does what it used to do a decade ago. So why not make use of that instead?
By default, when you press the PrtSc key a screenshot of your entire screen is copied onto the clipboard. You don’t get any choice in it, but when you capture the screen using a screen sketch, you choose specifically which part of the screen you want to capture. Then you can even view your screenshot, annotate it, copy it to the clipboard, or save it. It makes sense then to use the PrtSc key to launch Screen Sketch instead.
Must read: Move Taskbar Icons to Center on Windows 10
Fortunately, Microsoft agrees although they’ve not yet implemented this by default. Users running the latest Windows 10 Redstone 5 update can enable this option in the Windows 10 settings.
Launch Screen Sketch Using PrtSc Key on Windows 10
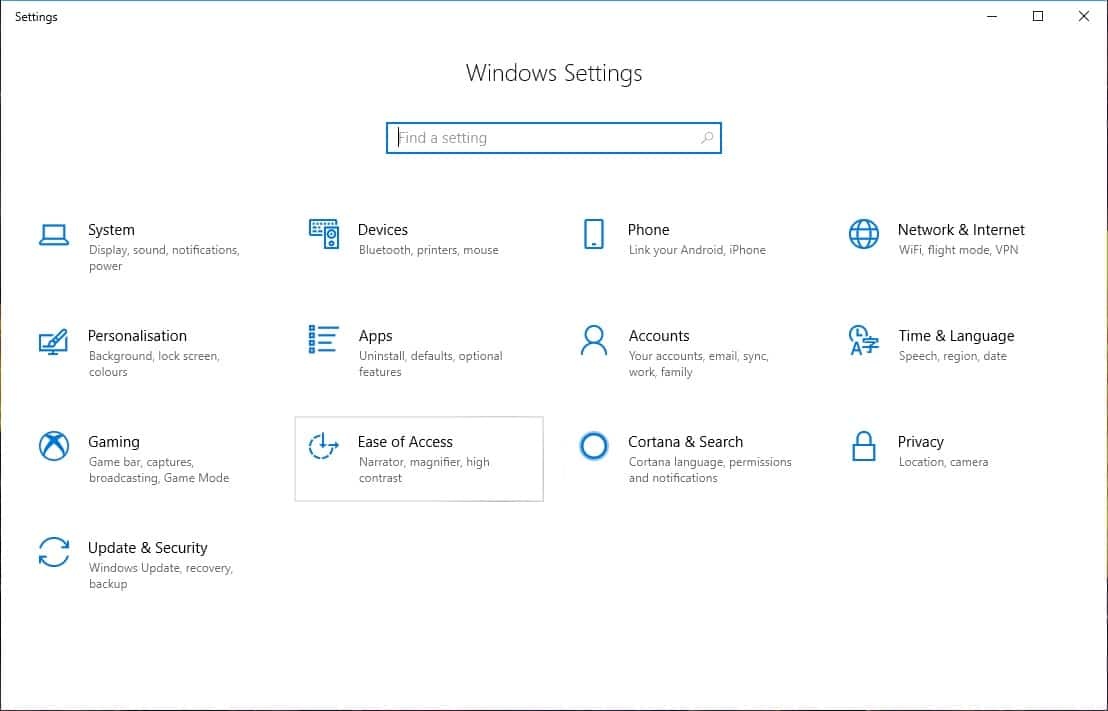
- Open the Windows 10 Settings app and go to Ease of access.

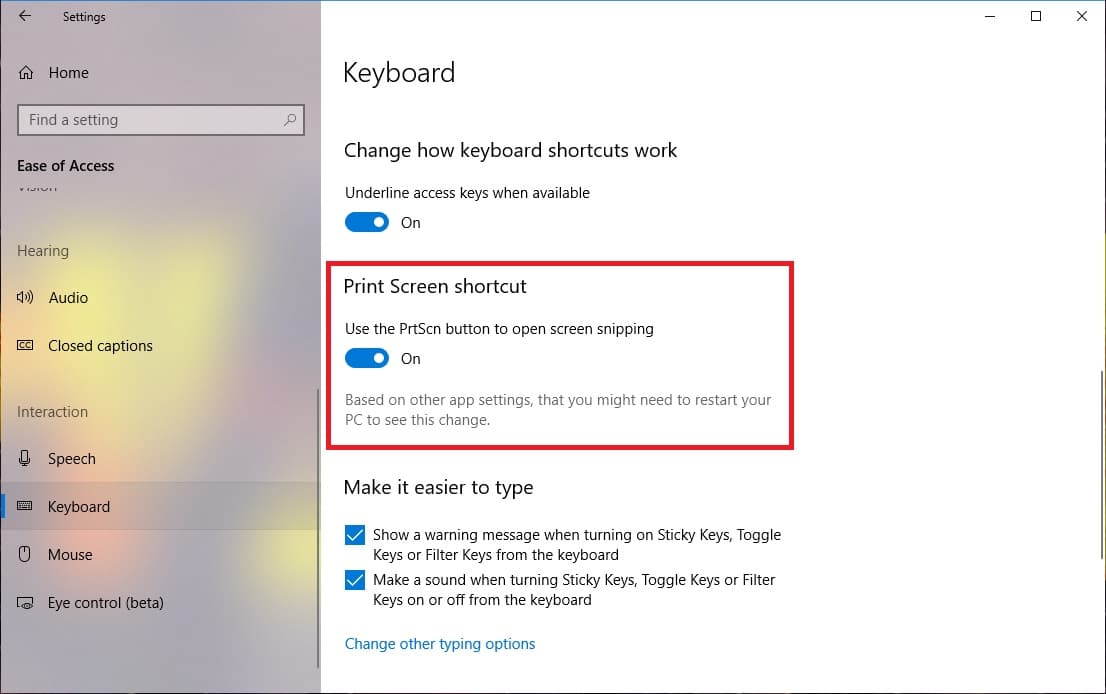
- Scroll down the left column and select Keyboard found under the Interaction section.

- Now scroll down on the right side until you see a heading that says Print Screen shortcut. Turn on the toggle under Use the PrtSc button to open screen snipping to make Windows 10 open Screen Sketch when you press the PrtScn key.
Make sure not to have any third-party apps installed that use the PrtSc key if you want the Windows 10 settings to work.
Don’t miss: Get macOS Mojave Dynamic Wallpapers on Windows 10
